


I am so excited to share some of my hard earned furniture transforming tips. I know that there are tons of books, e-books and even workshops to attend that cover this popular topic these days, but I figure that after so much love and support in helping make my dreams a reality I really want to send out good karma and love your way. I am sure this is one of those topics that everyone has a unique take on so these are just my opinions and lessons learned (sometimes the hard way). I hope you take away little bit of useful knowledge because Lord knows this monologue has been doing nobody any good sitting dormant on my hard drive for the past 2 years~
Each Friday for the next 3 weeks we'll slowly make our way from start to finish, covering simple techniques to unique finishes. Follow along with a piece of your own and on the Friday following our last class (4 weeks from today) I will be hosting a link party for everyone to share their progress, or feel free to just sit back and watch the rest of us do the heavy lifting.
So let's go!
For years I have reinvented everything from frames to furniture, with little more than a desire to create and a passion for what I do. When it comes to transforming furniture that passion makes me both fearless and uninhibited in achieving my vision. But I tend to dream first and worry about the details when they arise. I have learned from both my mistakes and my triumphs purely through trial and error, and if you want to learn from those mistakes and triumphs then you are in the right place!
Together we will save you time and money, all while helping you achieve the perfect furniture makeover. From visualizing and picking your piece all the way to the finished product.
Let’s start with the basics. Before you even head out treasure hunting these are what you should have handy at home so you know that this project won’t turn into one of those multi-year, never ending sagas.
The Equipment & Tools :
Before we begin our transformation I want to introduce you to tools and products I rely on. In the course of my career as a furniture painter I have learned that the right tools go a long way in making the job easier, faster and much less stressful. However, you don’t always have to have professional grade equipment to get a professional look.
I prefer to spray all of my pieces with a paint gun attachment to an air compressor, and while this does save me A LOT of time it is definitely not necessary to get the looks we will be achieving. So don’t feel compelled to drop your hard earned cash on an air compressor and air gun. If you already happen to have an 8 gallon compressor (or larger) you may want to consider investing in the gun attachment which usually runs $30-$100, but once again it is not necessary.
If you are going to go with the tried and true method of hand painting then just be sure to get a quality sponge roller that is appropriate in size for the furniture you are working with, as well as one good brush for getting in corners and crevices.
Some other tools you will need are:
-Power Drill (with varying drill bits)
-Screw drivers (type dependant on your hardware)
-A good electric palm sander, preferably not round.
-180 grit, 220 grit and 320 grit sandpaper
-A sanding block for hand sanding
-1 paint brush
-several clean rags or scraps of fabric that you don’t mind tossing out afterwards
- vinyl putty (or wood filler)
-putty knife
- Oil based primer
- flat latex paint in desired colors
- water based sealant
Treasure Hunting
If you already have found your piece of furniture or have had it stored in the garage just waiting to get started then feel free to jump ahead! But if you aren’t sure what to look for when you are shopping for a new project here are a few of the things I look for and think about.
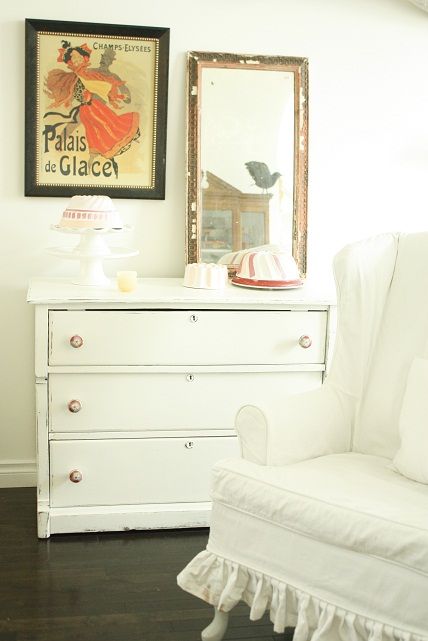
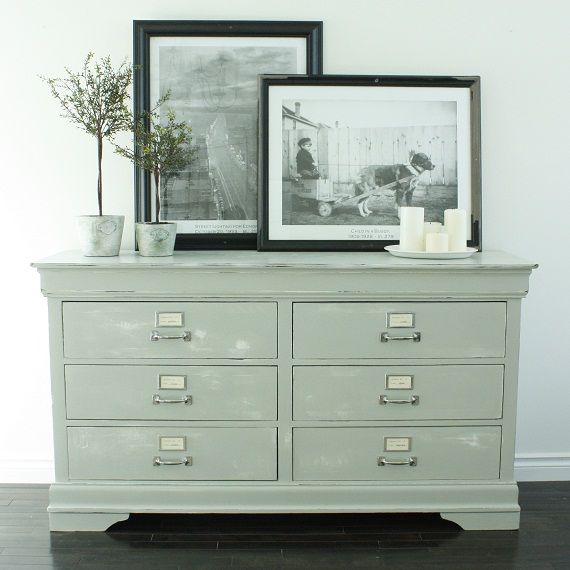
- The first thing I think about when I see a piece, whether it is online or in store, is whether or not it has potential! I know this is awfully vague, but if you don’t like the lines and style now you probably won’t like it even with a little paint. Yes, most things look completely different with a fresh coat of paint but I try not be blinded just because the price is insanely low. Specially if you intend on living with it for a long time! All of the pieces that I have fallen in love with (and kept, which is rare around here) are of a similar style and tend to have nice details that shine through and often become the focal point after being painted.
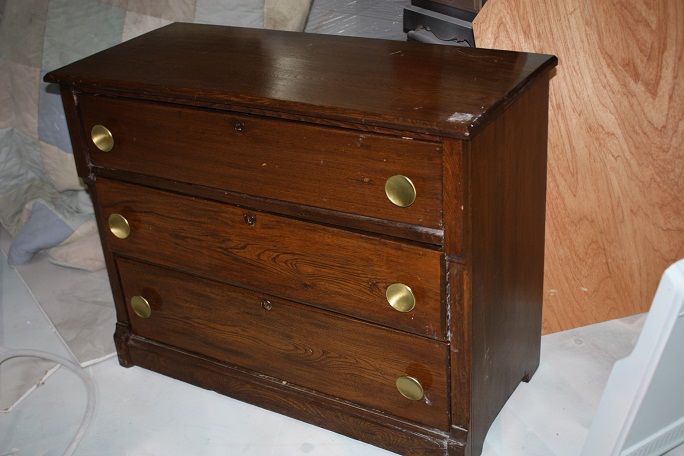

- 3. 3. Make sure the furniture is in good condition structurally. If the wood is dented, scratched and scuffed you won’t even know it later, but it needs to be in good working condition as far as the bones of the piece are concerned. Check to make sure all the drawers slide and that there are no joints coming apart!
- 4. 4. Look for solid wood pieces, but you can still work with wood veneer. In fact a lot of the antique pieces I work with aren’t solid wood, many have veneer over wood! Just avoid that plastic/laquer type of veneer and you should be OK.


As long as a piece can withstand some sanding and will hold up to what you need it for then the sky is the limit!
Next week we are going to work on a piece from beginning to end, laying out all the steps to get it done. Special finishes will come in the weeks to follow.
Happy treasure hunting this weekend!


23 comments:
You're are so sweet to offer your hard-earned painting expertise to us!! I can't wait to follow along! And maybe I will go furniture hunting and see if there's something waiting for me to transform... Looking forward to the rest of the series!
obsessed with this series...i'm SO happy about it. i've only tried to wood putty something once and it was a giant fail. i hope we'll be covering that sometime soon too hahaha. you're the best!!
So glad you are doing this! I am going treasure hunting this weekend to find a piece that I can transform with you over the next few weeks!
Thank you, thank you, thank you for your educational post! I have all the tools you mention except the gun for the compressor. It will be the next thing I 'mention' to my husband that I need. I have a huge oak kitchen table in desperate need of painting but I have been avoiding it because I found the idea of using a brush quite daunting. Now I am quite excited to get a move on with the whole project. I loved all the pieces you have done and can hardly wait for your next post.
Thanks again!! Carrie
Love your blog! Love the monochromatic style. Thanks for the series.
Saw in one of your pictures--What is that nozzle you attached to the kilz primer? My kilz spray can splattered everywhere. Huge mess.
Don't have an air compressor, wish I did. Any advice on getting a smooth finish with a roller/brush? Do share!
LOVE these transformations!!!
joannadell.blogspot.com
I am SO excited for this next few weeks. I have a few pieces ready to go, unfortunately freezing weather halted my production (my garage isn't heated). But I look forward to getting some great tips! Also, I was wondering if you were going to share where you find your pieces--apart from the Old Strathcona Antique Mall and Kijiji, I am unsure where to find these treasures for such great prices!
Thank you so much for doing this new series. I have watched you pump out beautiful piece after beautiful piece and am unbelievably excited to hear the "how to's"!!!
Becca
Great series, looking forward to reading all your tips and tricks.
Love all your work! ..also love that cute stripe sweatshirt from Forever 21, did you get that recently? Thanks so much!
This is amazing, I am looking for a nightstand for my bedroom, we have a three day weekend so I going on a hunt. This is perfect timing. All those pieces are just gorgeous!
Since I am an avid follower of your blog, I have transformed a few of my own pieces. However, I live in a downtown condo, so I am limited to what I can do. So far it has been small pieces. But the hunt, and the transformation still make it a fun process.
This is so nice of you to do! Can't wait for the next post!
Thank you!
SO excited! thank you!!
is there any chance you will be covering how to um... actually use an air compressor/paint gun? I have been too intimidated to try it out!
SO looking forward to next week!
Thank you so much for this....i love re-doing old furniture but always wonder how its done by a pro:)
Yay, I'm so glad you are doing this, I'm really looking forward to following along! I have a china cabinet that I have wanted to paint but I have just been feeling like I don't know where to begin. I'm so excited to start! :)
aaaaaahhh! :)))))
love all of it, but especially the grey guy.
Oh, I'm looking forward to learning from you! Maybe I'll tackle that french dresser with the gold handles and faux crackle drawer fronts.
Hi! Just wanted to let you know that I following right along with you on my blog at http://fleur-de-life.blogspot.com/2012/01/painting-furniture-series-with-life-in.html
Looking forward to it :)
Thank You for sharing it is so nice of you !!!! I love your style your house is a dream ....
Loving this series so far! I've only ever used floetrol with semi gloss paints. Your method of water + flat paint seems a LOT cheaper in the long run... why do you prefer flat? Does your top coat cover it all anyways and turn it glossy or it's just cheaper? Or is it easier to distress? Thanks! Can't wait to see next week's installment on top coats!! :)
Someone knew I needed to find you!!! I am so glad to be reading your blog and the timing of this class couldn't have happened at a better time. Thank you for being so detail oriented, I know your hard work will be the savior of many!
I will be following you everyday!!! I want furniture that looks like yours, I am just too chicken to start! I hope that your tutorial will help me overcome my fears. thanks so much for posting.
Post a Comment