Friday, July 31, 2009

Heirloom Party


If you have been wondering what the button down below is all about, today is the day you find out! Today we are sharing an heirloom with all the other lovely ladies signed on over at Marie's site: Emma Calls Me Mama.


The heirlooms I am sharing with the party are 2 pillow shams. These 2 shams were embroidered by hand by my Great Grandmother (my Dad's Grandma). They are in perfect condition and are perfectly whimsical. I hope that I have them to share with guests (they live on the guest bed) for years and years to come.


Thursday, July 30, 2009

Our House part1

In my "ask me anything" post I was not surprised at how many questions related to the layout of our house. It is definitely unique in a few ways, and it is hard to get a feel for a house by a wall here or a hallway there. So I thought I would do a rough (definitely not to scale) drawing of the basic shape. After one glance at the kitchen area I am sure you can all understand my excitement to start that reno! The pantry is literally jutting out into the middle of the room so we are ripping all those walls out and having a much more open feel, and possible a butcher block island or harvest table work space in the center. Other than that one problem area I really love our house. It is bright, open and airy. The only rooms with 9 ft ceilings are the kitchen, family room and laundry room. The Foyer, Living room and Dining rooms all have soaring ceilings and sky lights that really make the house feel even more spacious to me.

I am hoping to do a video walk through in the near future, and part 2 (the upstairs) is coming soon so stay tuned~

Tuesday, July 28, 2009

Frequently Asked Questions

From WhiteBerry furniture transformations to my wedding dress, you guys have asked it all. And now I am going to try and answer it all! So grab a cup of hot chocolate, curl up in your favorite chair and enjoy.


Please keep in mind that this not a "how to" on refinishing furniture, it just covers the basics. Why, you ask? Mainly because I am not one for following rules, and I tend to "wing it" with most projects. I hope you learn something new, but the best piece of advice I can offer is to just have fun.


What do you use to paint your furniture?
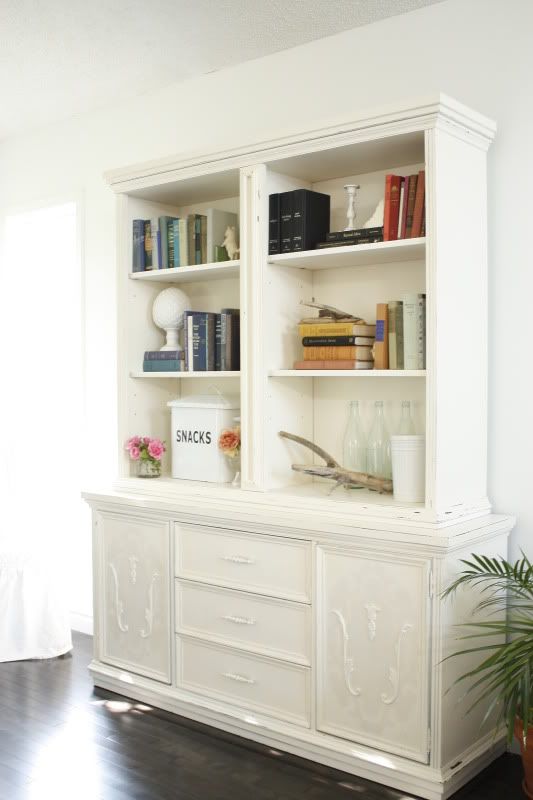
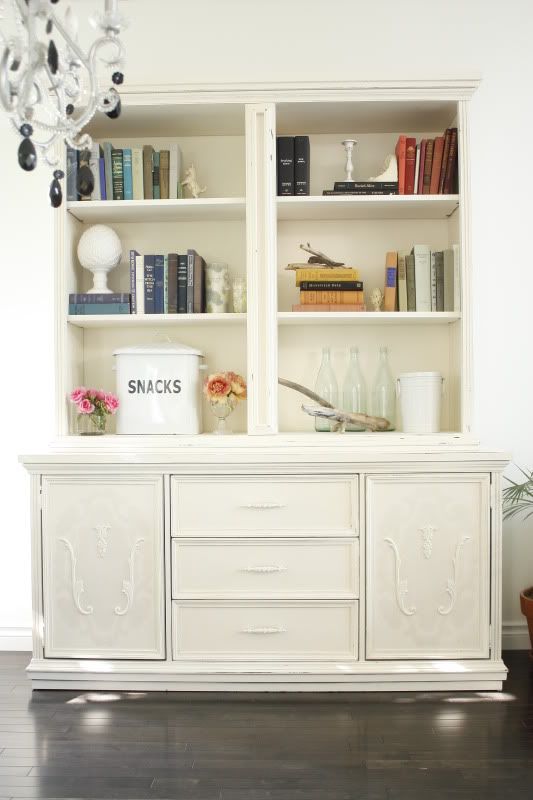
While whipping out a brush or roller is still the norm for most, I neither have the time nor patience to do multiple coats in teeny tiny cracks and corners on these bigger pieces. This is where the right tools really make the difference. I use a paint sprayer attachment for an air compressor.

This is an air compressor for anyone unfamiliar with one. It can be used with a variety of tools: hardwood floor nailers, trim staplers, screw drivers, etc.


They range in size and price, so be sure that if you are looking at buying one you first consult the sales person on what type of uses you will be needing it for. Not all compressors are compatable with sprayers and will ruin them if the compressor is too powerful.

This is the exact sprayer I use: a Campbell Hausfeld gravity fed.


Using a sprayer reduces paint time, as well as drying time. Often my pieces take about 30 minutes of actual spraying and are completely dry within 20 minutes.

I am regularly asked about the all in one units you can buy in the paint isle. I actually own one and completely packed it up and gave away after 5 minutes of using it due the splattered and uneven finish. However, I do regularly talk to and hear from people who LOVE their all in one. My best recommendation would be to go to your local home improvement store and rent each before you commit to buying. They literally cost only a few dollars for 4 hours which is a small cost to feel reassured with whatever you choose.
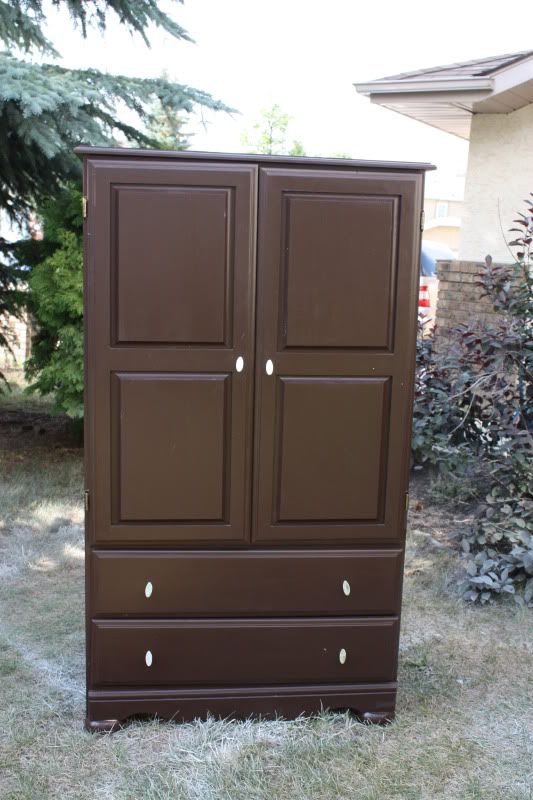
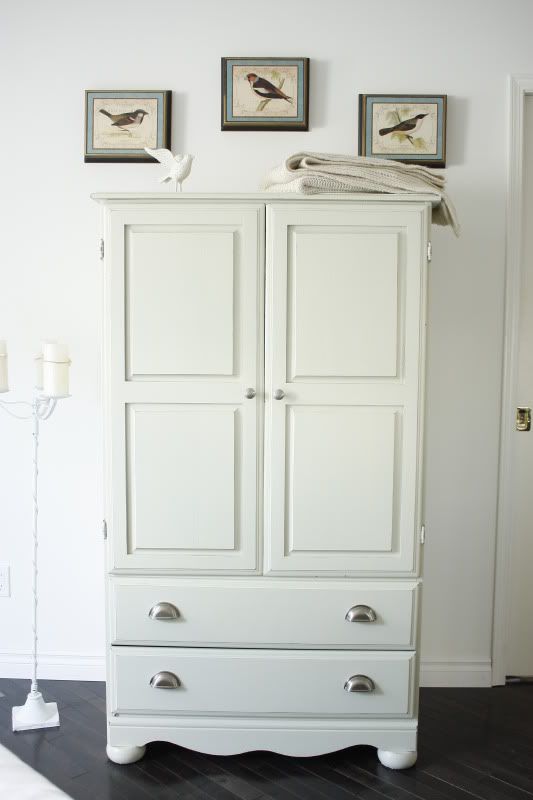
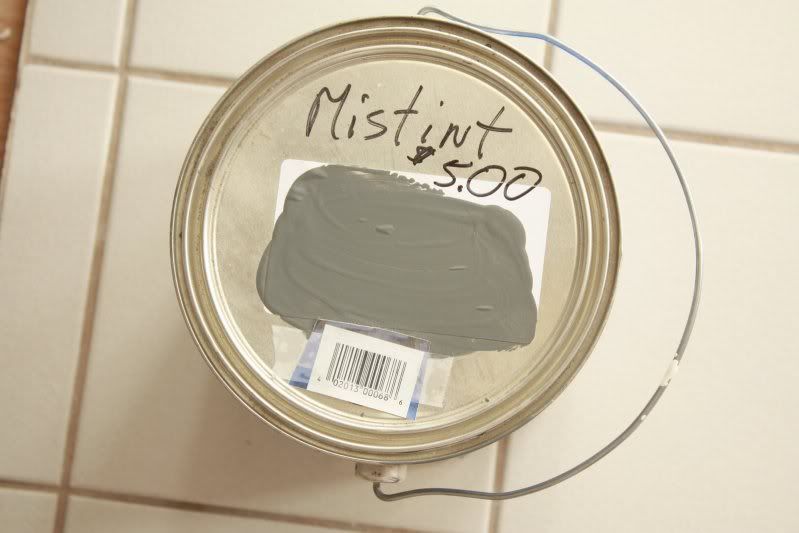

What colors do you use?
I really and truely wish I could answer this question, for my own sake!!! The reason I can't answer it is because I only buy mistints and mix my own colors. To keep my costs as low as possible (more money to do more projects with!) I love buying mistints. Often a gallon only costs $5!!! I also love buying them because it is so much less intimidating to pick a color. Too often a color is not what I envisioned on the tiny little card so with the actual paint painted on the lid I can see a true look at how the mixed paint feels in different light and finishes.
The other good news? Most people stick to shades of white, beige and cream for walls and trim so there is usually a pretty good supply to choose from in those shades.

The only downside is that unfortunately I have to rely on color matching (which still isn't 100% accurate) when I find a color I love, or if I need more.


What do you use to fill holes?
I always use wood filler.


Where do you paint in the Winter?
Sean (the brains and muscle of this whole operation!) rigged up an expertly constructed "studio" in our garage. Since it is fully insulated and drywalled in there I am free to paint to my heart's desire, even in the dead of Winter! To keep warm I do use a propane heater, but please be careful of where you are working because many fumes are flamable when you are working with paint, paint thinner and cleaner, etc. I highly recommend you do your research before working indoors!


What type of paint do you use?
Since I buy mistints I don't have the luxury of choosing. It varies from semi-gloss to flat most of the time. Because I finish of all of my pieces with several coats of semi-gloss verathane it really doesn't matter anyways, but I always tell people that if you don't want to do the verthane step just stick with semi-gloss paint.


Do you sand and prime everything?
The honest answer is no. Unless I have some repair or holes to fill I skip the sanding step. I prefer to just gently rough up the surface with some 220 grit sandpaper instead of completely stripping the old finish off. If I do any type of sanding I usually stick with a basic primer. Other times if there isn't any sanding I use Kilz no-sand wood primer. This has always done the trick, infact I even used it on the railings when I redid them and not a scratch or chip is to be seen.


Do you put primer in your sprayer?
NO! You can, but I just find it a real pain to clean the nozzle afterwards. The other reason is that you do have to thin your primer in the sprayer and that can be tricky sometimes! I use the spray cans of Kilz primer, which are also really fast drying (which is great when you need to work on multiple pieces in a short time frame). I know it isn't the most eco-friendly option, but I do make sure to send along all my used cans to the eco-station.


Do you paint the inside of the furniture?
No, I usually don't like my clothes and stuff to smell like paint LOL. I do paint the insides of cabinets when there are glass doors, but other than that I leave well enough alone!


How do you work with laminate or veneer finishes?
So far I have only worked on solid wood pieces so unfortunately I don't have any advice on this front. But a little paint never hurt anything right?


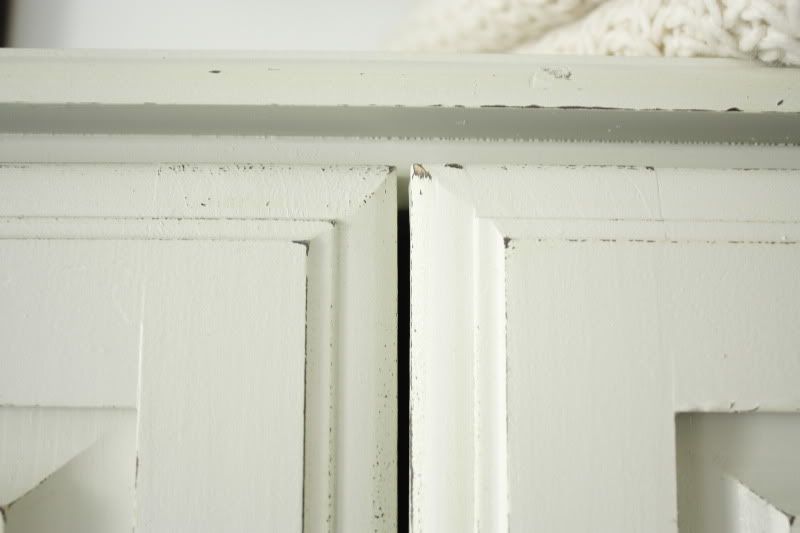
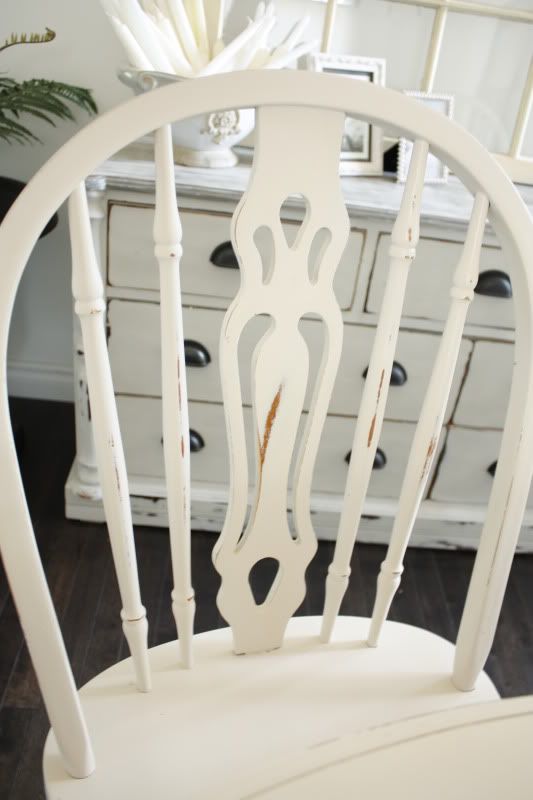
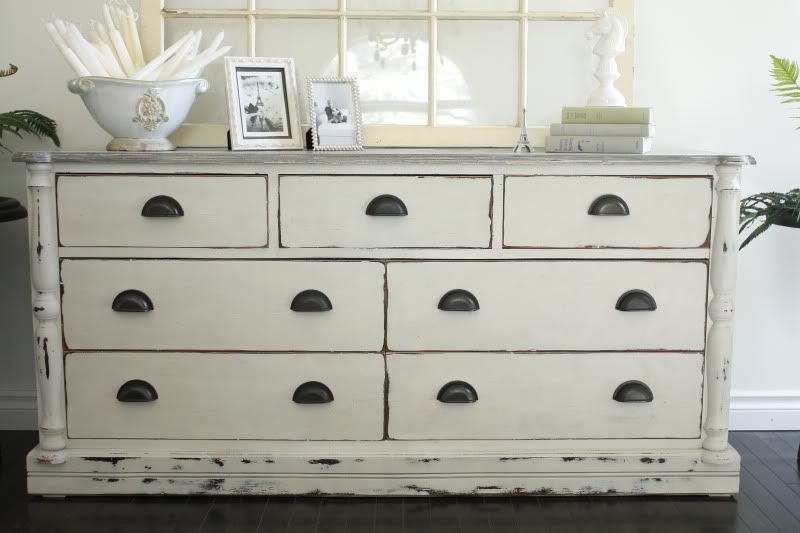
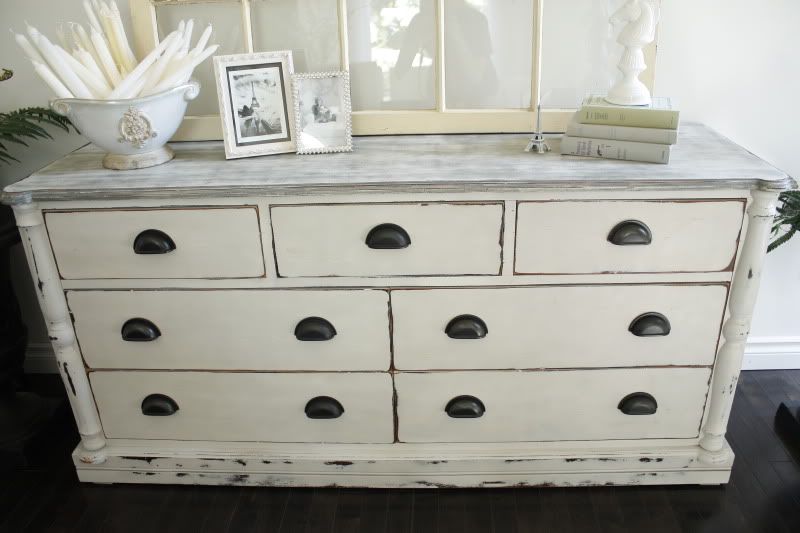
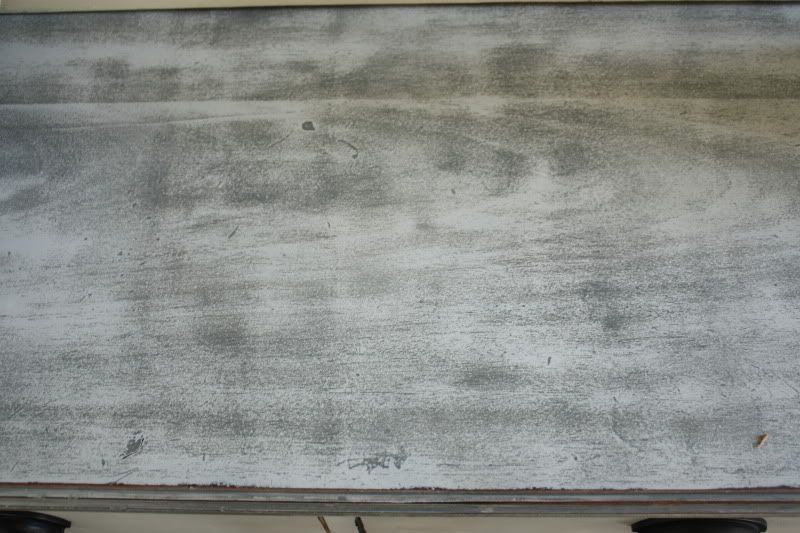
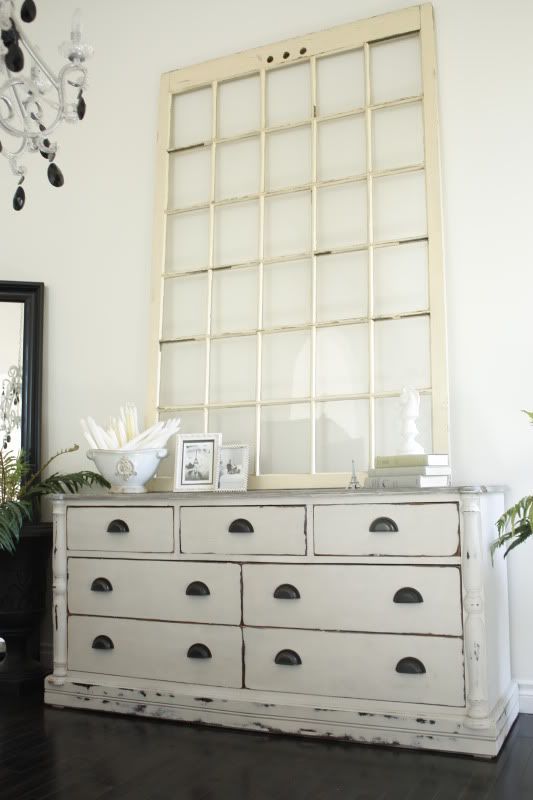
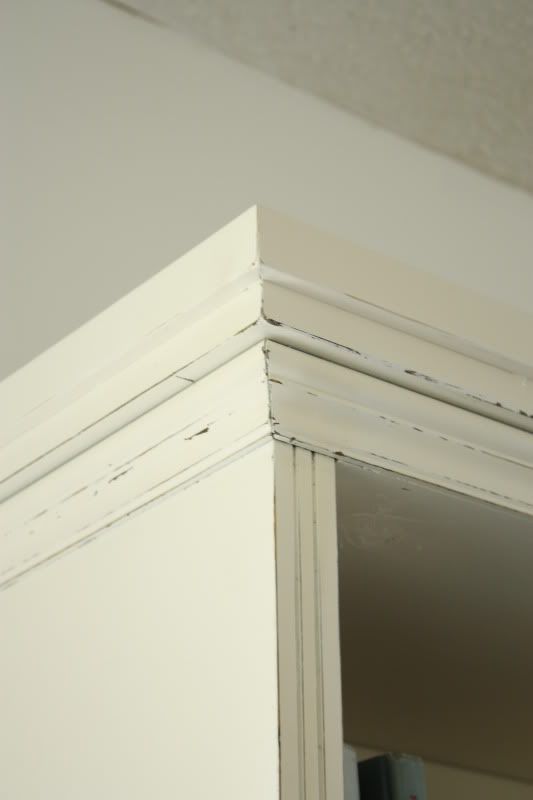
What do you use to distress the furniture?
I use 320 grit sanding blocks. Going over the most exposed areas, like corners and edges, gives you the most realistic look. I know it can be intimidating to scuff up your freshly applied paint, but trust me, once you start it is hard to stop!


What do you seal your furniture with?
I use Verathane brand water-based sealant. I usually work with semi-gloss but occasionally use satin as well. It is VERY IMPORTANT to try and find this type of sealant (I buy mine at HomeDepot) because everything else I have tried does turn the paint yellow over time. Sometimes you can see the yellow fairly soon after it dries, but other times it takes a few months to see (even when the can specifically says non-yellowing). So now I am very loyal to only buying Verathane, especially since I primarily paint in shades of white and any amount of yellowing is definitely not good. I usually do two coats to give it a nice, even finish.


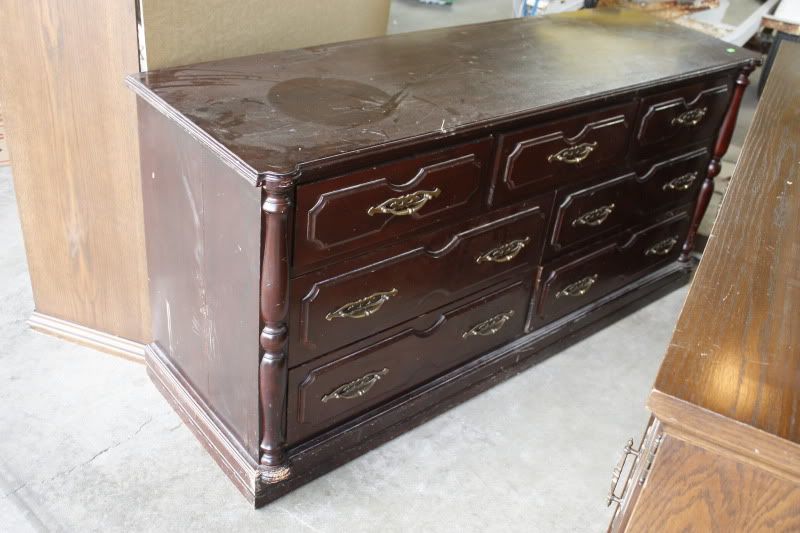
How do you pick the pieces you work on? What should I look for?
I generally have 2 criteria:
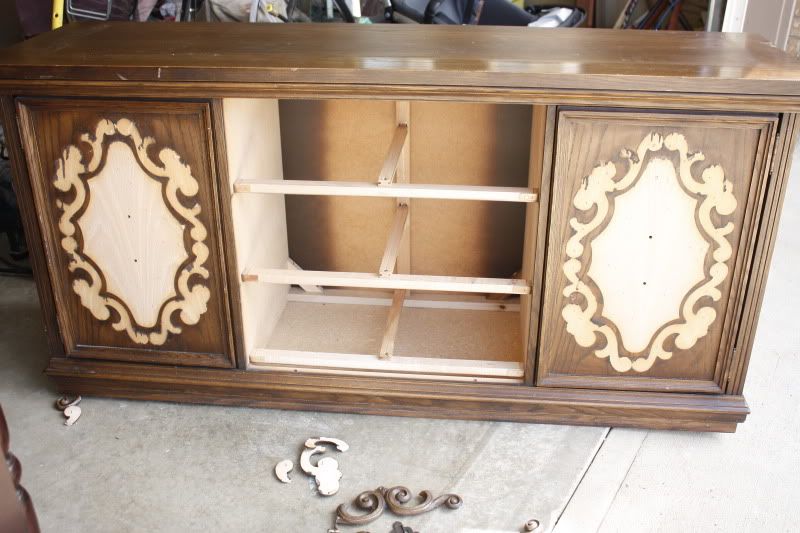
1. the piece must be in generally good condition structurally. If there are problems with drawers or anything I stay away, but a few minor fixes like broken hinges or closures are not a big deal.

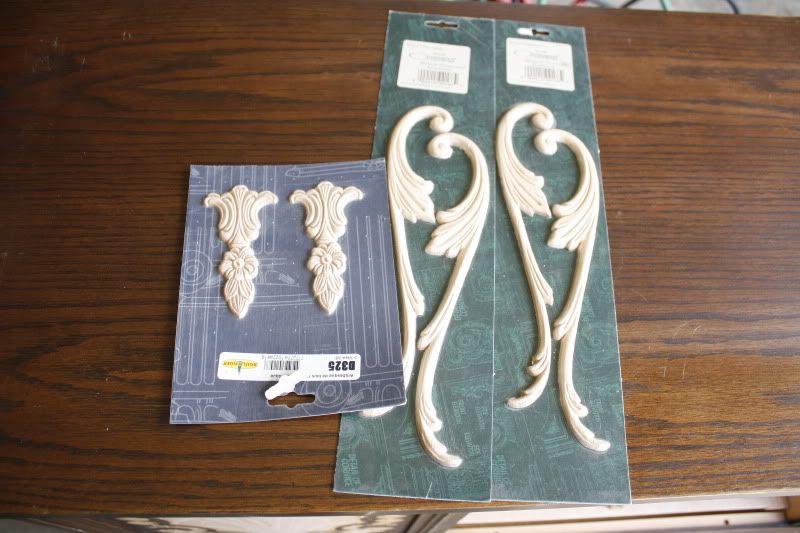
2. the piece should be solid wood. I can easily work with adding or removing anything as long as I am working with real wood.

If you are a beginner at refinishing I would recommend that your first few pieces just be things that will look like new with some fresh paint and new hardware. The more advanced work or removing or adding detailing or trim usually require more tools and time and can feel overwhelming if you are just starting out. But soon enough you will be jazzing up even the ugliest of old furniture!


Where are you located so I know if I can buy your pieces? How much do you usually charge?
I am located in Edmonton, Alberta. If you are in the general area definitely get in contact if you have any inquiries. My prices range from $150 to the mid-$400's. I like things to be accessible and affordable so depending on my time and the hardware I try to keep them priced decently.


Where do you get your hardware?
I get all of my hardware from http://www.leevalley.com/ . They have an unbeatable selection!


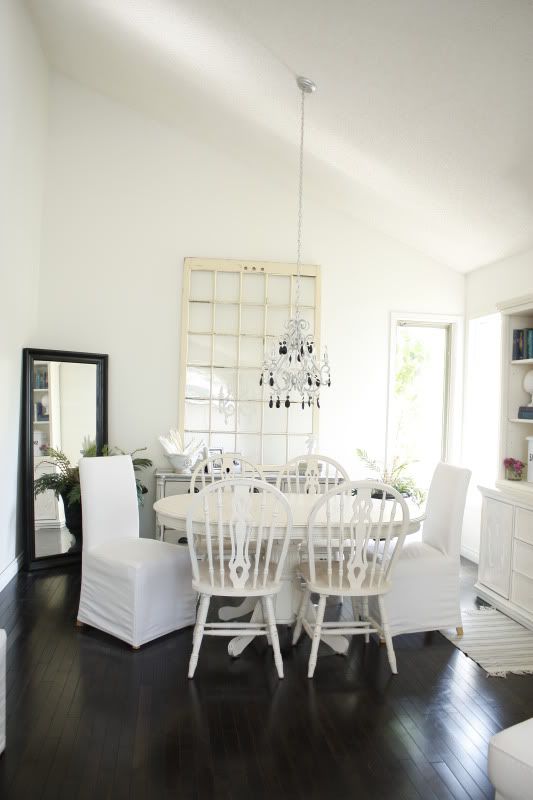
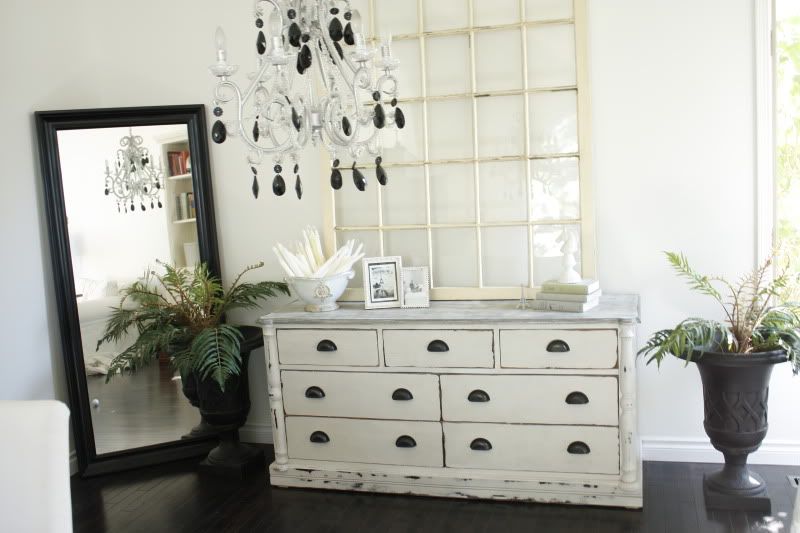
What color are the walls and trim in your house?
Every wall in our house (with the exception of our dark grey master bedroom wall) is painted in Seed Pearl by Pratt & Lambert. I highly recommend them for interior wall painting, even though they are a little pricey, because the finish is really beautiful and the coverage is great! Our trim is mostly unpainted still, but we have chosen Mirage White by CIL for the trim. It is a bright, fresh white.


What kind of Camera do you use?
I use the Canon Rebel. It takes a while to learn (I still am learning actually!) but it is very user friendly. For most photos I use a Canon 2.5, 55-300 mm lens. If you have invested in a fancy-shmancy camera you need to work your way out of the green box zone!


Where do you get your slipcovers?
All of our upholstered furniture, with the exception of our wingback dining chairs and our living room couch, comes from Ikea. It is affordable and the covers fit like a glove, pretty much the perfect combination! As for our wingback chairs, we picked them up from a Craigslist ad for $20 and had a local seamstress do the covers. It was a bit of a splurge, but totally worth it for the perfect fit and look we wanted. Our living room couch (seen here) was another splurge when we bought our first house and was custom made by Urban Barn. The cover is a surefit cover I bought on clearance for $30 that I bleach white and then nipped and tucked a little for a perfect fit. Want more ideas on how to make store bought covers look custom? Click here to read a previous post I did on the topic.


You have a toddler and two dogs, you must be crazy to have a white house!?
I will leave that issue to the professionals, but for a run down on our life in white, check out this previous post.


Where did you get your silver poufs?
HomeSense (aka Canadian HomeGoods), where else! They were on clearance for $70 each and I just loved the paisly pattern that is embossed on the leather. It is a unique take on the typical pouf.


Did you make your wedding dress?
Hehe, I always chuckle a little when I am asked this. You guys must really believe I can do anything (which is totally making me blush)! While I can sew a relatively simple pillow sham I am nowhere near the skill level of making actual clothes. My dress was made by Vera Wang Lavender Label, from Spring 2007 if I recall. As soon as I slid it over my head I knew it was perfect for me! A little unexpected and unique, and the perfect mix of shabby (unfinished seams) and chic (black lace=pure romance). Totally my personality!


Where did you get this shirt?

My everyday uniform is pretty much centered around this equation: Romantic, Breezy blouses+ ripped and torn jeans=pure comfort! This particular blouse is by design duo Christopher Deane and was purchased about 2 years ago from my favorite online store ShopJinny. I admittedly splurge on designer clothes, just not that often. Knowing how I wear my clothes I prefer to buy quality, long-term pieces that I will get a lot of wear out of. But of course I would rather be spending $$$ on stuff for the house~


Want to know more random tidbits, like where we got Wren's name and how we fell in love? click here for the juicy answers to your most random questions!

Bedroom Armoire

The previous owners of this cabinet took a lot of time and brown paint to give it an update a few years ago. This is one of my first pieces that I have had to "refinish" over a previous paint job, so I wasn't sure whether it was worth my time and effort to sand down old roller marks and brush strokes. I decided that it wasn't worth it, which really made it a fast project.

As always, the before:


The After:


It is set up to hold a TV, but I also added 2 shelves inside so I can house sweaters or jeans (until it goes to a new home, that is) since it is in our master bedroom right now.

Just a minimal amount of distressing. I like the contrast of the chocolate brown coming through the minty-celadon green.

Friday, July 24, 2009

A quick kitchen set paint job

A pedestal table and four chairs popped up on my local craigslist last week and just from the pictures alone I knew that it was the perfect set. It was in great condition, had all 4 chairs, basically just needed a new coat of paint, and obviously the price was right.


Working outside at 8:30pm to get it done before night fall!
Fast, easy and cheap! Sounds good to me~


I debated on whether or not to even distress this set, but the unanimous feedback from the family was DO IT! That is what makes my pieces a little unique, right? But I still went easy and just did a minimal amount.


A QUICK NOTE:
Thank you SOOO much to everyone for all the wonderful comments and questions! It is actually overwhelming how many emails I get everyday. This week alone I have already responded to over 100. So please be patient, I promise I will get back to everyone. If you have a question in particular about anything I appreciate you asking in the comments section, but it is easier for me to keep track of what I have or haven't answered if you ask me in an email.
Now we are off to the cabin for the weekend to enjoy a HUGE family reunion! Have a great weekend everyone~

Thursday, July 23, 2009

Dresser Redesign

I found this gem a few weeks ago, complete with the matching mirror. Obviously someone's dog also thought it was a gem because it had chewed and scratched it pretty well along the bottom. Rough, yes, but lots of potential!
Due to our crazy life these days I didn't take any "in progress" shots. But a quick outline of what was done goes as follows:
-remove old harware
-chip off the old front piece on the drawers (definitely not as fast or easy as the china cabinet since this baby is solid wood)
-sand the chipped drawers
-wood fill hardware holes
-paint the entire piece a warm slate grey
-grey-wash the top in a darker coal grey
-distress
-varnish
-install new hardware


I really wanted to hang the black mirror horizontally above it in our bedroom for now (our home is my "showroom" for now so things change daily around here) but I have an armoire piece I am doing that needs to go there for now.

The top turned out really well! Even I was surprised LOL.

You can even see the wood grain come through all that paint!


Tuesday, July 21, 2009

A day away


Yesterday we went out to my Grandparents' house. They live on an acreage with a few horses so it is always nice to get out of the city, especially on such a gorgeous day! I am hard at work today on quite a few pieces (pics to come!) so I was really happy to take a break for a day and enjoy some peace and quiet.


"Who put this board here??? I can't see the horses!"

"Oooh, Figured it out!"

"

"This door looks like something my mommy would like!"


Friday, July 17, 2009

7 Months Old

We cannot believe that Wren is 7 months old this weekend! She is growing like a little weed.

She has a love of daisies. They grow like crazy in the backyard and she enjoys grabbing and pulling at them.


Apparently roses are a little more delicate...


She just discovered the joy of fisher price rings and has lately spent many an hour playing, chewing and talking with them.


Happy 7 month Birthday Wren Berry~

Wednesday, July 15, 2009

White Berry Reinvented

I can't share all our exciting news just yet, but the part I am most excited to share is that I am starting a new business! I am refinishing and selling furniture just like the pieces I have shared so far as well as offering refinishing services on pieces people already own. Unfortunately due to shipping it is really only a local business, but never-the-less I am launching a website in the very near future which will showcase all the pieces as my inventory changes.

Last night was a bit of a milestone as I sold my first piece! I placed my ad and within minutes I had a buyer, within a couple hours I numerous emails, and as of today I have responded to countless people who are wondering if it is still for sale. The first buyer actually never showed up, so I offered it to the second email I received, and this is where I discovered how small a world it really is.

The email was from Rebecca, a regular reader and commenter as well as regular over at DecorPad! I was so excited. We dropped off the piece and met for the first time last night and let me tell you, as soon as I walked in I knew I had just made a new friend! Her living room is GORGEOUS and I recognized it immediately from DecorPad, and not only that but she decorates on a budget (I was shocked when she told me her stunning living room chandelier cost only $19!!!). We have exchanged numbers and several emails and plan on doing some thrift shopping together soon. How amazing is that?! and yes, I told her she needs to start a blog of her own~

Thanks for all the encouragement and support you have given me with your comments and emails! Until now I didn't think anyone could possibly be interested in buying repainted furniture so the inspiration really came from all of you. And stay tuned for more on White Berry Reinvented.

Tuesday, July 14, 2009

Well that's new!

Hmmm, you may or may not notice something new in my posts. Maybe close to the bottom?

I received a couple emails recently and the senders could not find my name anywhere so it occurred to me that perhaps I should make my posts a little more personal. Hence the new addition~

I have several pieces of fun and exciting information I am looking forward to sharing in the next few weeks. Oh how I wish I could tell now, and I am sure it is a little cruel to leave you hanging but I am just so darned excited!

Hope you are all having a great day~

Sunday, July 12, 2009

1970's China Cabinet

I found a new favorite local thrift store that has unbeatable prices! It didn't look like much from the street but inside it was a thrifter's dream. I grabbed some great pieces, the first of which being this 70's china cabinet.

It had great proportions, and was the perfect size. And while the decorative detailing was "neat" it really didn't have much hope so I took my chisel to it and low and behold it wasn't even wood! It was plastic, which was fast and easy to remove.


I saw these decorative wood pieces at the hardware store on clearance for $4 and thought those would be perfect for adding some interest to the door fronts.

One thing I didn't anticipate was how much paint this would take, I went through a full can! I chose to remove the cabinet doors, but still painted them just incase I ever change my mind so that took extra paint, and I added wood shelves instead of the glass ones which also took extra paint. I still can't believe how much painting this thing required!
I also added an extra couple inches of decorative molding at the top to make it feel a little more substantial. This is a fast and easy way to make furniture feel a little more heavy.


I really want to display a collection of all white ceramics in here eventually, but for now it is housing some of my antique book collection (along with a few new favorites!).


An unexpected thing happened on my second coat of paint: the pattern of the old decorative piece started showing through. This is really weird because this area was actually lighter since there was no stain on it, but it came through darker than the paint. I have no idea what happened but I LOVE it! It feels like a really worn off old decorative paint embellishment.


I am in the midst of picking out some new hardware for the handles, but the old ones with a coat of Rustoleum will work for now.

Friday, July 10, 2009

Cabinet Door Gets Second Chance At Life

You probably remember how we tore down some of our upper cabinetry back in May, well instead of tossing the doors I thought I better just save them in the event that I can salvage them somehow. Here is where I become a bad blogger. I had seen someone turn old cabinet doors into photo holders using chicken wire recently but for the life of me cannot remember who (if you know the answer to this riddle please enlighten me!). After seeing this person's amazing work I, too, saw the possibilities.

My sister and her boyfriend recently moved into a new apartment so I thought a chalkboard for their kitchen would be a cute gift. I slathered on a quick coat of paint, stamped their monogram at the top and "notes..." at the bottom and distressed it. Eco friendly and all done in about 1 hour of working time, talk about a great gift idea!

Edited to add: Thanks to Katie we now know it was in fact Stacie over at the Creative Crate who made the amazing chicken wire frames. You can see her ingenious design here.

Wednesday, July 8, 2009

Can you be in love with a window???

Only yesterday I said that the latest dresser will most likely see some change of scenary behind it, but I had no idea that it would be today! Even though it is raining and thundering away on all the windows today, this window is nice and dry in her new home.
Checking out a local architectural salvage warehouse I saw this 6 foot beauty and knew she was the perfect piece:


We are working around some freakishly high ceilings here and LOTS of bare walls. I have been on the hunt for a HUGE cabinet to span the wall but this is even better. Once up on the dresser I have almost 10 feet of interest on a pretty bland wall.


I am sooo in love with this window that I am even considering eliminating the formal dining room and instead having a nice reading area off of the living room. Sean is yet to be convinced though...

 
Blogging tips