Tuesday, January 31, 2012

{Inventory}


I have been busy busy busy (what's new, I know you must think I don't have time to breath over here). The reason is that I finally dedicated some time over the past few weeks to adding a new branch to the WhiteBerry website. It has been a goal of mine to finally start sharing all the awesome small wares that I see when I'm out, as well as many of the ones that have come home with me despite the fact that I had no need for them other than thinking they were too fabulous to sit in a garage, basement, store, etc.

The biggest share of work needed to take place behind the scenes as I developed everything online, but now I should be adding things weekly (the pile I need to sort through is a little overwhelming).

But my favorite part is that many of the items are able to be shipped within North America, so now anyone can find a treasure and bring it home.


I really have no guidelines to what may pop up there, so who knows what you may see. Most things are interesting and purposeful, but some are just plain interesting and may need someone with a creative touch to think of what to use them for!


So stop by and take a peek every so often at what WhiteBerry {Inventory} has laying around!


Thank you again for all your WhiteBerry love over the past 3 years, it is still so cool to meet new friends and share this love of old treasures with so many people. That is definitely the biggest treasure of all!

Monday, January 30, 2012

Paint Perfection {Class 3: Aging through glazes}


Thanks so much for your patience! Life got a little crazy this weekend and I had a few small touches to add to this post. You'll notice this is a really photo heavy post, but as the saying goes a picture is worth a thousand words so I figure I just saved myself roughly a week worth of typing~

We are going to pick up where we left off after 
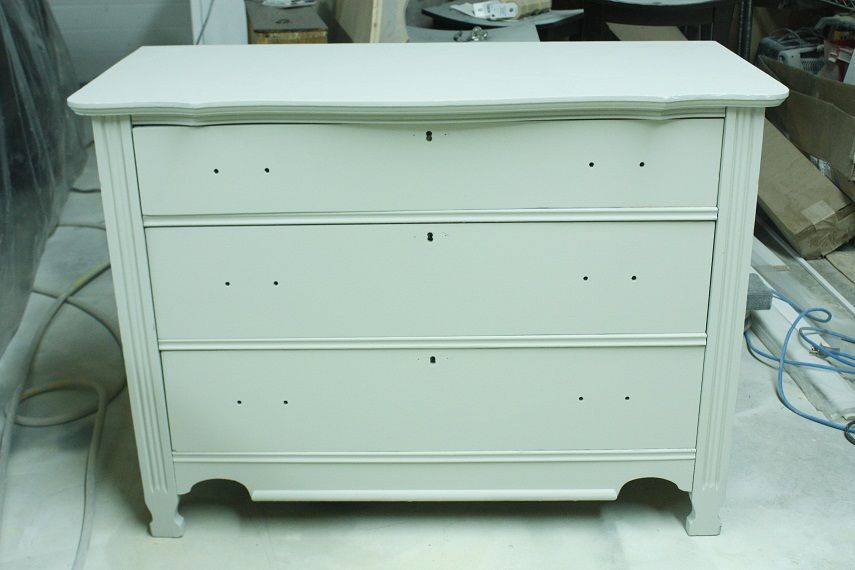
Class 2, with a freshly painted piece! Today's class as well as next week's will cover optional treatments like distressing and glazing. I rarely use more than one of those techniques on any single piece but of course the fun part is trying new things and taking chances so make it how you love it! Next week will be our final class and will cover distressing as well as the final steps of sealing things up nicely, but this week we will be chatting about glazing.

Some people use special waxes or products for glazing but make no mistake, things don't have to be as complicated as they look! My "glazes" are simply watered down paints, in any paint color. So put your thinking caps on because glazes don't just have to be used to make things look old!

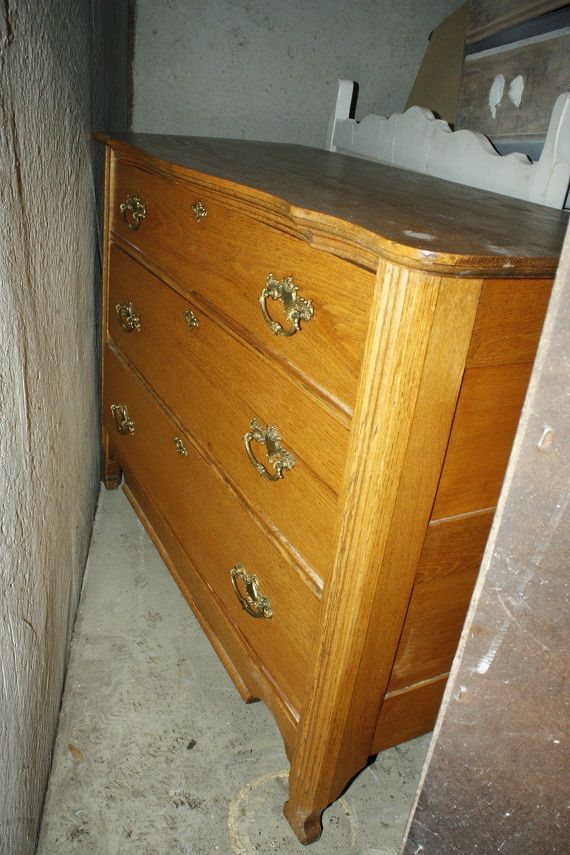
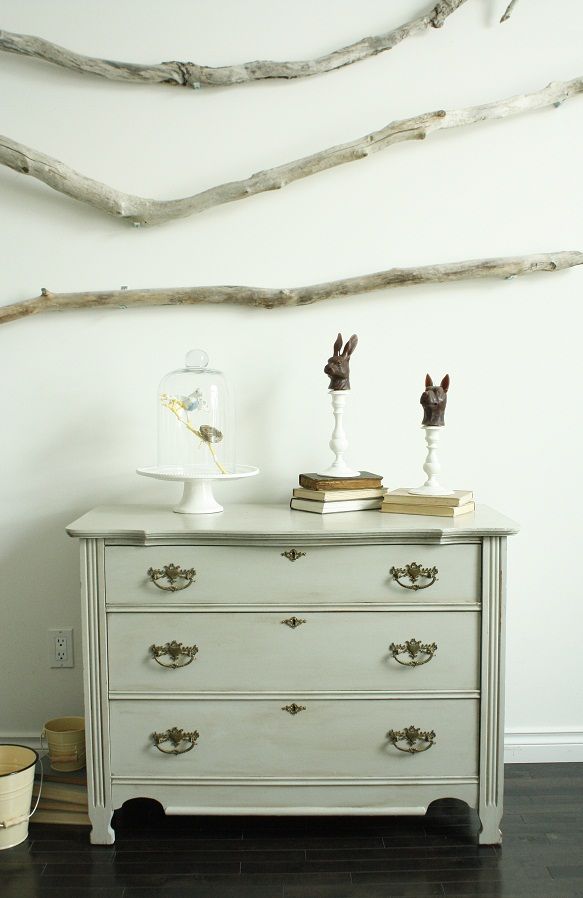
Our first project is going to be taking this antique dresser and giving a rustic grey finish.


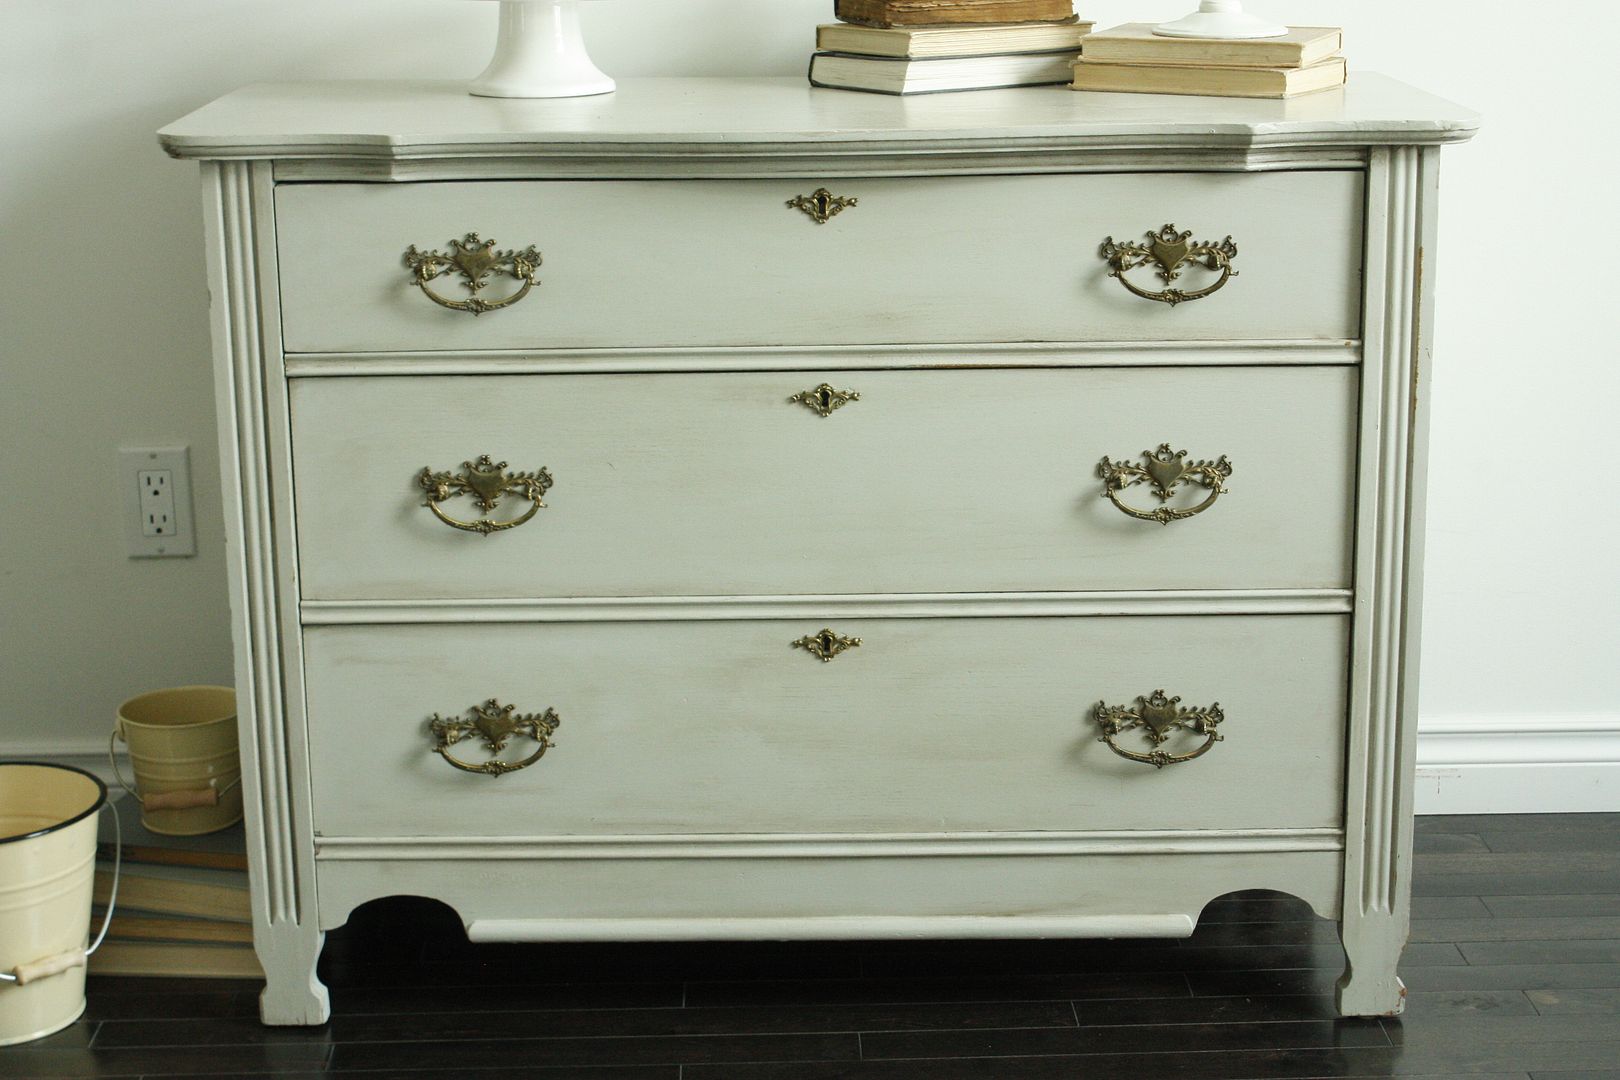
To get it looking like this!


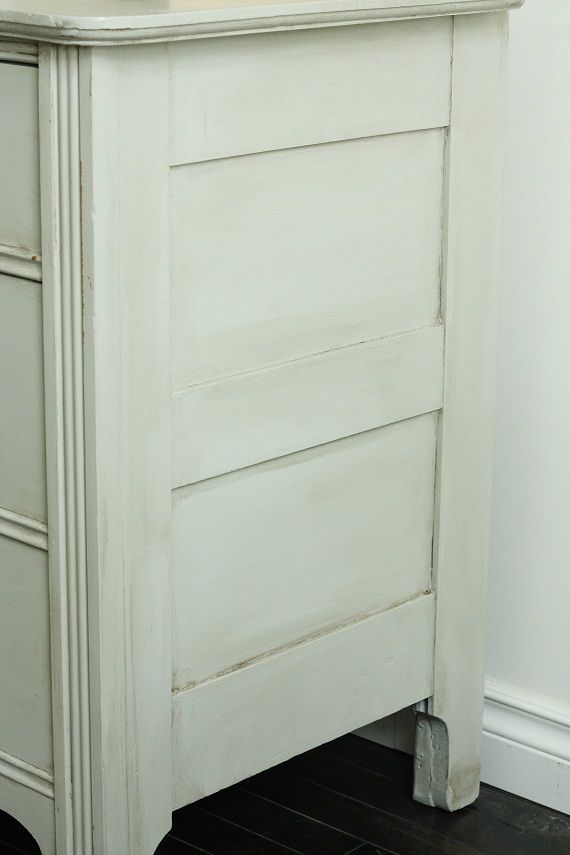
It's not hard, but it does add nice dimension to a piece. I tend to be pretty light handed with glazes but again, make it as dark or dirty looking as you like!

Our dresser after last week's class.

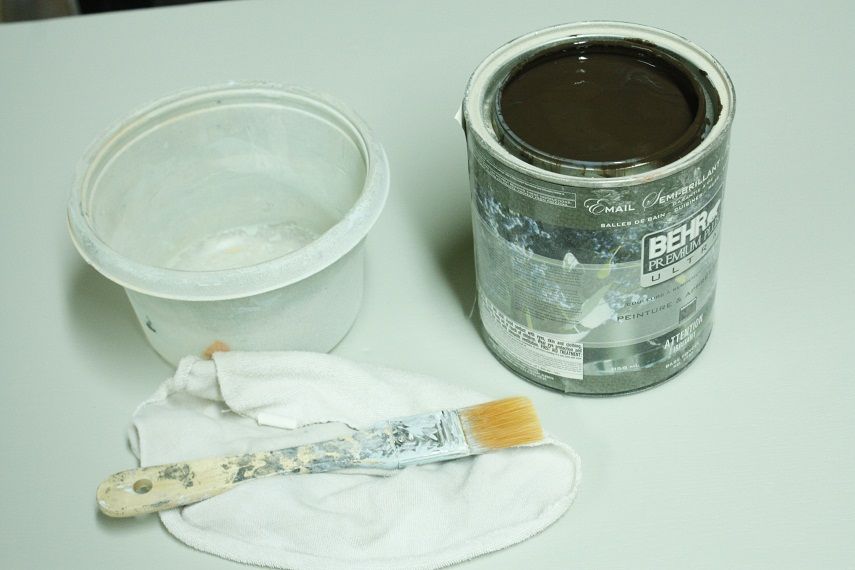
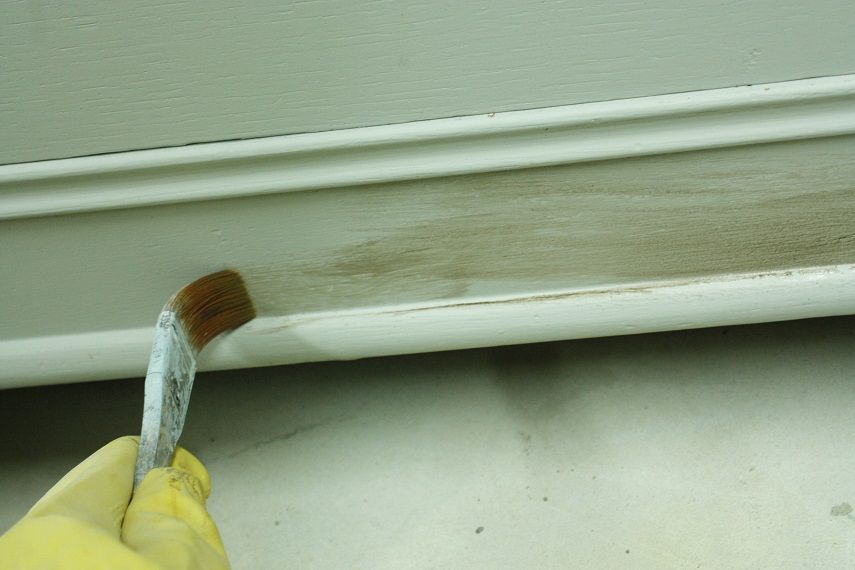
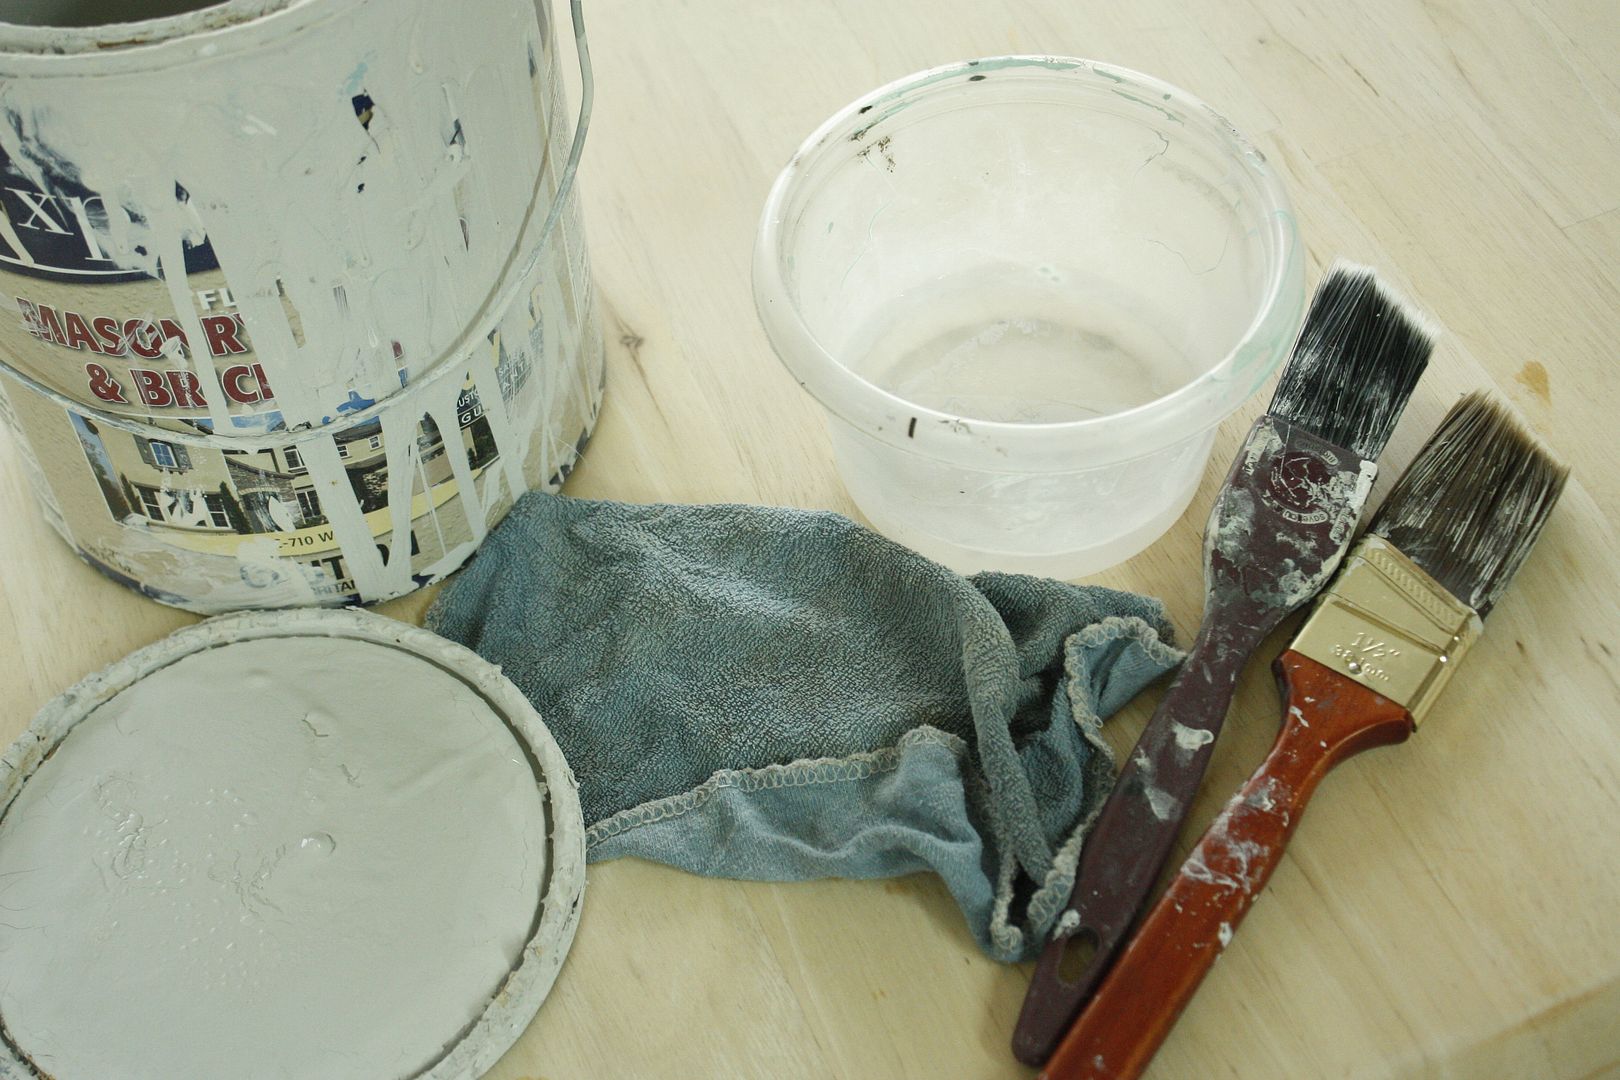
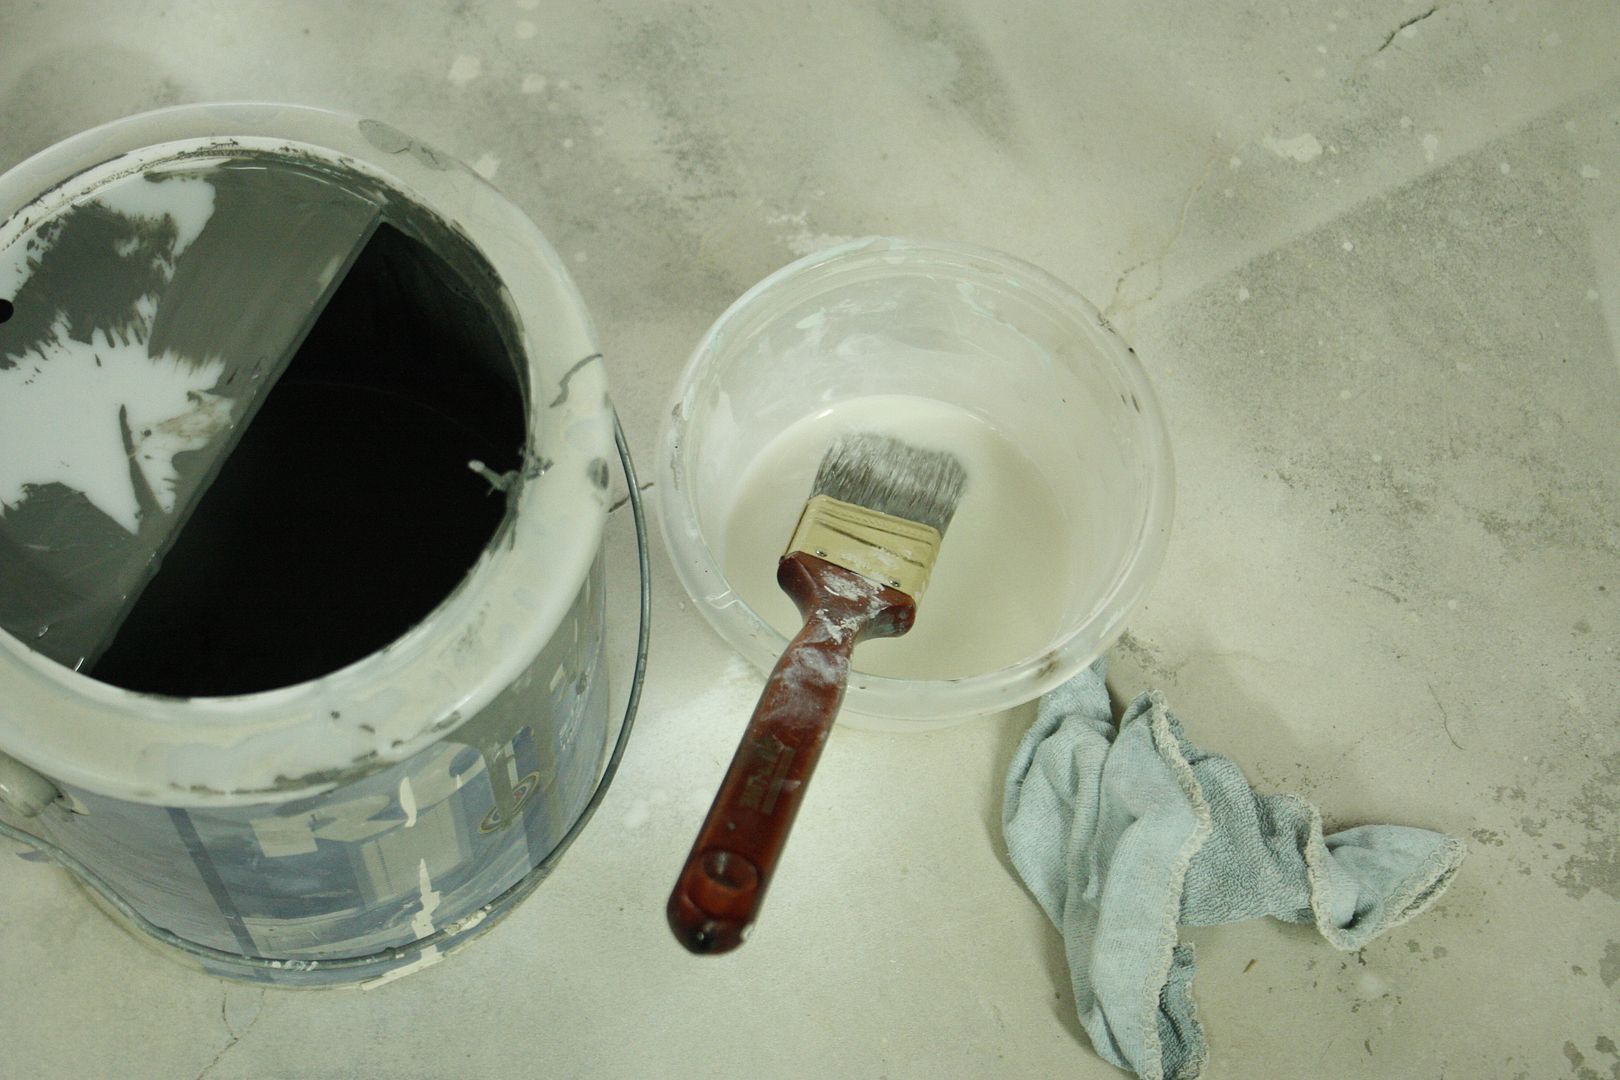
The tools are simple and cheap. An old bowl with water, a brush, a rag and some dark paint. For this dresser I used a dark mocha brown to give it some real patina.

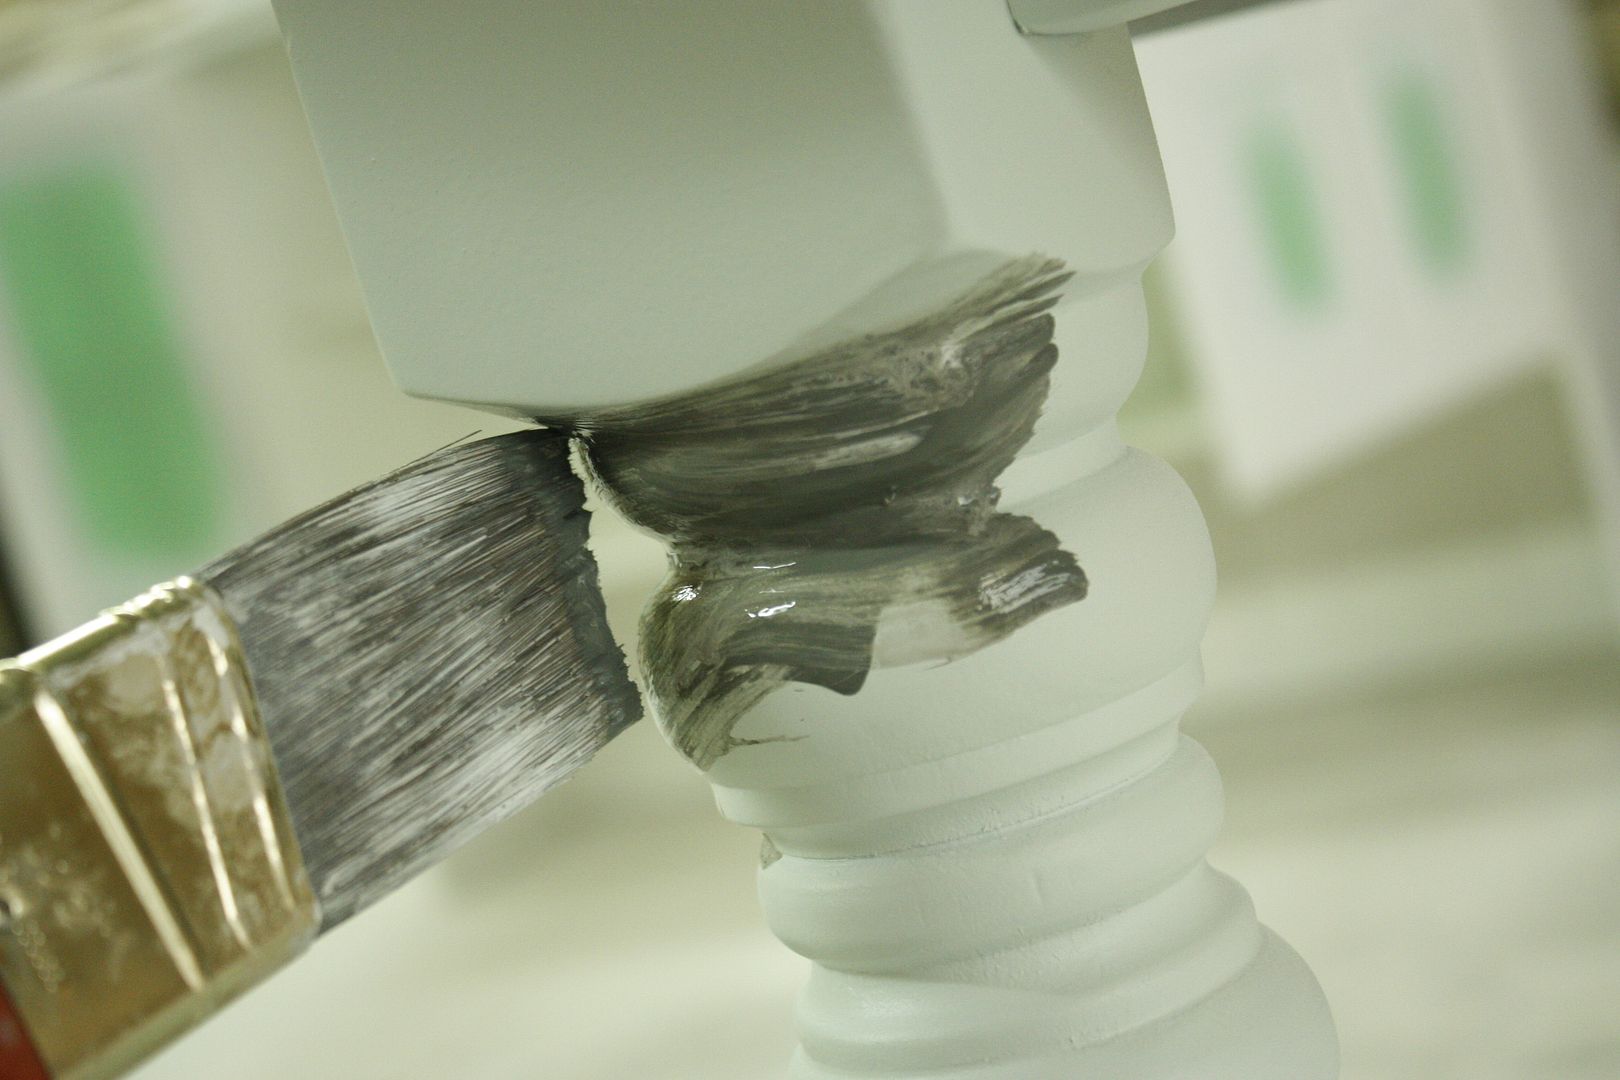
The real skill is knowing how and where to apply the glazes realistically. For the most part real dingy pieces collect the most grime in indentations. So I like to take my brush, dip it in water then take a quick dip in paint. Then I messily get into all the corner and crevices. I like to hit these spots first then leave them just like this while we go work on smooth surfaces. Don't worry, we won't be leaving it like this for good!


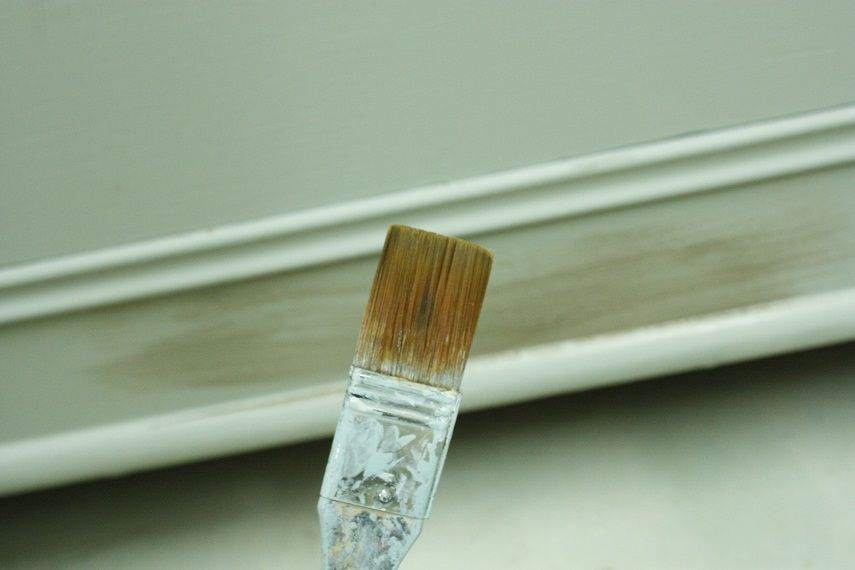
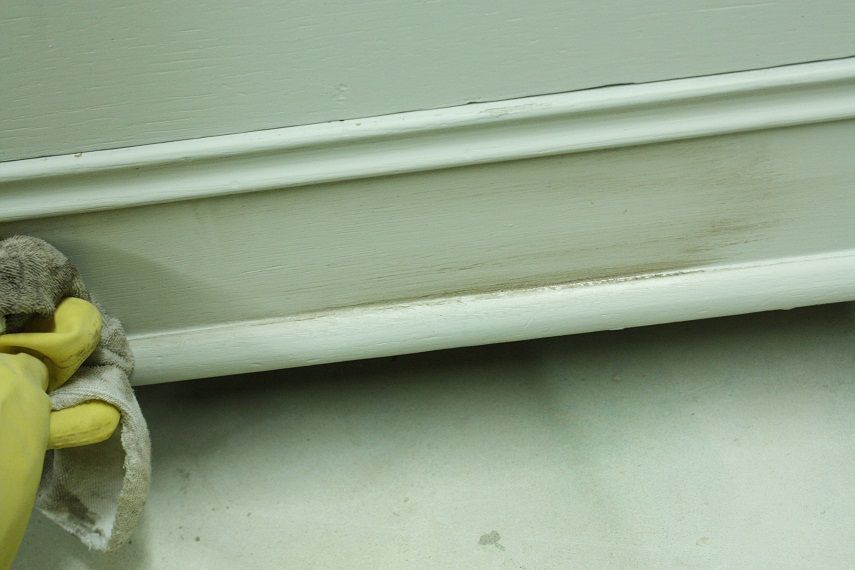
After getting all the corner areas I dry my brush off on the rag. For our smooth surfaces we will be dry brushing. It is a pretty standard technique but can take a little practice. You gently dip just the tip of your brush in undiluted paint then tap off the excess on the rag. This leaves very little color on the brush as you can see.

I recommend brushing along with the grain of the wood for the most realistic finish. I like to dry brush then wipe with another dry rag, repeating as necessary to layer the effect.


After a few passes with the brush, then rag.

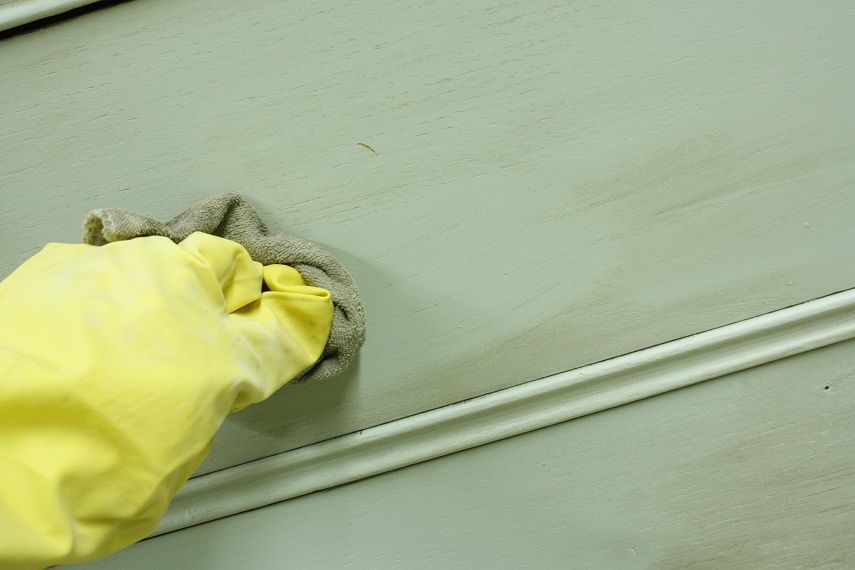
Keep working over your surface, creating an even finish. I do like to build up and work the finish further along areas that would naturally see the most use or see the least cleaning. After building up the finish you can still work with it if you aren't happy. I felt that it was just a smidge too dark for me here.

So I simply made the rag a little damp and gently wiped.


Much better now!


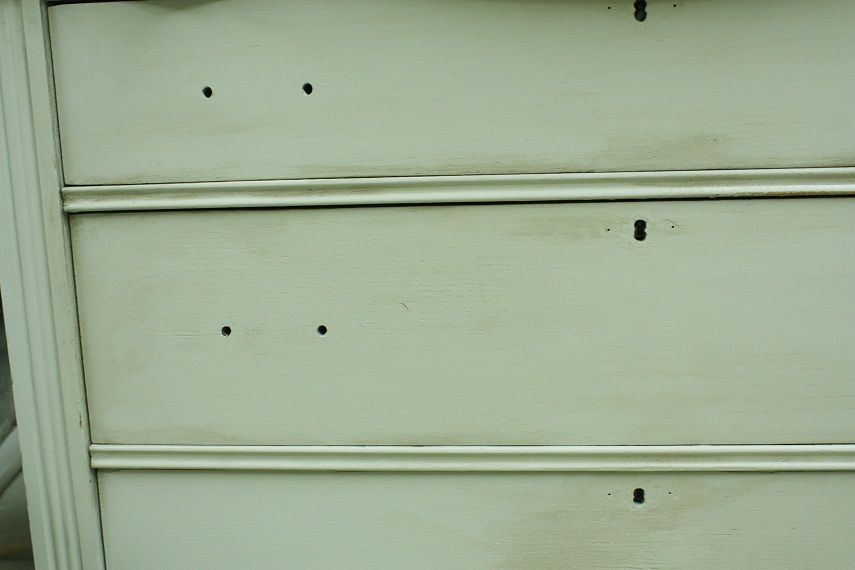
Once you feel like you are happy with all your smooth surfaces take a lightly damp rag and wipe with the grain on your corners, etc. that we first applied the paint to. Since the paint was diluted it should still be somewhat wet, if you are working on the smooth surfaces and start to see it dry too quickly then take a little break to wipe down these areas before they dry.


Hardware back on and all sealed up!

The grey and brown tones compliment the brass nicely.

A successful glaze in my opinion.


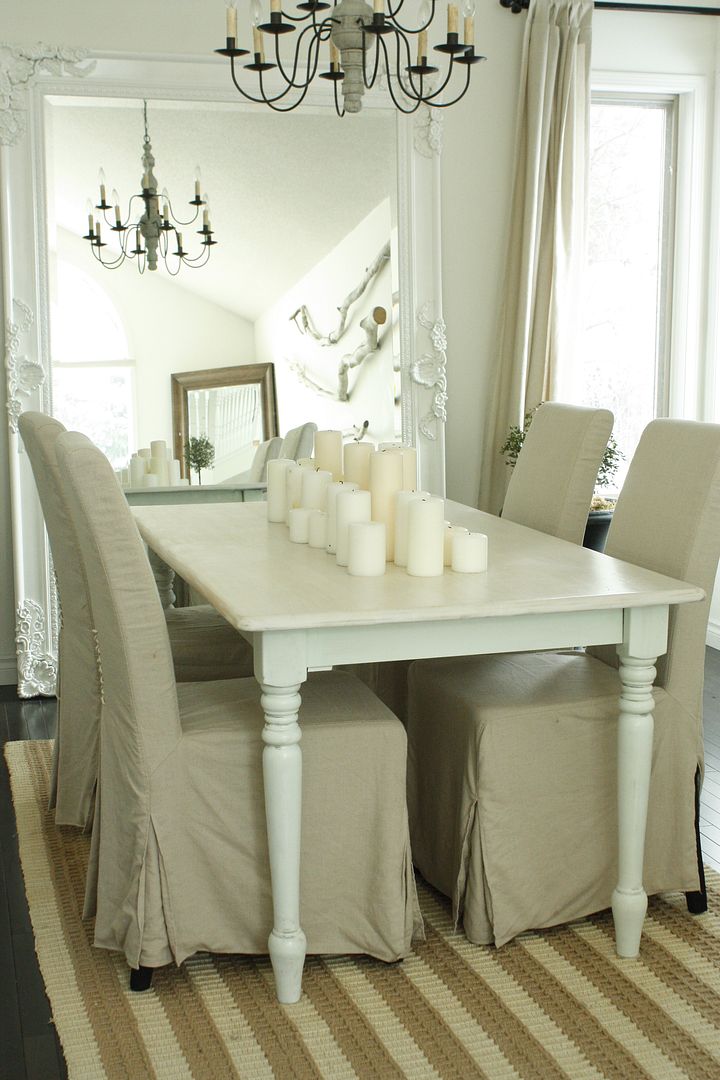
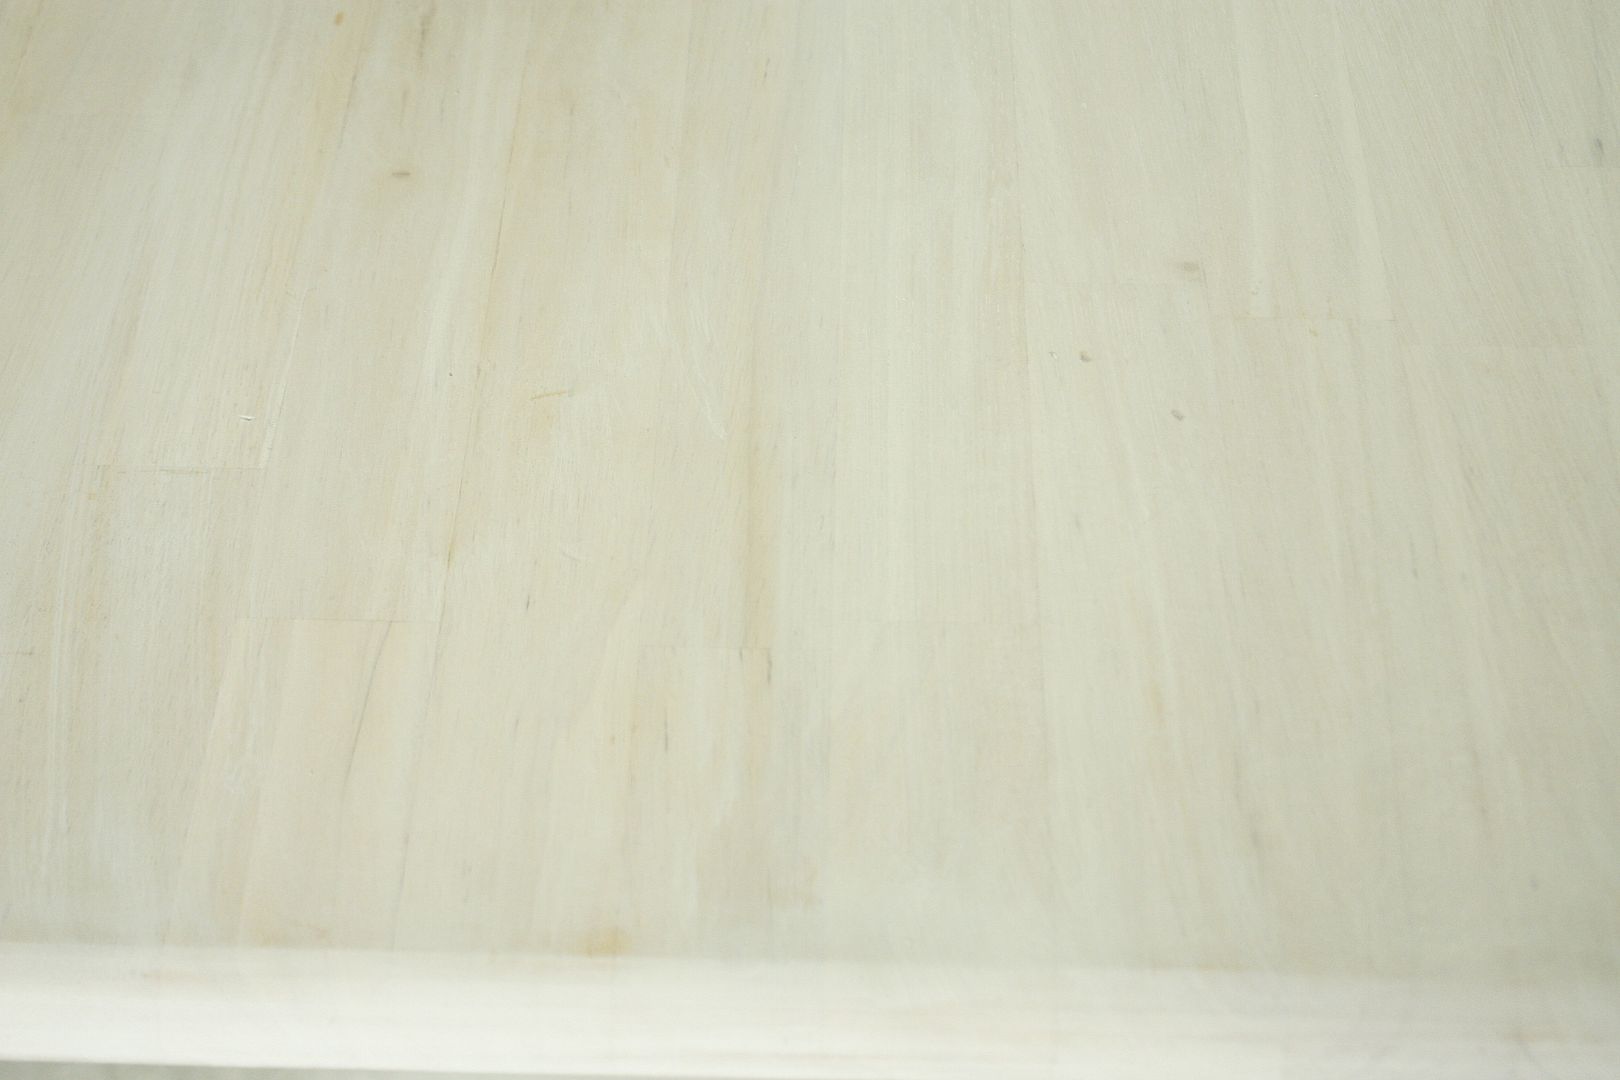
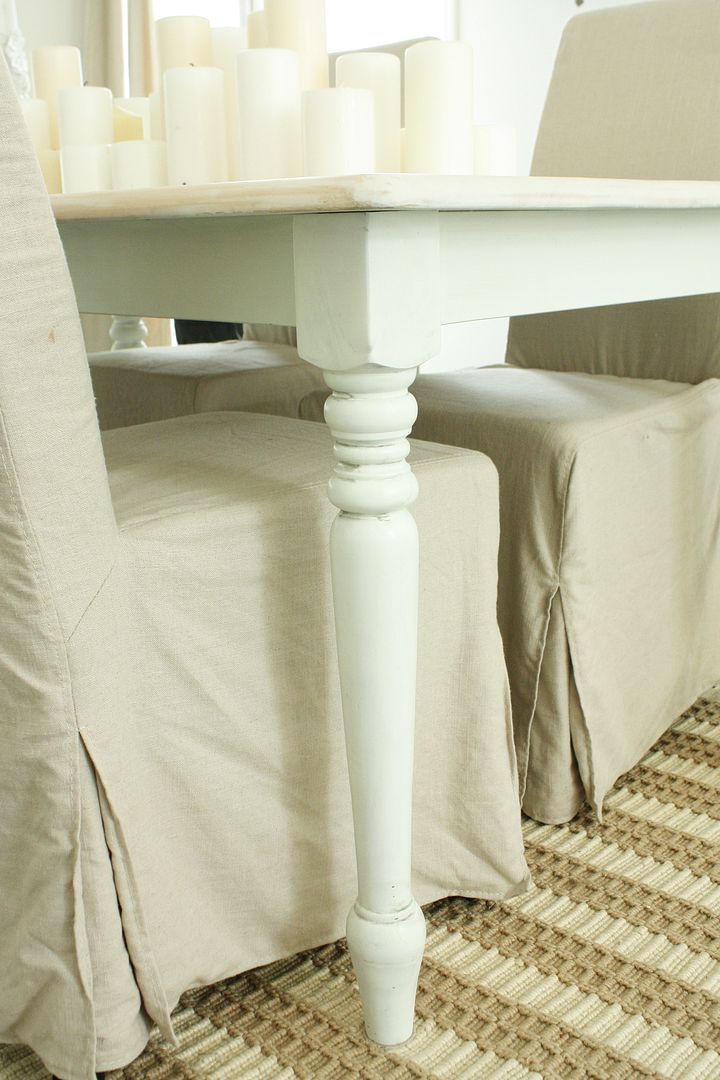
The other type of glazing I occasionally do is directly on wood. This table is both glazed on the painted legs as well as the wood top.

I like glazing wood with grey/white for a soft finish, but love the warmth that wood grain offers.

Glazing directly to wood is fairly time consuming due to the fact that we need to completely strip any paint/lacquer on the wood. This table was about 16 hours of stripping. You can sand or use chemical strippers, but I prefer sanding for the smoother finish.

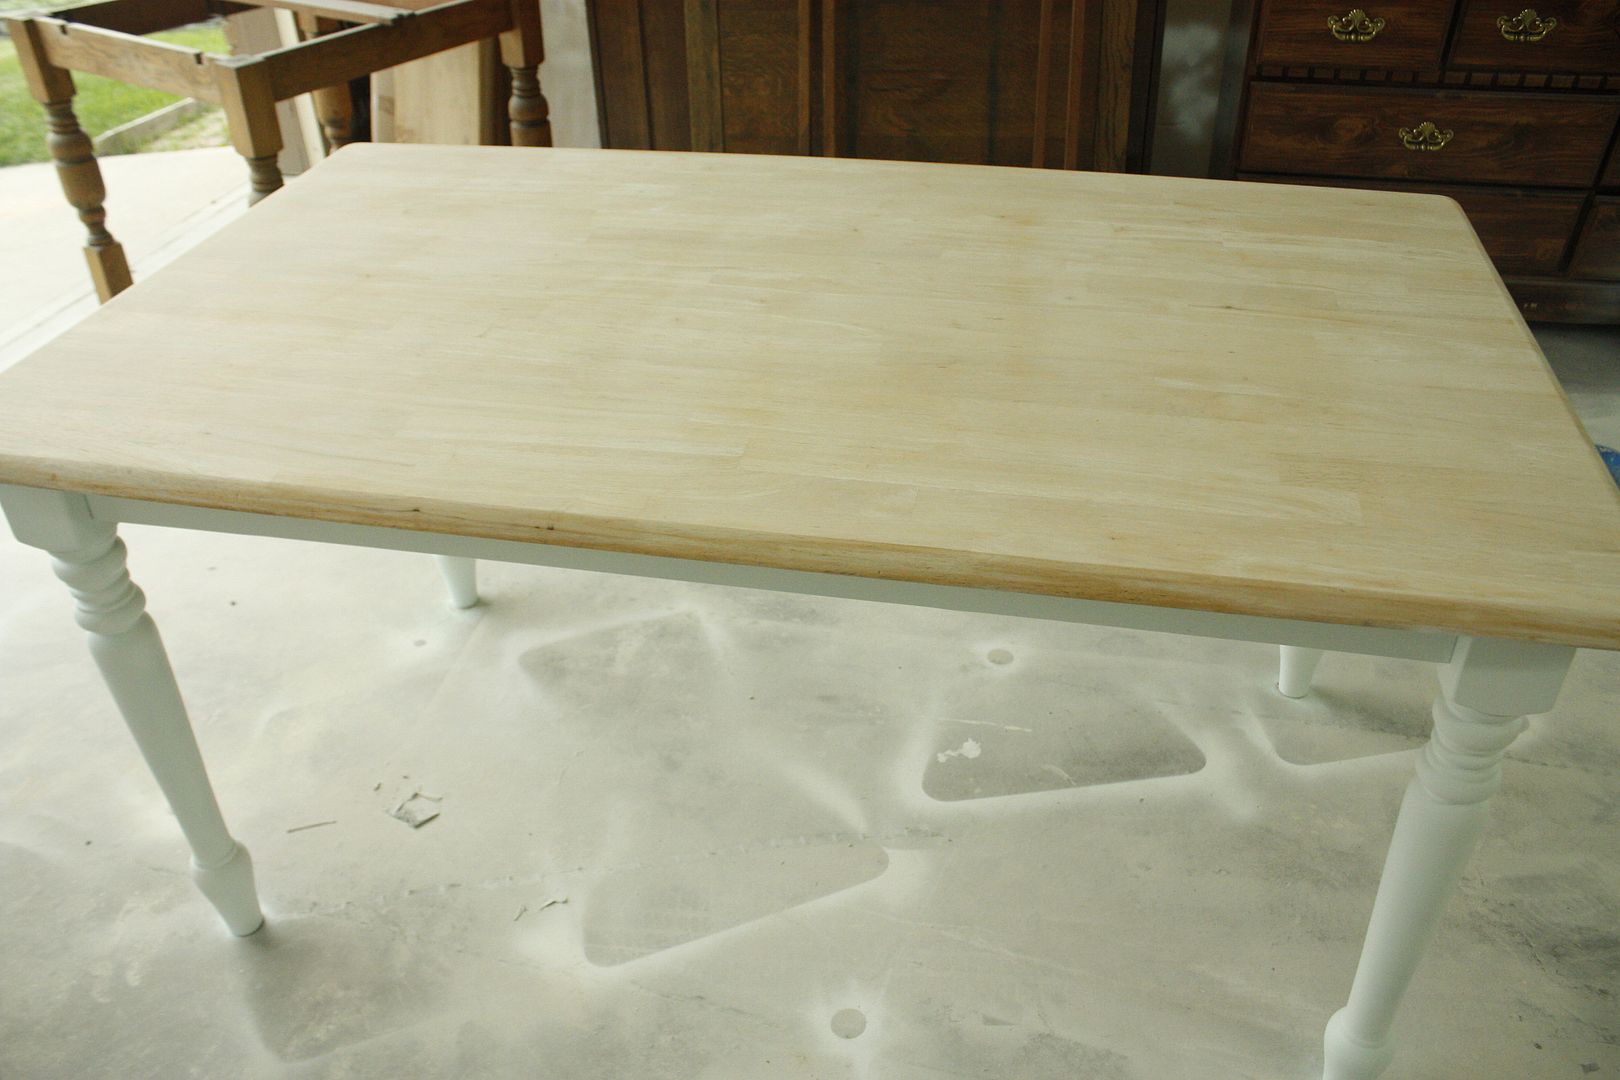
Stripped on the left, lacquered on the right.

All stripped, and legs have been painted a soft teal.

For this glaze we will approach it the same as we did with the dresser but instead of dark brown we will alternate layers of white and very very light grey. Alternating colors in layers gives real tone and depth to your final finish.


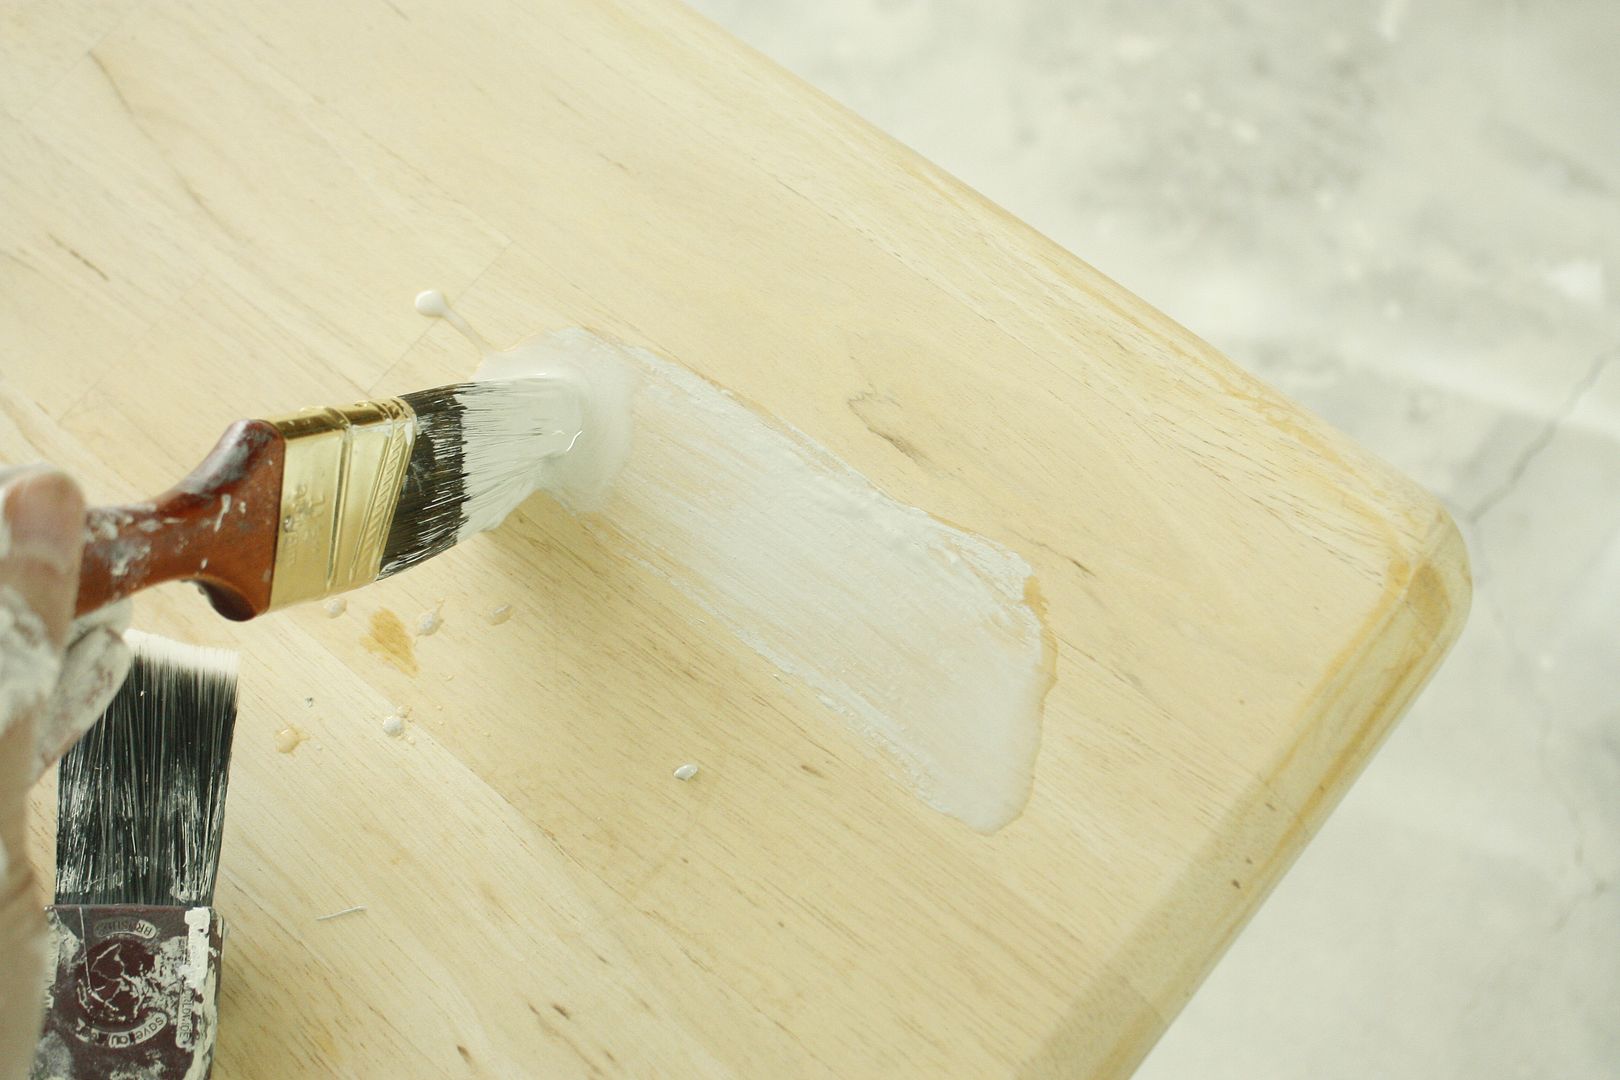
We want the wood to absorb the paint quickly so I dip the brush in paint then quickly in water. This also helps it brush on smoothly in large areas.

Again, work with the grain of the wood.

After a pass with the brush let it set (I usually just move on to another area while it soaks up)

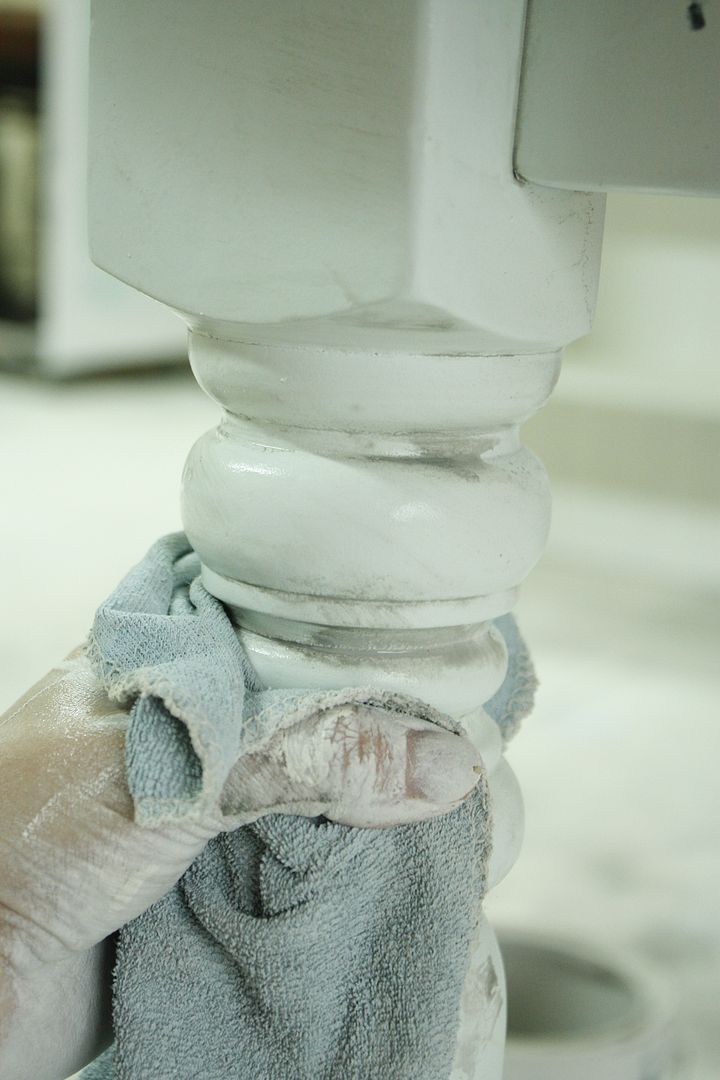
After a layer of white, then grey I wipe every thing down with a damp rag to help blend.

I still like the warmth that is visible, but you can build it up as much or little as you like.
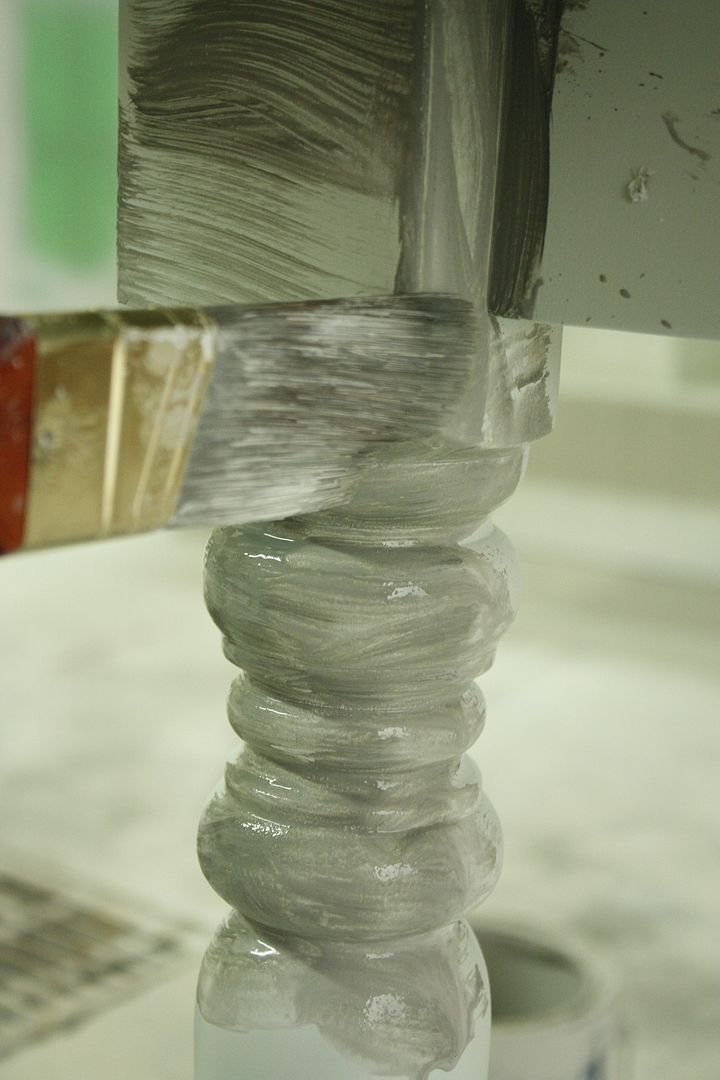
For the light teal legs I wanted the glaze to compliment the surface.

So we used a darker grey in the same color family as the light grey we used on the surface.

Again, we apply liberally in recessed areas.

Then wipe away.


I prefer working up with the finish, building in layers over applying in thicker layers initially. It is more time intensive but so much more realistic and subtle in the end.

How are all your Paint Perfection projects coming along? Don't forget we will be having our link party in just under 2 weeks!!!

Friday, January 27, 2012

I'm with the band...

Hi Guys, I know today was supposed to be Paint Perfect class 3, but due to some awesomely unforseen circumstances I am now moving that post to tomorrow (Saturday). I know my blog is called In the Fun Lane, but after last night I feel like it should be called life as Penny Lane. I had a totally "Almost Famous" moment thanks to my sister and her friend Harris.

If you are Canadian then you probably know Dallas Green (City & Color) and his music. If you don't know it or are from the Southern half of North America then you need to check it out, it will change your world. The last 2 nights he played 2 sold out shows here in Edmonton and I was lucky enough to go last night and get the ultimate VIP treatment all courtesy of my sis!!!!

Before the show we had the whole concert hall to romp around and take silly photos in. Or so I thought, that man in the background must have wondered who the heck we were and what we were doing!

Before show time we were welcomed with open arms by the whole crew, even invited to just relax in the tour bus while the opening act set up.

While everyone was taking their seats we were backstage with the band while they finished their dinner and Torri caught up with her friends. But I just had to snap this awesome picture of the stage getting prepped for show time!

Torri's friends were super sweet to get us prime seats in the audience, but come show time I was super duper overwhelmed to learn that they invited us to simply pull up chairs on stage left and watch from only feet away!!!


How cool is it that you can literally see the sound waves on Dallas's guitar here?? Just beautiful. They opened with one of my favorite songs (Coming Home!!) and that pretty much set the tone for my amazing night.

Still cannot believe how amazing the whole show was! Specially because one of my favorite songs was not on the set list but somehow was performed~

Torri and Harris, goofing around, all while I sang my little heart out along with Dallas!

LOVED.EVERY.SONG.

I think the crowd was just as thrilled with the show as I was, but I will definitely never forget it!

Today I am taking cupcakes down to everyone on their day off just to thank them for my amazing night, hence the move of paint perfect (SORRY!).
Any other lucky Edmontonians catch the show???

Wednesday, January 25, 2012

A little flair from a chair

See that crazy patch of color just beyond the flowers on our coffee table?


It is the new super happy chair we bought last week! Remember when I told you that we've had some new purchases for the house? This was the by product of one such purchase. When we were out buying a totally different item (which I am almost ready to show you guys) my mom told me to go look at this chair. I was completely shocked when Sean expressed his love for it. Um, hello, who is this guy? was basically all I could mutter. But with an approval stamp like that I couldn't leave it behind!

I think it is going to be right at home in our family room. It's a fun place where there are often toys out and about so it will blend in well opposite our sectional.

A happy chair for a happy room! Makes me smile every time I come in here.


And a super happy, fun day to you as well!

Tuesday, January 24, 2012

Lavender

Nothing is more soothing to me than the smell of fresh lavender! Sadly fresh lavender doesn't happen way here up north. But I can now pretend I am relaxing on a chaise in Provence, even on the chilliest days thanks to these amazing faux Lavender buckets I scooped up at Restoration Hardware last week.


Trust me, I am usually anti-faux plant! But these look so real that I often find myself leaning in for a sniff before I remember they aren't the real thing.

The original price reflected their realistic look at $238 each (holy cow I can't believe someone would drop close to $500 for 2 of these!!) , but they were a much more reasonable $70 minus another 10% last week. Still not cheap, but I think they may actually save me money in the long run after the bad streak of killing plans I was on last year.


I've played with them all over the house but they have ended up in my cast iron urns so I will be sure to share their final resting place once I pad them up with a little extra moss.


Blogging tips