


I may be coming down with something guys, I painted... something... BLACK! Huh? What? maybe I should sit down for a minute???
In all fairness, it wasn't for the sake of wanting black furniture. It was to add a dash of fun in our dining room with some chalk.
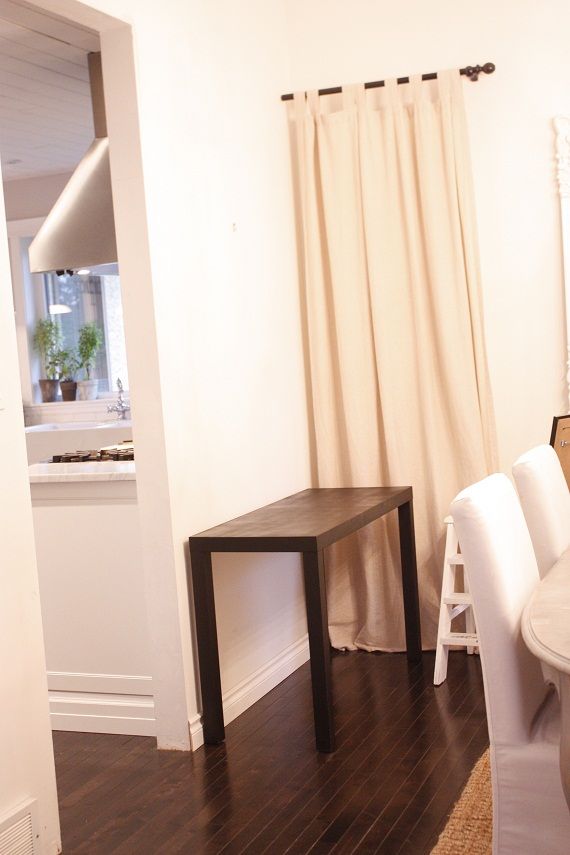
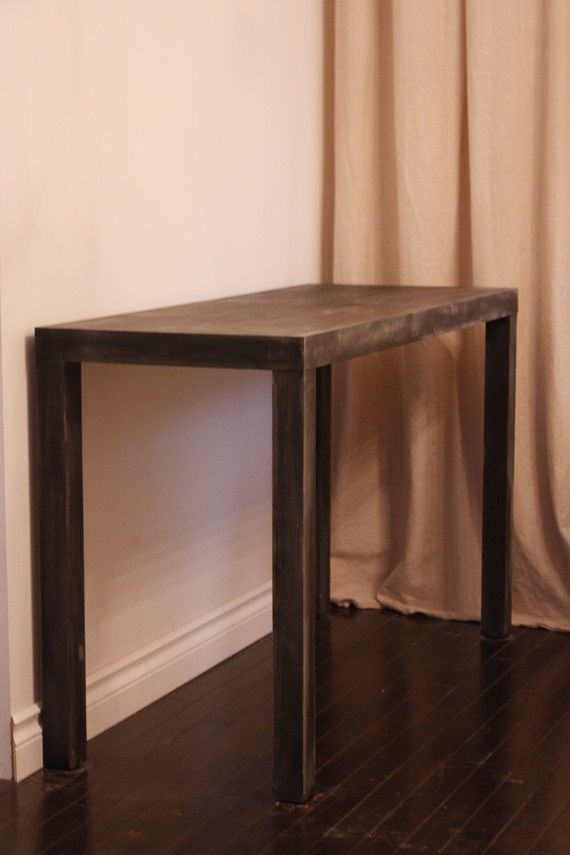
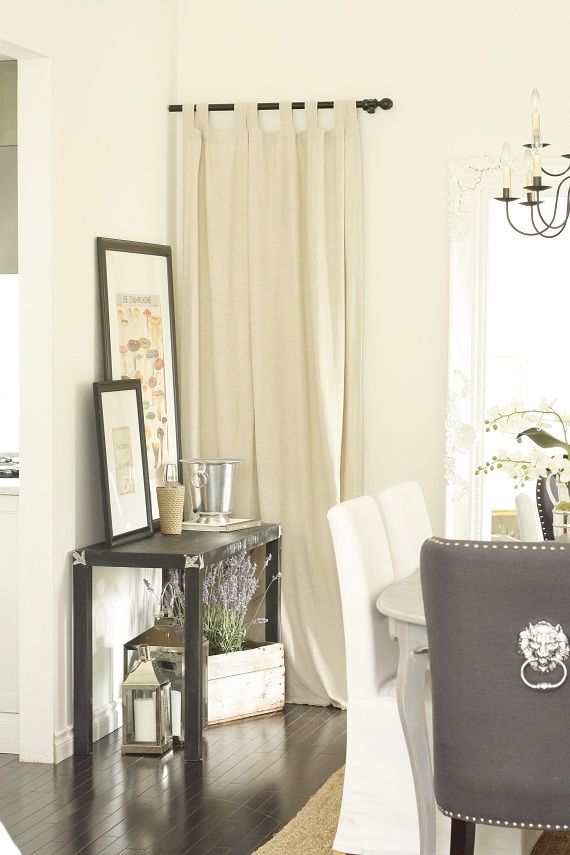
I found this table at Goodwill last week and knew it was perfect for a wall in our dining room. It was $14 and when I flipped it over it had a sticker that said Ikea Lack. I thought "cool! If anyone likes this project they can do it too!", and you still can, but I guess the Lack sofa table/console isn't made anymore... which is a bummer because the size and dimensions are awfully close to the always popular Parsons Table from West Elm.
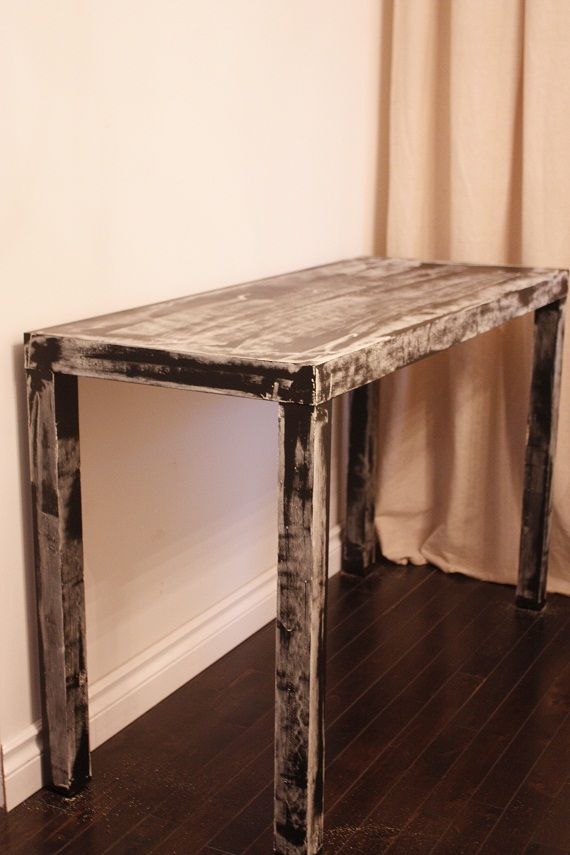
{ the table in it's wood grained glory }
(and yes, I notice that I have baseboard missing there. I will admit I have procrastinated on that project for about 6 months now and this may just be the motivation to finally get it done. The joys of renovating!!)
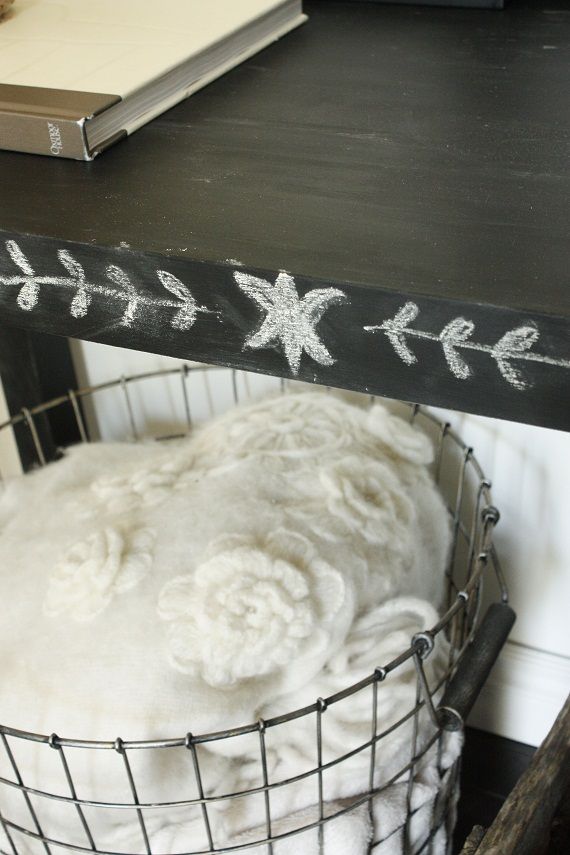
I threw a can of spray chalkboard paint on the table. It was my first time using the canned stuff and it worked well, but really, is it any different than flat paint, beside being triple the price??? I might see how flat spray paint works on future projects first unless someone can talk be off the ledge with some words of wisdom.
While I don't mind a pop of black or dark grey here or there it was a lot to take in for me. I think the main issue was that it looked too stark. I wanted it to look more like slate, and not so new. So I rubbed the whole thing down with chalk. I would have done it outside (and if you can, definitely go that route) but it was a torrential down pour the weekend I tackled this project.
(side note: our sump pump gave out at 10pm Sunday night as water was rising FAST. Thank goodness I have a handy hubby, he got it sorted out, found an emergency plumber on Kijiji and got us a new one before we had a pond for a basement. NOT fun!!)
Back to the project!! All rubbed up.
A quick wipe with a dry paper towel gives it the look I was going for.
Now here's where I need your help!! I had just got it all set up and photographed like this when an assortment of cool things came home from the Salvation Army with me.
I couldn't leave well enough alone so I need your opinion on which set up is your fav!
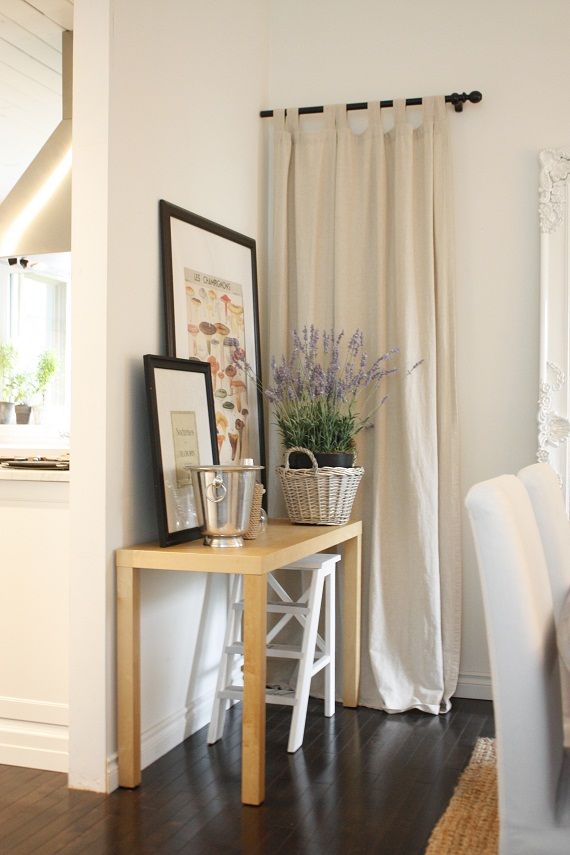
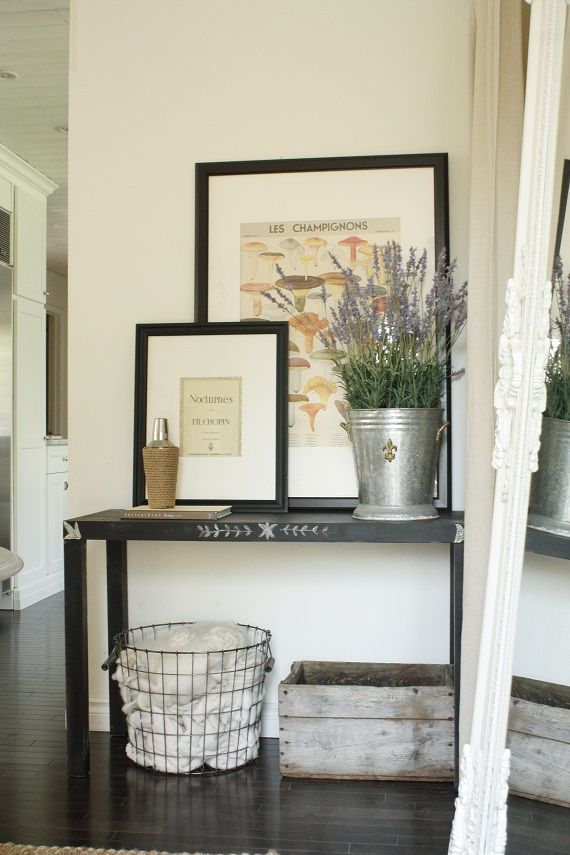
{Set up 1 }
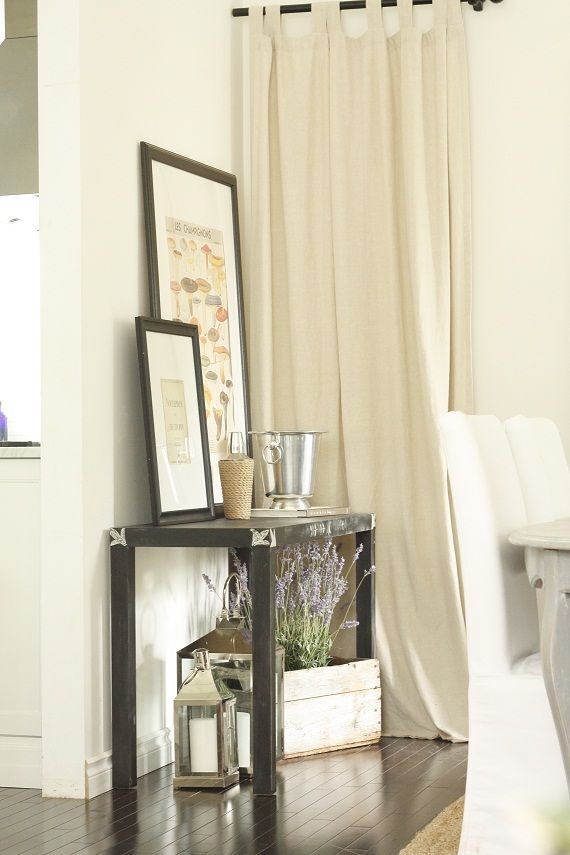
I went simple for my first attempt at free hand decorating a table. But wouldn't a detailed faux bone inlay look amazing? It is in a low traffic area so it wouldn't be ruined in a hot minute, but I know in a foyer or office it wouldn't stand a chance.
Haven't tackled the ceiling yet, but I am ITCHING to get started!
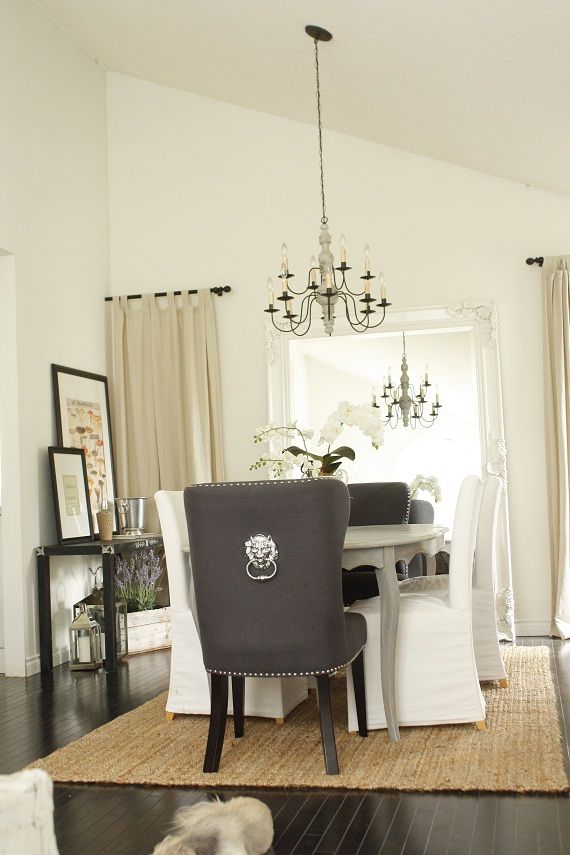
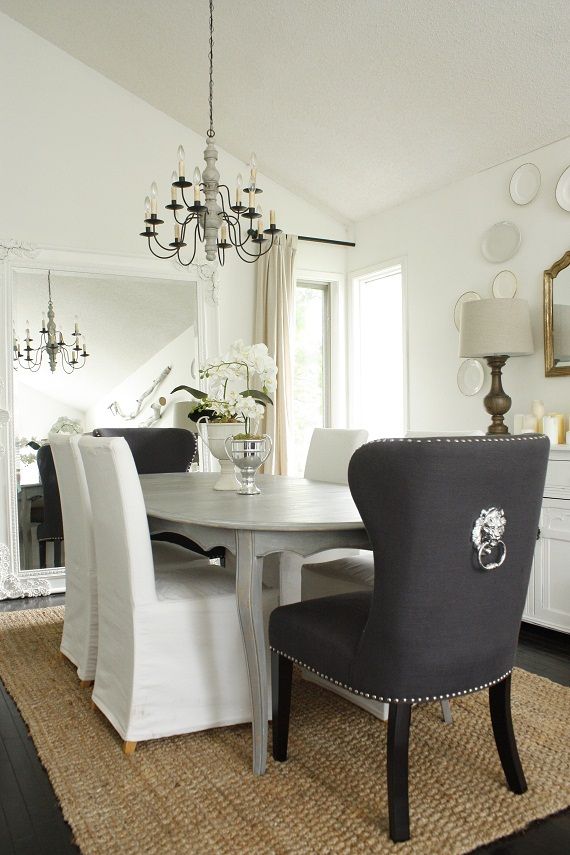
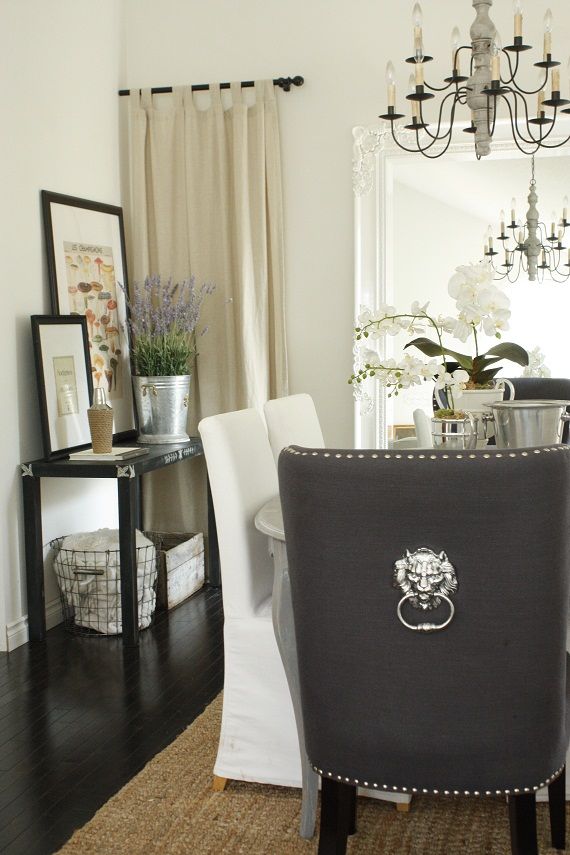
As many of you have noticed and commented, my linen lion chairs that were intended for Lexington never made it over there. My dining room held them hostage instead.
I also switched the table out with this antique french provincial table I have like 6 leaves for! Good for entertaining. It was stripped by the previous owner and I used tinted wood stain to give it the driftwood/limed wood look. I have been asked by friends if it was done with chalkpaint but I am going to share a little secret, one I know will not be popular: I do not like chalkpaint. I know!! It is all the rage right now, but I am not. a. fan. On a high traffic surface that we use and wash daily I need durability, and I had a can of this color of stain leftover from some of our floor projects at Lexington. The color name escapes me, but it was pre-tinted and by Verathane brand. After a few months of solid use I am more than pleased with it and not a scratch, oil spot or scuff can be seen even though it is a flat finish.
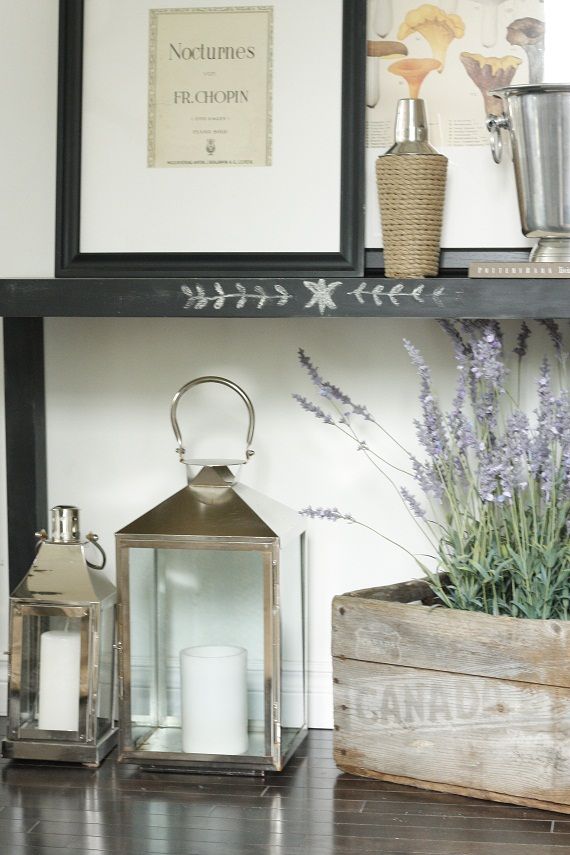
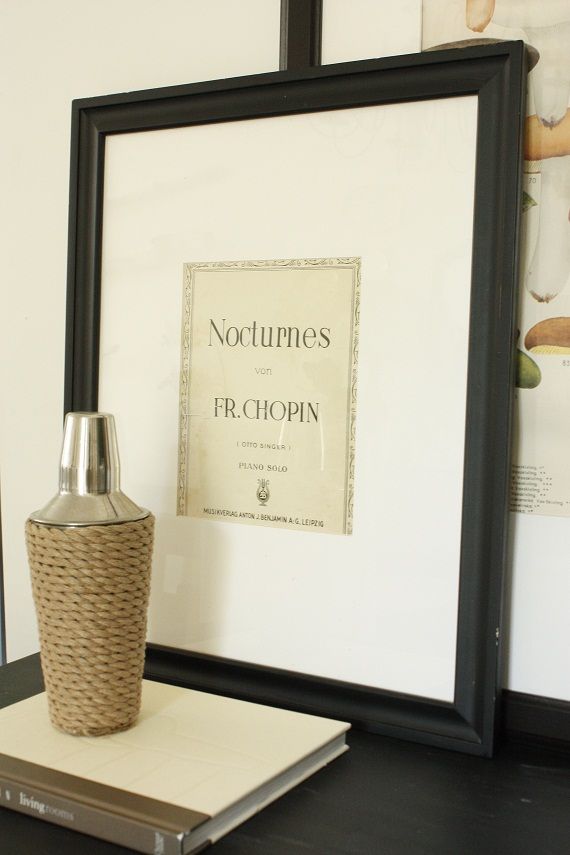
The title page of some old sheet music made a fast and easy art addition.
One last look at set up number 1!
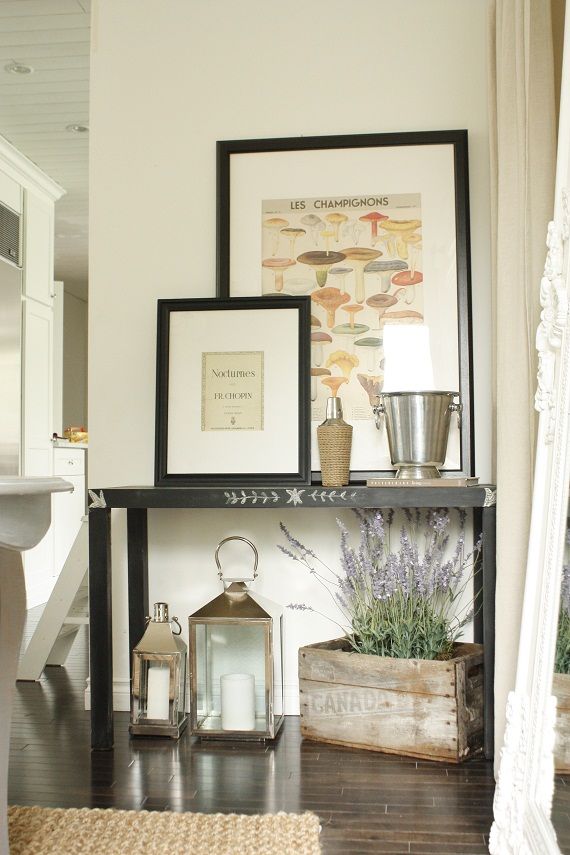
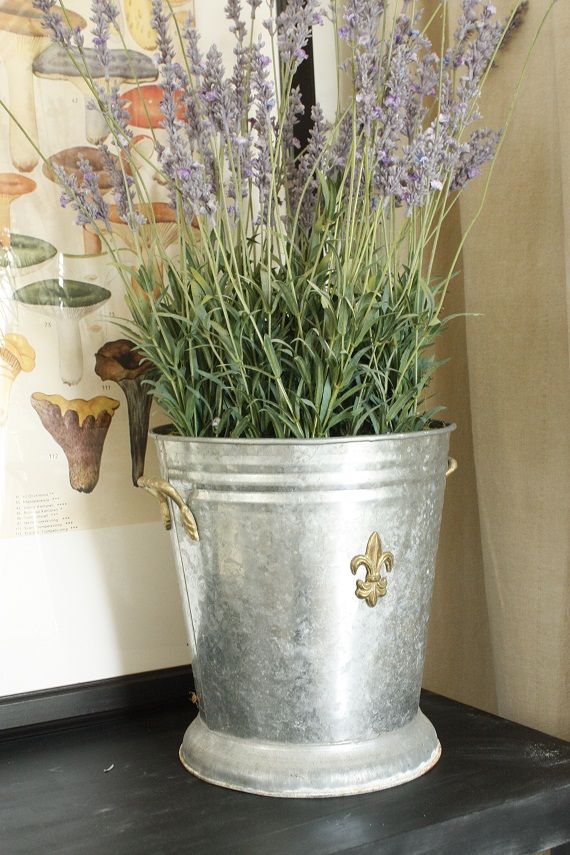
Then this really cool french bucket jumped out at me for $5 at the Salvation Army!!! And now the lavender doesn't fit under the table so I had to move it all around...
{ Set up number 2 }
What's the verdict judges??? Set up 1 or 2?
Have a happy and fun weekend!


37 comments:
Love the idea of a chalk board table!
I love the wire basket in look 2, but I think the lanterns in look 1 compliment the galvanized bucket nicely and also give a pretty pop of shine! So I vote for look 1!
So fun. I am loving this room and those prints.
Set up 1 for sure!
I love the first option. It has interesting pieces on top and I love how the plant fills the bottom space. The darker chairs in the room really tie in the table, too. I love chalboard paint, but have never tried it on furniture. Thanks for the inspiration!
Angela
I ADORE your new dining room table! It's so hard to find a round/oval table with enough leaves for big dinner parties. My vote is for set up #2 :)
Set up 2. Love it! Gorgeous!!
Set up #2. It just feels more natural. I think you are going to love the chalkboard table. Think of the possibilities!!
I vote for setup 2! I love your table! Looks awesome
No. 2! It feels more simplified.
I like both, but I like setup 2 better.
Alda
Both options are great; but I'm partial to the first setup with the lanterns, which are nice balance to the champagne bucket above. I also like how the lavender fills the space.
No. 1. It seems more balanced.
The gray stain on your dining table is perfect! I recently purchased a French dining table with a parquet top and have been debating whether to leave it in its current stripped state (with a protective wax) or whether to stain it.
I love what you did, think #1 looks more complete & pleasing to the eye...
It does add some Fun! I like set up # 2 great job~Cheers Kim
They are both gorgeous but I'm leaning towards number 2. I love the lavender in the bucket. Well done!
I say set up #1 the lanterns make it so complete!
I like set up 1 best.
I like the lavender in the box under the table.
number 1! :)
I am digging number 2 :) I love how the lavendar is front and well, off centre! Cest manifique Holly! I am loving your dining table...any chance you will share with me how you achieved that looks? LOVE driftwood!!
number 1 :)
I love this. Looks great. I am actually currently working on a small bench and doing the faux bone inlay thing.
Well, your dining room is lovely! I like number 1 better, since you asked. What a great job you did on the black table.
I love number 1
I love those lion chairs. We had a new higher end store open in town and she has the chairs in red. I would love to have one but they are $250 here. I started to save my pennies but I didn't
get very far when I bought a pack of gum for almost $3. Eeepp.. Everything looks so gorgeous and dreamy.
Hi Holly,
Just four words... Annie Sloan Chalk Paint. It is finished with wax for durability and comes in 30 colours, all completely mixable to customize.. something that would be super handy knowing your high creativity level!
I just happen to have a little kicking around if you`d like to try it... on me! :)
-Leanne
P.S. Love set-up number 1! :)
I find #1 aesthetically pleasing...however I would probably do number 2 for practicality!! If it were me I would change it back and forth depending on what I need to store at the time!! However I always put flowers in a bucket similar to that because I love it!!
Hugs Giggles
Number 1 is more balanced.
I like #1
I kinda had a chuckle on how that black table looked like after you chalked it, and before you rubbed it off. The end result looked awesome, though I'd use a light-grained sandpaper instead for a more natural, rustic look. I just hope they added a white primer if I do ended up sanding that cool table down.
I kinda had a chuckle on how that black table looked like after you chalked it, and before you rubbed it off. The end result looked awesome, though I'd use a light-grained sandpaper instead for a more natural, rustic look. I just hope they added a white primer if I do ended up sanding that cool table down.
#2 was instantly pleasing : )
I'm going with #1! Congrats on breaking out of your comfort zone, it looks great :)
Number 1 gets my vote! :)
I vote for #1.
Looks great!
If in future you want to do chalkboard paint again without the dark colour, try 1 cup flat paint in any colour with 2-3 tablespoons of non-sanded tile grout mixed in. I'm guessing from all your renovations at home at at Lexington you could do it for free with supplies you already have.
Also, how gorgeous would navy chalkboard paint be?
Post a Comment