


Wow, what a week!! Wrennie started her first week of preschool which has been an adjustment. I am so happy that she adjusted really well and surprisingly didn't have any issues with us leaving her (I was anticipating LOTS of tears!). She has definitely proven how much of a big girl she is. We have also been busy little bees at Parkview so stay tuned for lots of updates next week!!
I have had this post in my draft folder for ages, not sure why it never managed to get finished... but I have had a few emails lately about the old cabinet in the living room so I thought it was time to finish up the post.
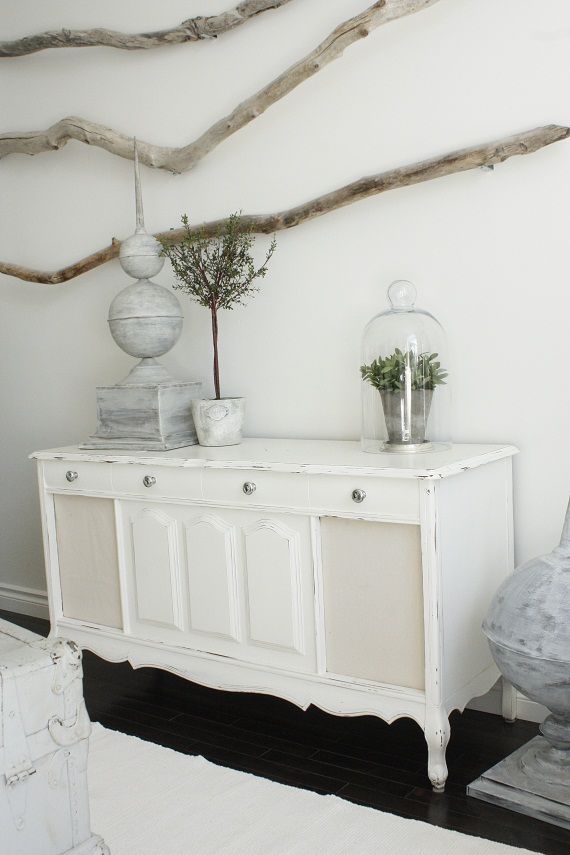
If you hit up estate sales, auctions or thrift stores the one piece of furniture that is always priced to sell are old radio cabinets. They can usually be scooped up for less than $20 or $10, and even more often I see them on sites like Kijiji for free! The truth is that nobody has a use for them, even if they are a beautiful piece of furniture.
But with a little elbow grease you can take these outdated pieces and use them as functional furniture!
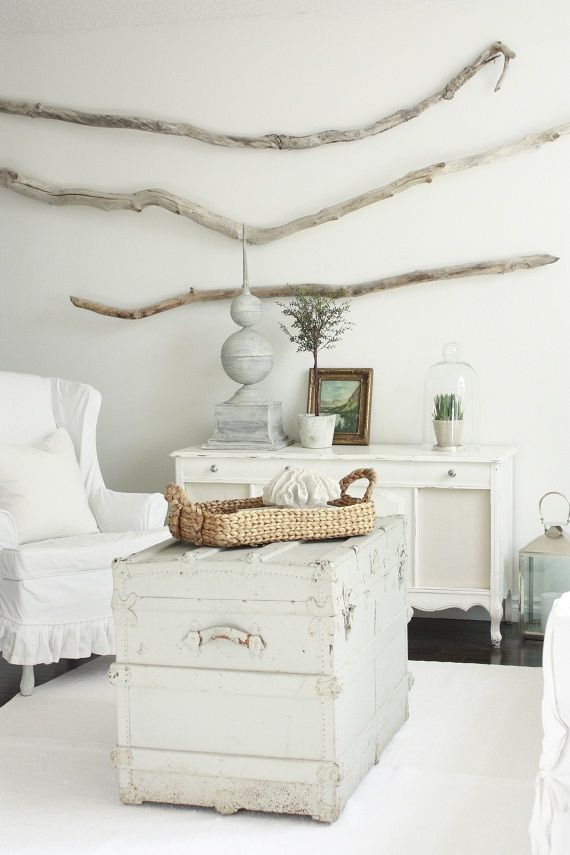
This cabinet has two fabric panels (of course I forgot to take picture of them in place with the old fabric), the 'drawers' are for looks only and the top of the dresser lifts up on hinges like a chest. So while you can't use these pieces in the same way you would a dresser, they make a great spot to put rarely used china (plus little hands can't get into it!!!), heirloom blankets, anything you don't use daily but need a safe storage spot for.
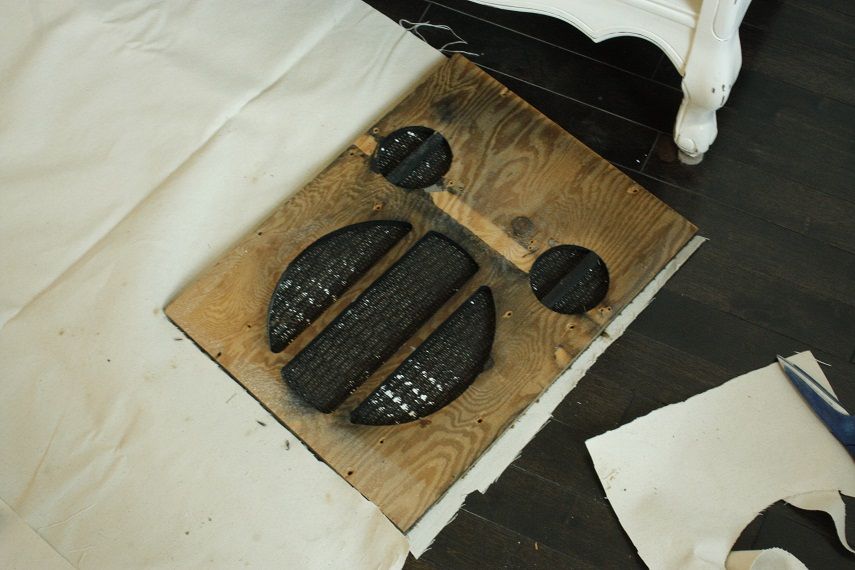
The hardest work is removing the electrical. It usually comes out with the removal of a couple screws, but if you don't have use for it there isn't a big need to be gentle or careful with it all. I would recommend doing this before refinishing your cabinet so any potential scratches/scuffs will be covered by the new paint.
Once your electrical is out you can get your fabric panels out. In the few cabinets I've done they are always screwed in place and easy to remove.

All you need is a fabric you like, some upholstery nails and an upholstery hammer. I didn't bother to remove the old fabric for 2 reasons:
1. it isn't necessary since we are covering it anyways
2. the fabric is usually so old it just disintegrates, gets everywhere and generally makes a disgusting mess.
Trace your fabric and cut it to size.
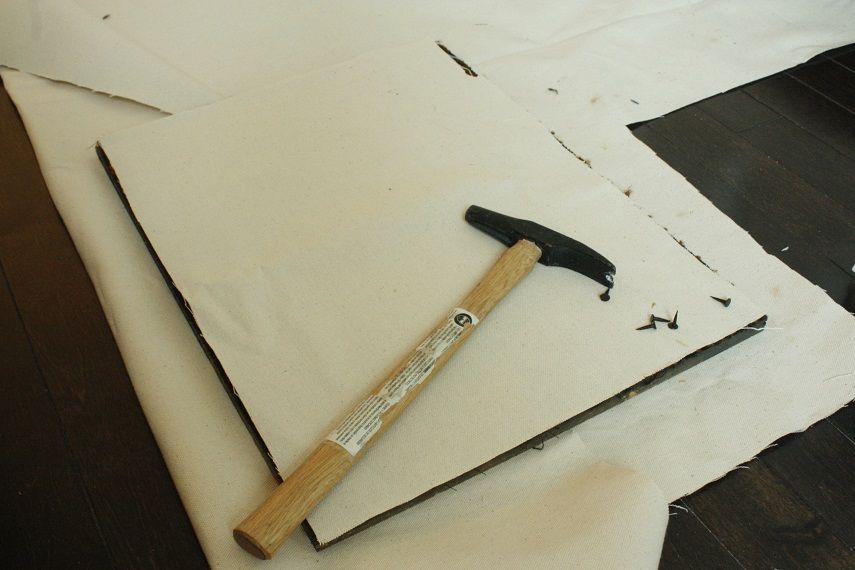
Nail your fabric in place. stay as close to the edges as possible to keep your nails hidden once the panel is back in place. You may wonder why I didn't nail to the back side, and that would be because this particular cabinet makes you slide the panels in place before screwing them and with a few extra millimeters of fabric my panels wouldn't fit on the track or slide. But your cabinet may allow it so just check before nailing it in place and realizing you can't get it back in place!
You don't need a lot of nails, just enough to keep it in place.
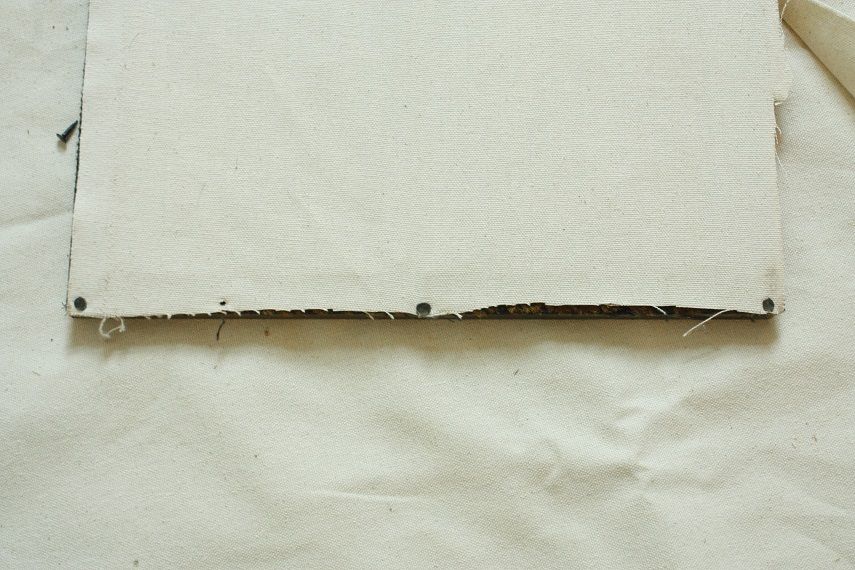
Do the same with the other side.
Put your panels back in place and Voila, you are done! If you are more adventurous you can get really creative with the fabric you choose. I haven't had time to get to it, but I actually bought some chrome 'nailhead' studs that I am going to nail in a pattern to pull together some of my other nail head details in the dining room for that extra little sparkle.
Happy Adventures this weekend everyone!


11 comments:
Wow! That looks fantastic. I have seem this type of piece at garage sales and never known what to do with it. Thanks for the ideas!!
She's a beauty!
I love it! I love coming up with new ideas for old pieces! Great looking!
It's beautiful after you worked your magic! I love how the legs give the piece the look of French furniture. I also like that little ones can't get inside. :) I will definitely be keeping my eyes out for a piece like this one!
I found your blog on Mamma Laughin and I am so happy I did you have a new follower :) I love what you did with the radio cabinet.
Looks fabulous!
Happy to here Wren is adjusting to school ok! We just sent our baby to first grade, I think that was the hardest thing I've done as a parent so far.
I'm having a stella & dot giveaway, if you are interested stop by.
Londen
That's such a cute piece of furniture! Love how the rooms comes together. Btw, I'm your newest follower
Anja @ cocalores.blogspot.com
I love what you do with furniture! I am a newbie when it comes to refinishing furniture. With paints and stains before 1978 containing lead, how do you prepare a piece so that all that lead dust from sanding doesn't get inhaled, especially by little ones?
I absolutely love the branches you have hanging on the wall. Care to share where you found them??
I'm curious to know how or what you used to hang the branches on the wall?
Post a Comment