


My first attempt is a VERY easy project that even the most amateur DIYer would have a hard time screwing up: bleaching (or dying if you prefer) an old rug.
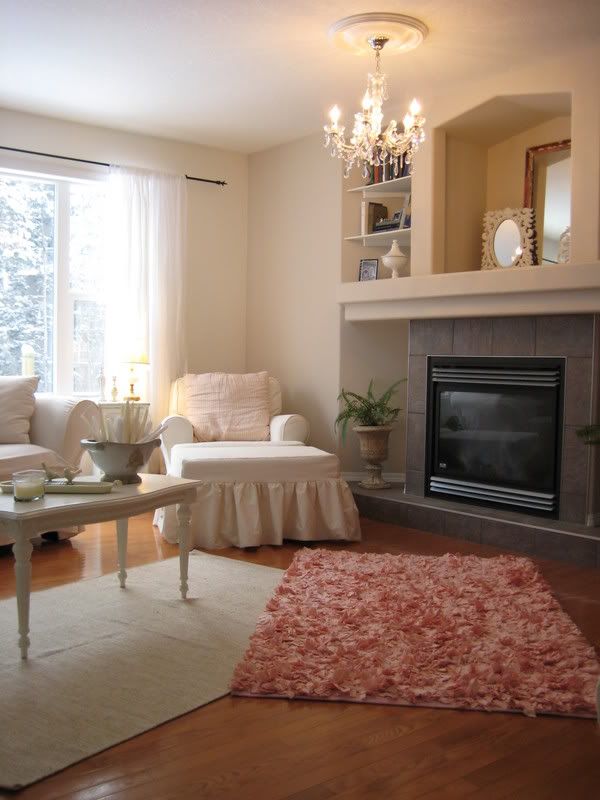
Last year I stumbled across this adorable and fun rug at a local home store on super sale for $38. While I absolutely adored the pink, Sean found it less than exciting to have this beauty layed out in the living room, especially on his poker nights (seen here in our previous home last November). The plan is to bleach it white and use it in the baby's nursery as the perfect contrast to the espresso floors.
1. The first step is to put the rug in a tub and fill it with the hottest water possible until the rug is just barely covered. Make sure you have a lot of air circulation happening, and open a window if possible, then pour the bleach into the tub (make sure you are wearing thick, cleaning grade latex gloves while doing this so you do not get any bleach directly on your skin). I use 1 part bleach for every 4 parts water. Then you just wait it out until you see the color lightening.

2. Once you have the color completely removed (should not take longer than 45 minutes) drain the tub and let the rug sit for a few minutes. This last step is perhaps the most important if you choose to bleach instead of using dye: because the bleach will continue to eat away at the fabric it is crucial that you counteract it with either an Anti-chlor product or plain old 3% hydrogen peroxide. I refill the tub with fresh water and add the anti-chlor and let it sit again for another hour.

Once you have rinsed it out for the last time it is just time to let it dry!


5 comments:
What a great idea - I'm excited to see how it looks in the baby's room. Very impressive!
Wow great job! Love your blog!
Great idea Holly! I'm sure it will look great against the dark floors in the baby's room.
This is a great great idea! It's going to look awesome. I can't wait to see the baby's room.
you little DIY er post more DIY tricks!
Post a Comment