


As promised, the long overdue last class in my Paint Perfection is finally ready. Funny fact: the forces that be REALLY didn't want this class to happen. First time I typed it out my computer died, second time Blogger ate it in their transition to the new layout and then this week Photobucket has been giving me error messages like there's no tomorrow. I had to go old fashioned and upload straight to blogger to make it happen but I am happy to say we are finally in business!
Our final class covers the last step I do with all my furniture: sealing it up. It is a step that is so simple but can make the difference between getting a year of use out of something or 10+ years. There are not a lot of secrets to sealing but there are a few things that I think are crucial to getting that perfect finish.
If you are just tuning in, here are our previous Paint Perfection Classes that work on everything up to this step.
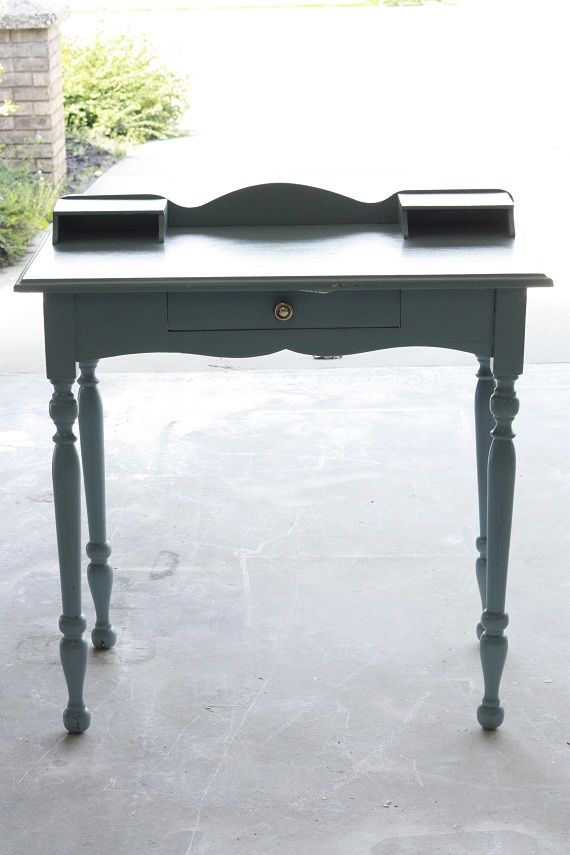
To go over everything briefly I have a couple pieces we'll be sealing up together. The first is this little desk that I found at goodwill. It was already painted a cute greeny-grey but I wanted to make sure that it would stand the test of time by sealing it up.
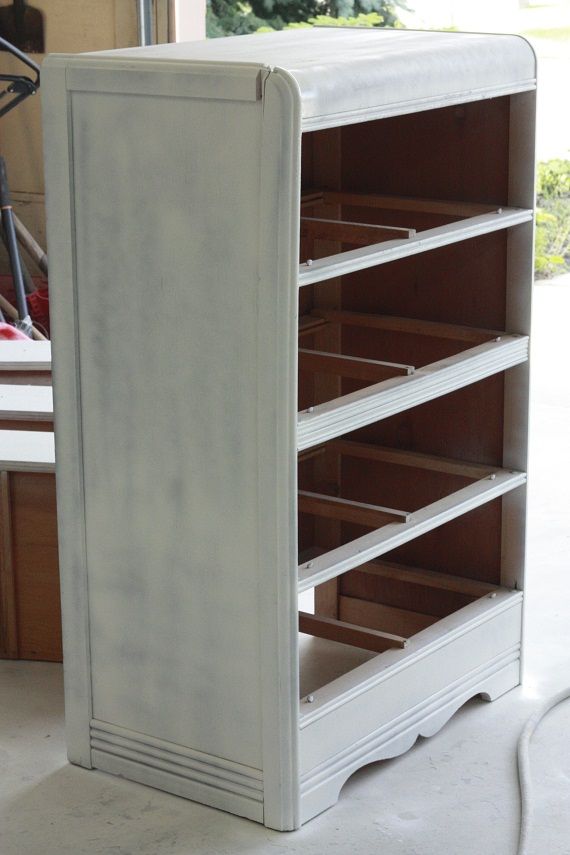
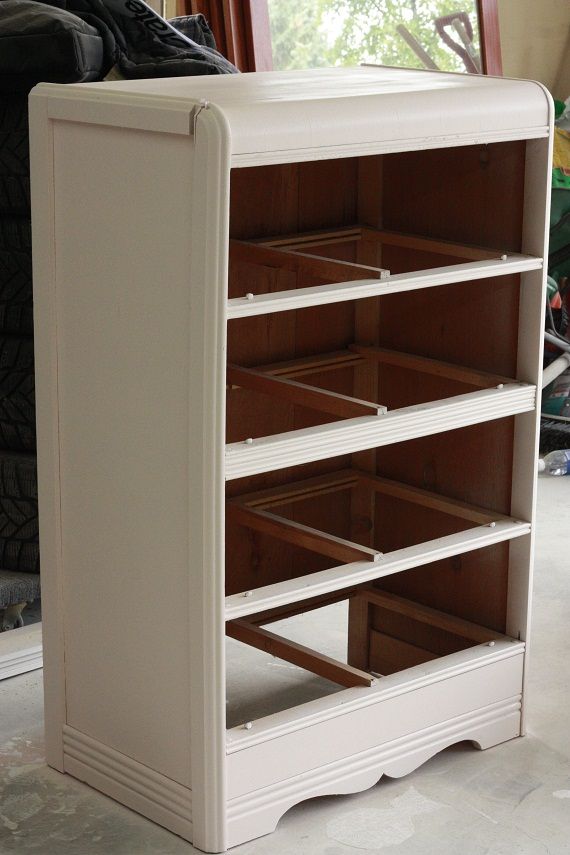
The other is this old waterfall dresser that I have had sitting around for quite some time. It has beautiful brass art deco hardware and I think it will be lovely all revamped. Let's start from the top and cover everything quickly up to the sealing step.

We took off the hardware, gave it a quick sanding (not stripping it), and put a good coat of Kilz on it to prime. It is soooooo crucial that you prime pieces first like this because sometimes you won't see any discoloration aka bleed through until you start sealing it up. But trust me, they can and will bleed through making your beautiful new paint all dotted with orange/brown/red blotches. It is worth the extra work to prime!
All painted in a soft pink.
Ready for distressing!

Now comes the final portion of our project: sealing our furniture.
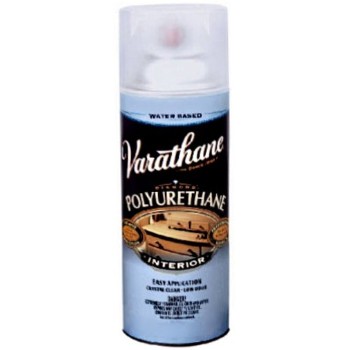
I am very specific on this step because I have tried a few products and have come to heavily rely on Varathane brand interior sealers. If you have worked with something else and it is a product you trust please do share because I have had American readers tell me they have had troubles finding Varathane. There are different kinds of Varathane, but look closely at the labels and buy only the Interior, water-based formula. You might be wondering what could possibly go wrong if you buy something else? Well the answer is that your paint job will yellow and discolor over time. I have made this mistake, trust me!! Just go with the good stuff in the first place and you will have no problems.

Many of you have asked if I use Varathane in my paint sprayer and the answer is yes! I love the finish I get doing that way but it can be tricky. I will go over the technique in a moment, but first let's talk other applications. If you don't spray your furniture you can get the same finish by buying your sealer in a spray can, it can be a little more pricey this way because I often need a can or two for an average sized dresser. You can still get a smooth, professional finish without spraying as well. In my experience the best way to manually apply sealer is with a foam brush. Rollers and brushes leave a small amount of texture and I like that you can simply toss the foam brush into your eco-station pile after only one use.
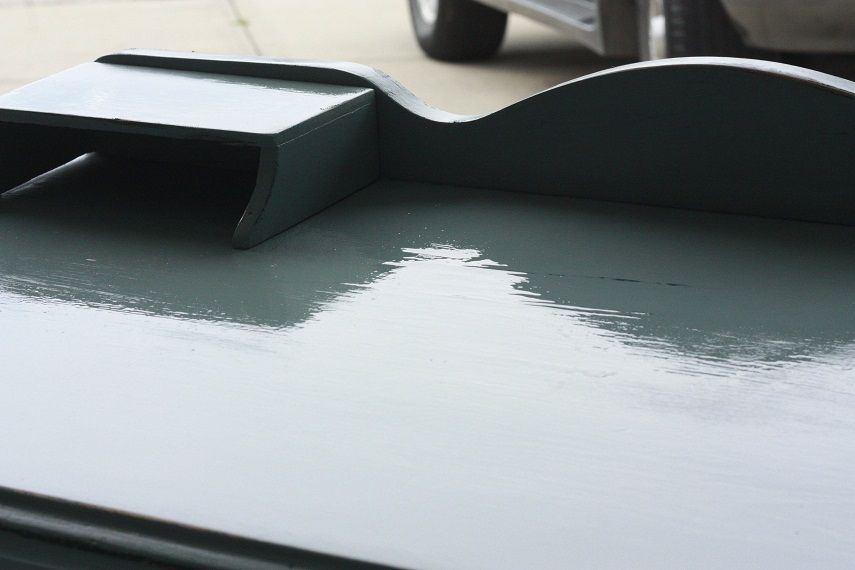
Now is the difficult part, getting an even, smooth surface. The issue many have with spraying on their sealer is that they are too light with the application and then it has a different smoothness in different areas. The other issue is that some people go too heavy and get drips. This is a very common issue, mainly because it goes on so thin that it doesn't feel like you are getting enough coverage. Then you come out a half hour later and your furniture looks like it is melting!
After using Varathane for so long I have come to get a good feel for it's consistancy. I set my sprayer on a very wide radius and have minimal fluid flow. It is so thin that it almost looks like you are spraying water so do some test sprays until you feel like you have a good feel for it as well. This dresser is a good example of how it should look as it dries. You can see it is unevenly drying (it was like a million degrees the day I shot it) but where it is wet it does not seem too 'wet'. I slowly build up a couple coats like this.
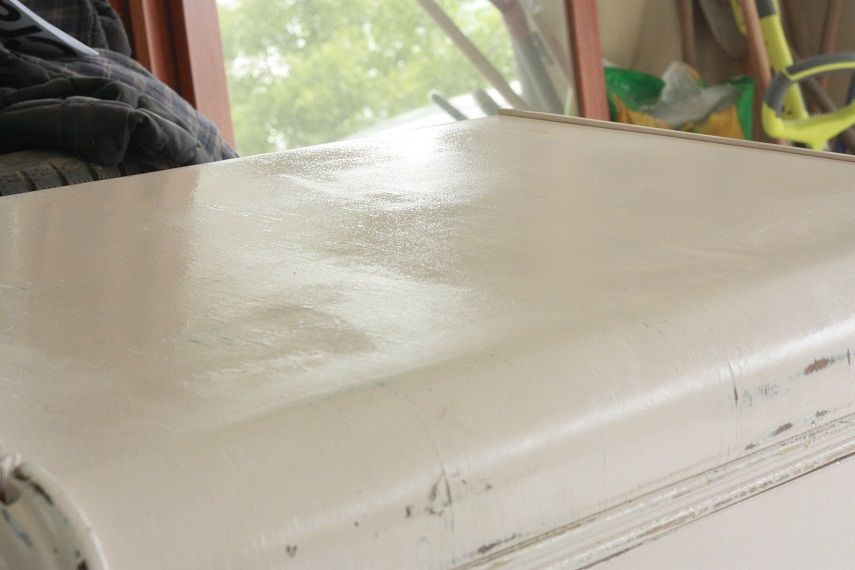
If you are working on a piece that will see A LOT of use and wear (like a kitchen table) or something that has some unevenness to the surface (like the brush strokes the last owner left on this desk) there is a little trick that I do. On the flat, horizontal surfaces I apply the sealant in a thicker coat. Not near the edges where it could possibly drip down, but on the bulk of the surface. Do this in a spot that is a little cooler so your sealant doesn't dry too fast, and after a few minutes your sealer will 'self level', filling and evening everything out.
Right after applying and starting to level out. The back is where I started to work and you can already see it is smoother than the front which was just applied just seconds after going on. It won't perfect the surface but will make it really durable and easier to clean, etc.
All in a days work!
.JPG)
All finished up and ready to write a love letter.
Protected and able to withstand years and years of use.

I think that covers everything, but please don't hesitate to ask any questions below and I'll do my best to answer!
Have a great weekend lovelies and thanks for your patience~


15 comments:
These pieces look beautiful! But I want to see the finished waterfall chest!!
Andrea @ www.dwellrepurposed.blogspot.com
it looks like you can order it from amazon! can i ask what sheen you use? satin, maybe?
I followed the right steps steps to paint and even sealed my furniture. I used a satin paint I believe and a polyurethane (I think) sealer. I moved this weekend and of course, the movers were not careful. Now my lovely dove grey armoire (that did not have a distressed finish), has paint damage from getting scuffed... and not the cute, distressed kind. There are areas of paint that have been peeled off, and I think b/c of the satin paint, it just continues to peel where it got hit. I think I got a paint/primer in one... is this why the paint is peeling do you think? I did sand it down well prior to painting. How to fix this? I'm thinking of just distressing it, but worried about these blotches of peeling paint now, especially since it is a glossy paint job from the sealer. Oh, so irritating! What would you do?
Lovely! I adore reading your posts and insight on painting. I am a white on white lover myself, with just the right amount of simple but statment color. I get giddy about swedish inspired interiors. ;) Thank you for passing along your artistic vibe and sharing your creations!
Any special cleaning instructions for the paint sprayer after using the Varathane? Thank you!
Great info. Will have to go back and read the other class posts. Thanks! and loved how the desk turned out.
Awesome. I loved seeing this post as I paint a lot of furniture too and love to learn more. Quick question......Do you ever use chalk paint or have you ever used it? Do you like/dislike it etc etc. :)
Thanks!
Awesome. I loved seeing this post as I paint a lot of furniture too and love to learn more. Quick question......Do you ever use chalk paint or have you ever used it? Do you like/dislike it etc etc. :)
Thanks!
Awesome. I loved seeing this post as I paint a lot of furniture too and love to learn more. Quick question......Do you ever use chalk paint or have you ever used it? Do you like/dislike it etc etc. :)
Thanks!
Thank you so much for all this helpful information! As I am working on doing my first refinishing project, your blog has become my go to spot! I was wondering though if you recommended a certain finish (gloss, semi-gloss, or satin) of the varathane? My project is two Louis xiv chairs if that would make a difference in what you'd recommend.
Liz and Karen, I go between satin and semi-gloss. For distressed pieces I usually use a saying so it isn't too glossy, then on non-distressed items I use semi-gloss. If you want more of a matte finish just Spray LOTS of thin, misty layers of satin.
Liz, for you chairs, I would do the satin.
Lisa, (little lovables) I am thinking it may be the paint/primer in one thati causing your peeling. I find that stuff goes on so thick that it only takes one scuff for the whole thing to come up like a sheet! Next time be sure to use the Killz primer and even if your movers are a little shaky you shouldn't have any peeling in the event of a scuff. Sorry to hear your paintis coming up but congrats on the move!! Just saw the pics on your blog and can't wait to see it all settled in.
Julie, I just do the same as with paint, rinse, rinse, rinse, with water till the water coming out is clear. It actually seems to clean up faster than paint!
Hi Holly! I love your tutorial on refinishing furniture. I have recently dabbled in a little refinishing work and I bought the Minwax Wipe-On Poly. Have you ever used this product? If so, what do you think of it? I just don't want to waste my time applying it if I'll end up repainting and resealing the furniture because the wipe-on poly didn't seal it properly. Thanks in advance!
Just came on over from Pinterest! Love your site. I also paint so am always looking for new ideas and products. I have never seen spray Varathane...that would be awesome. I have used other spray polys and I can't quite get the smoothness I want. What is the secret? Layers and layers??? Thanks again...am your newest follower. Cmon over and see me!
Post a Comment