


Love her bedhead!

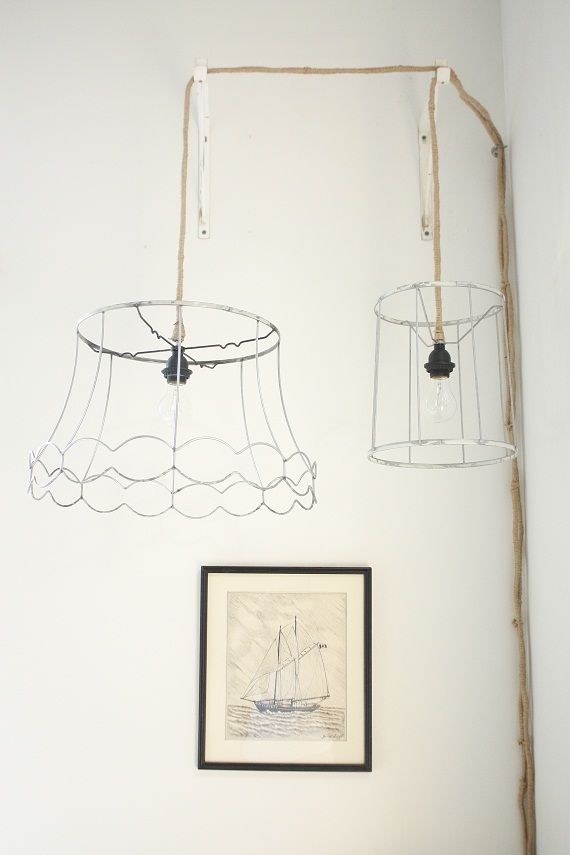
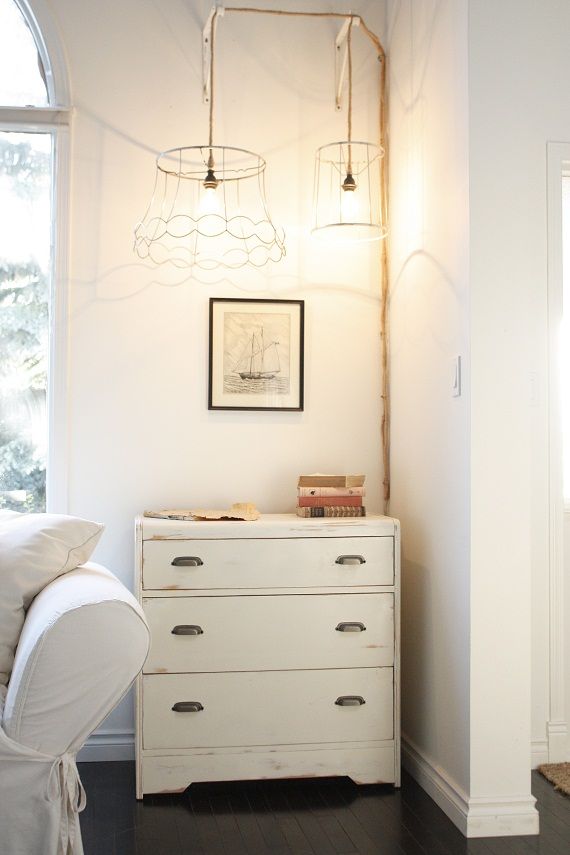
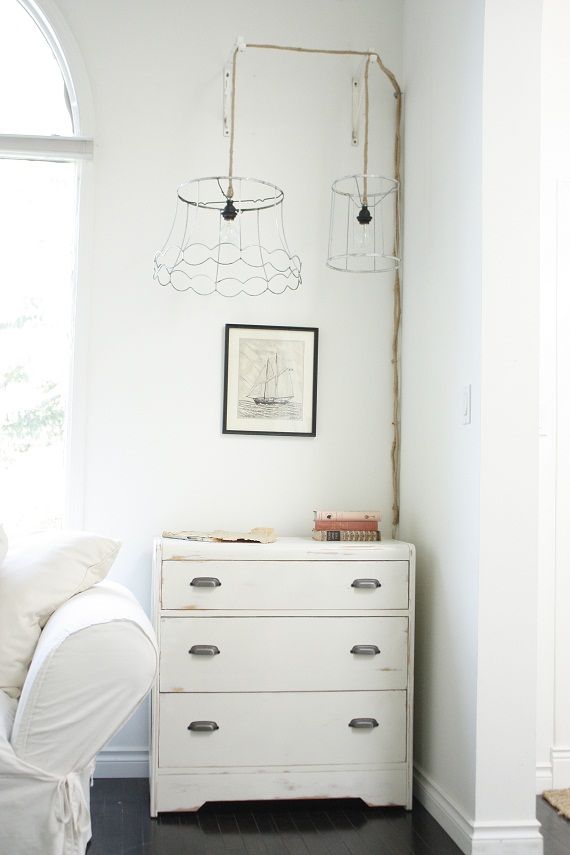
This is a really "Anthro" feeling project now that I see it all done. But the inspiration came from a ratty old french lamp shade I have been eyeing at a thrift store for the last 6 months without the slightest inkling of what I could do with it... and voila! Ghost Lamps were what I call my latest project only because they really do feel a little ghostly, and also because they are really living on still, but are almost invisible.
DIY Ghost Lamps
Difficulty: EASY
Time: 4 or 5 hours
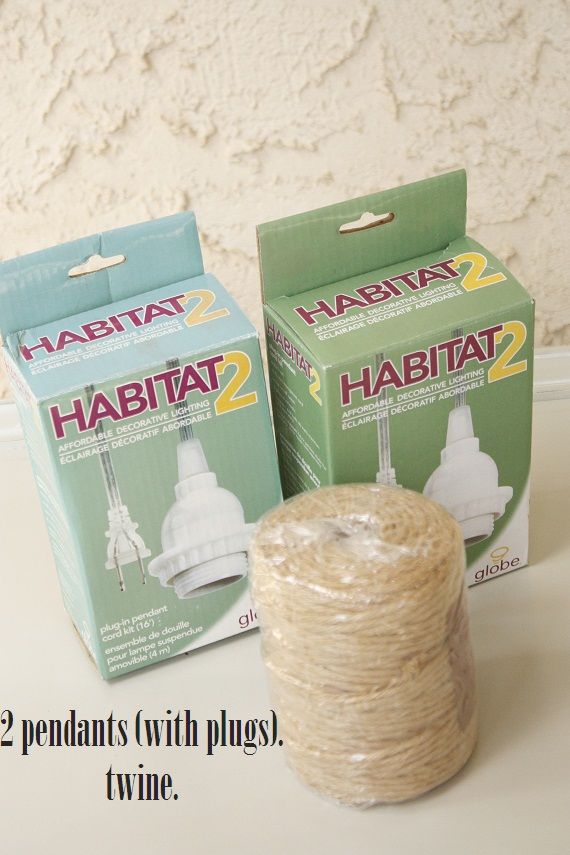
Cost: $9 for shades, $30 for both plug ins, and $8 for twine
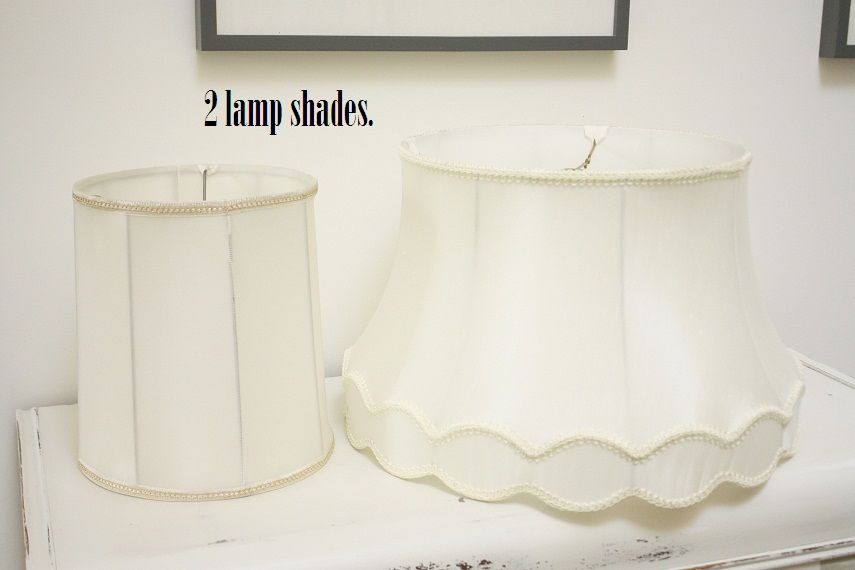
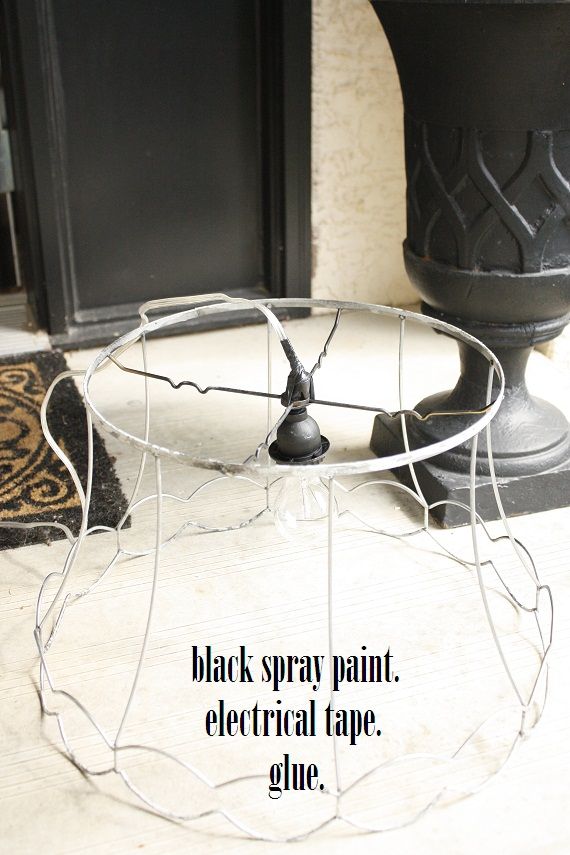
You will need:
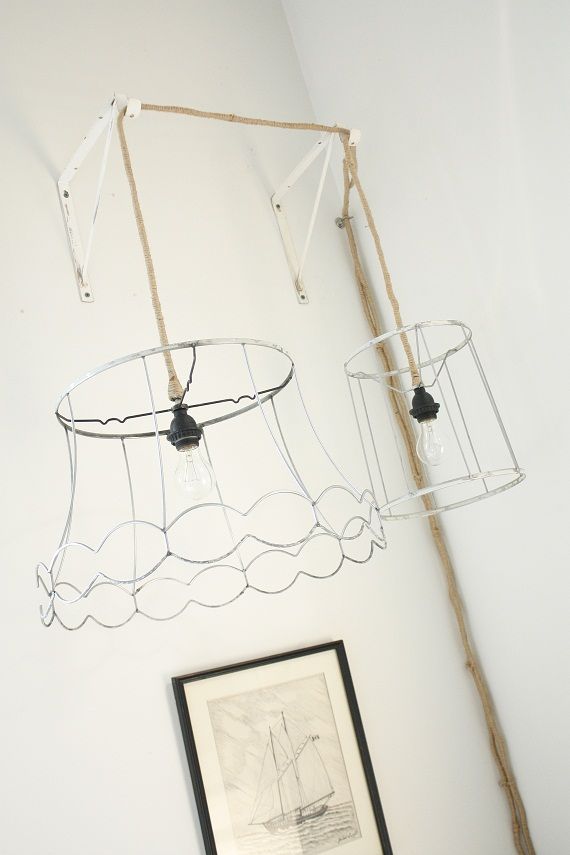
I liked the idea of one really funky shade and then another simpler one. But you can mix and match to your heart's delight!
I picked up these plug in light fixtures at Rona for $15 each. I would usually wire a light fixture right to the ceiling but our living room ceiling is 20 feet high, and also currently doesn't have wiring for ceiling fixtures (weird, I know!). But I think it was a stroke of good luck because I actually like the haphazard look of the cords.
The first thing I did was strip the shades, which only took a minute. I actually didn't clean the old glue or anything because I didn't want them to look like new. The top of one shade had some brass so I sprayed it black, as well as the area where the bulb screws in because I just wasn't feeling the white. Once it was dry I used a little electrical tape just to secure it all together so once I twined it all up I knew it is good and solid. Then I just dabbed glue on the cord and wrapped the twine. This is where 95% of the time I spent on the project went. I had to wrap LOTS of cord because I hung the pendants so high, but you might not have to do as much.
Since there is no possible way I was going to hang these from the ceiling, I found some old brackets in our back yard that looked subtably old and rusty (probably what most people would call garbage LOL) and mounted them fairly high so the ropes really hung down. I also put a small hook in the corner to gather all the cords and tied them together down the wall so they weren't too wild.
All the fun of this project is that nothing has to be (or should be) perfect! If you have older kids maybe they could take the brunt of the work and even do the twine on the cords~
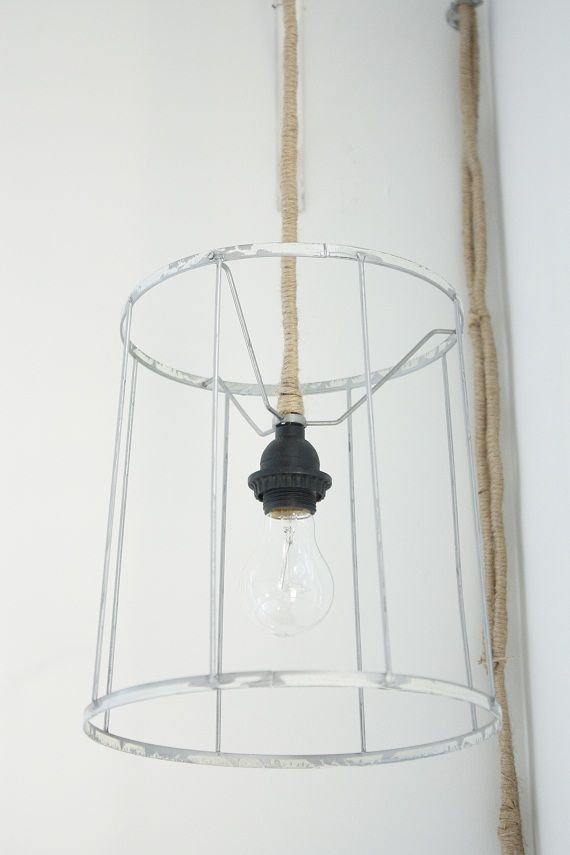
I picked up some "old fashioned" clear bulbs at Rona as well. I think they are much more charming.

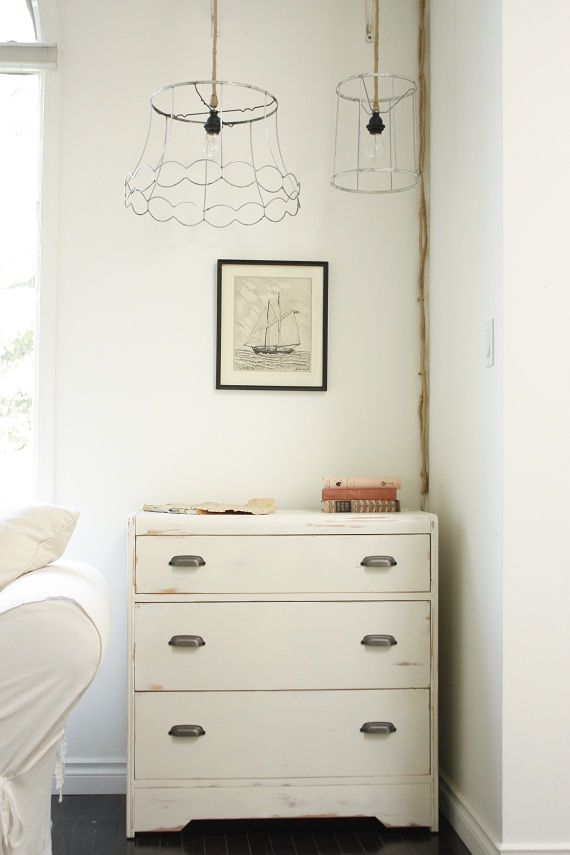
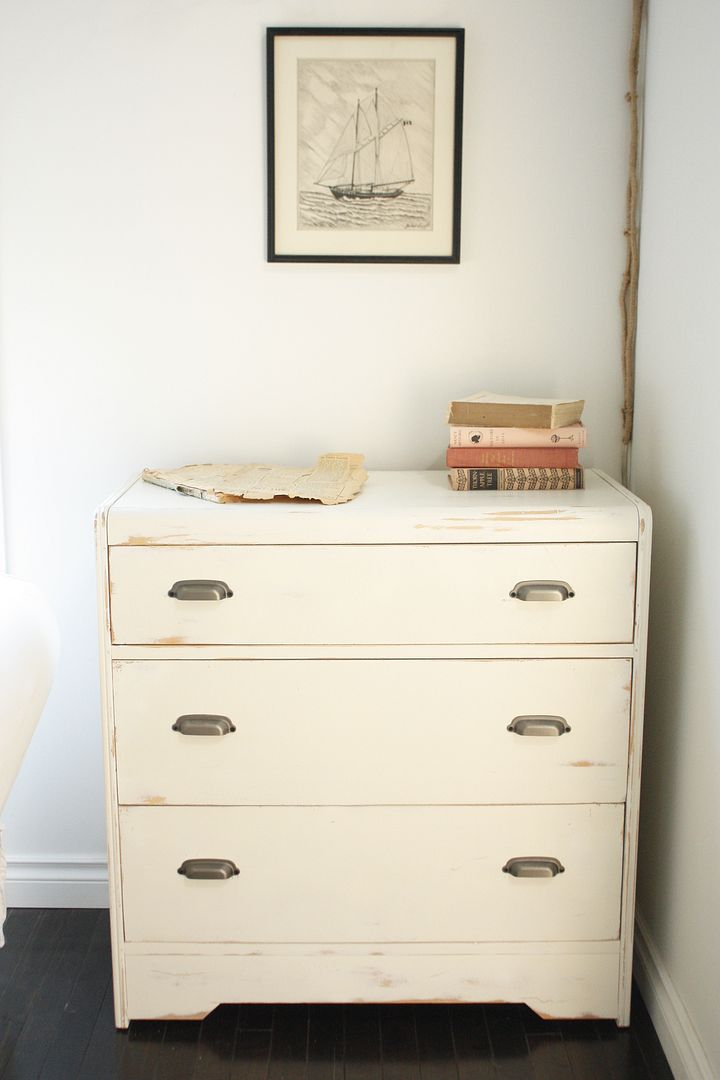
I also brought one of the many dressers I finished this week inside yesterday. It was made for the corner the Ghost Lamps are in so it had to make an appearance in this post.

It was a cute old thing, but mismatched handles just aren't a good look. So I gave it an old chippy finish and some zinc handles.
When I turned these on last night I actually sat in awe because I can hardly believe we have had a living room without any lamps or overhead lighting for 2 years! We get a lot of natural light in here, but still...
I am really starting to feel like this room is getting close to finished as these bare corners that had me scratching my head are finally coming together.
And I have another piece I just finished for in here as well that I can't wait to share tomorrow on Fresh Coat Friday.
See you tomorrow, can't wait to see what painted projects you got through this week!!!


47 comments:
What a neat project! I love it!
Super craft and interesting. It looks like something out of an Anthropologie catalog!
I have two of almost the exact same lampshades at home. I have plans to do the same thing as you, but spray paint one and wrap fabric around the other. I'll send you pics when I'm done. Thanks for sharing!
I haven't posted in a while but I'm still here reading... I'm sorry that I've stepped away from commenting...
But I have a question... Could you be a guest blogger on my blog? I posted today about how I want to learn about people and their blog/shop names. Since you have both (and I love both of them), I thought I would ask you to respond. :)
I can not WAIT to try this project!! My boyfriend recently moved into an apartment that has such poor lighting in the living room in the evenings.
I've been trying to think of ways to bring in more light (without using a floor lamp) and this is perfect!
Once I finish summer school, I'm trying this!
Oh my goodness! This is the cutest thing ever! I absolutely love how you used the twine. It's perfect...and do-able for someone like me CANNOT sew those cute ruffly cord covers! I'm so inspired...thanks for sharing!!
Tiffany @ Easie Peasie
i really love this! thanks so much for sharing. i think i want to make one for the sitting area in our master bedroom.
thank you SO much for showing us this! Our living room has no lighting in it, and since my son is into destruction I haven't been able to use a floor/table lamp in months! I might just have to try this!
Neat idea! I will have to try this one, we have a room that is tiny but needs lighting and this is almost perfect. Thanks for sharing!
What a great idea. So clever and unique. Mind if I steal it?!!
This is great, I absolutely love it! I need to try this in a room that has got me scratching my head as well :)
I LOVE this idea!
I'm thinking that this is what I might need to do in the corner of our living room, that has NO light!
Thanks so much for sharing this tutorial. It REALLY got me thinking :)
~Shelley
ohhh lala 2 darn cute!
What a great project! It's so unexpected and fun.
LOVE this!
This is an adorable idea. We don't have overhead lighting in our living room either (go figure....contractors) :) so this is a great idea.
this is a great and highly attainable DIY, thanks for the inspiration!
What a cute idea, I saw something like that a while back on a blog ( I forget where) but they wrapped fabric around the bare shade and made a mobile out of it. Thanks for the inspiration.
Where did you find Wren's crib?? I love it!
I of course love all of the projects that you do, and you are so creative and tallented, but I just have to say that your daughter is an absolute doll! If I ever make my way to Canada, or if you make your way to Los Angeles, I would love to photograph her...she is just SO cute!
http://www.danielerosephotography.com :)
I love it! It looks so great!
Very Cool idea!!! I love all of your furniture pieces... How do you find time to do all of that with little Wren running around? I barely have a minute to get anything done while chasing after my 10 month old!
so pretty and unique. i love wren's room too!
Loving seeing Wren!
I am so in love with this idea - I have SO many places I want to do this....I can't wait to do it - just might have to dash to Goodwill tomorrow just to see what I can find ;) Brilliant!
Holly i looooove these! our kitchen lighting doesn't quite work for me anymore and due to some electrical/crawl space situation we're limited on what we can do. we have two lightbars i'm seriously considering replacing with similar fixtures to the ones you've showcased here! thanks for sharing girl.
Too funny! I've been thinking of almost the same project! Except I'll be wrapping fabric around one and twine around the other. lol...great minds...I love how you wrapped the twine around the cords. Looks much better than the plastic clear cording! LOVE
Love it! But I'm a sucker for visable bulbs and wire shades. I recently used a locker basket as a lampshade and got mixed reviews. I love it, that's what counts right?
Also, Wren's bedhead...to die for!
Here's the link to my locker basket light if you want to check it out...
http://everydaylifeofbellom.blogspot.com/2010/05/kitschy-kitchen.html
so cute! i've seen a few of those bare lampshades and thrift stores and thought of doing something similar too, but haven't done it yet - it looks great with all your white!!
Do you find that the ghost lamps are a little too bright with the bare bulbs shining in your eyes? I think they look really cool but would be too bright for me with the "naked" bulbs.
Brendan, try a 25 watt bulb! I also hung mine higher so that they aren't at eye level~
!!!!!!!!!!!!!!!!!!!!!!
I am sooo amazed!! You are brilliant! This is absolutely adorable. I am "remodeling" my room and I am definitely adding this!
Wow I love this idea!!! Definitely looks like something you would see in Anthro! I love this idea instead of lamps and I had no idea you could get those cord kits at Rona!!! It turned out gorgeous!
This is adorable! Such great and neat idea ...
♥ Ickemixe
The lamps = awesome! I love your creative style! :)
Roeshel
I saw this featured on Apartment Therapy and I LOVE it! I have a question though - how do you attach the pendant lamp to the actual shade? does the cord detach from the socket so you can thread it through? If so, any tips about where I can order those online?
Thanks again for a fabulous idea! :)
Yes, i started this project and got stuck on how you attach the shade to the cord? Could you help clarify? thanks!
LOVE it! minus the fact that the first pic with the creepy ghost child (no offense, i think its the lighting.....)
Love this idea! Just shared it on my blog.
I just added this to my ever growing-never decreasing list of things to do. But I would not have it any other way!
Love it!
Liz
http://mylovelylittlelulu.blogspot.com/
Oh my goodness, totally Anthro. Love the look and I love that it's so easy -- and cheap! My kind of project.
this is my first time to your blog and, wow! that is sooooo cool. i am really going to try and figure out where i can do this.
I will definitely be trying this - Very Inspiring.
I will definitely be trying this - Very Inspiring.
I will definitely be trying this - Very Inspiring.
Very Inspiring. I've been looking at an old shade wondering if I should just throw it out. Now I know what to do with it.
So cuuute !
http://madeinmarie.wordpress.com/
Post a Comment