


Remember how we were (or I should still say "are") renovating our laundry room? I promise that it will be a pretty good reveal in the next few weeks... we are WAYYY behind schedule for several reasons, one being our vacation, the other being that our cupboard took several weeks to get here and then once we opened it up to assemble it we discovered that it was broken into multiple pieces. So we had to continue the waiting game until just recently.
But besides our cabinetry we are pretty close to finished!
And now back to the caulking tutorial...
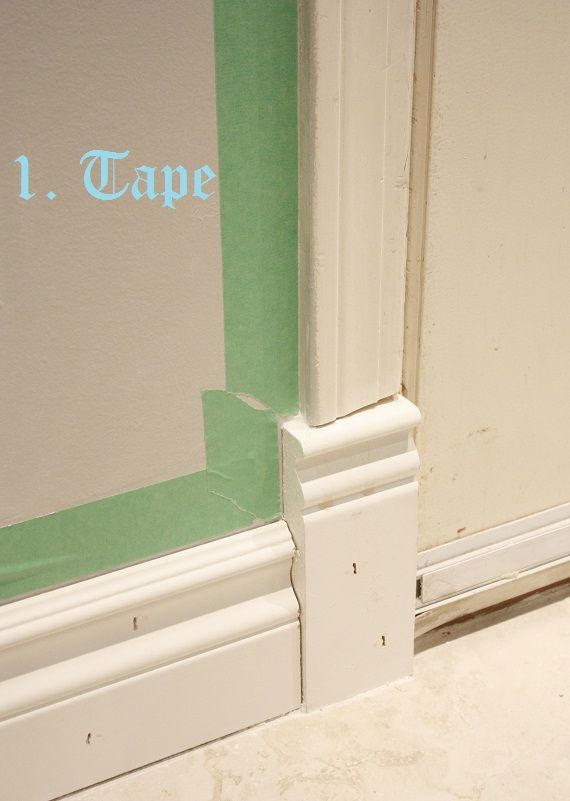
The first thing I have learned is that painters tape is your best friend for this job! Not only because it keeps the caulking straight and tidy, but because if you weren't aware silicone is a big fan of right angles. When you just drag your finger through it over time you see it start to pill and wear away, and using tape to make a clean line will prevent that!
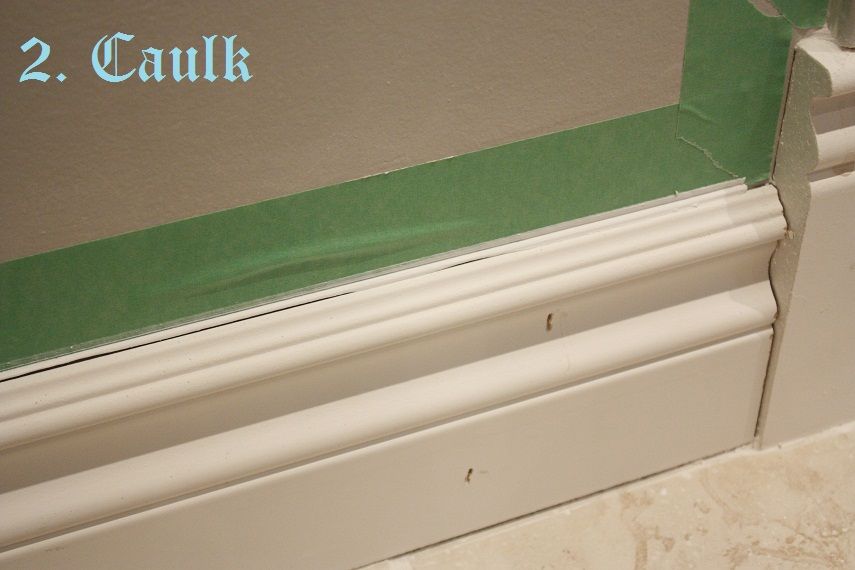
The next step is to run a small line of caulking along the top of the baseboard.
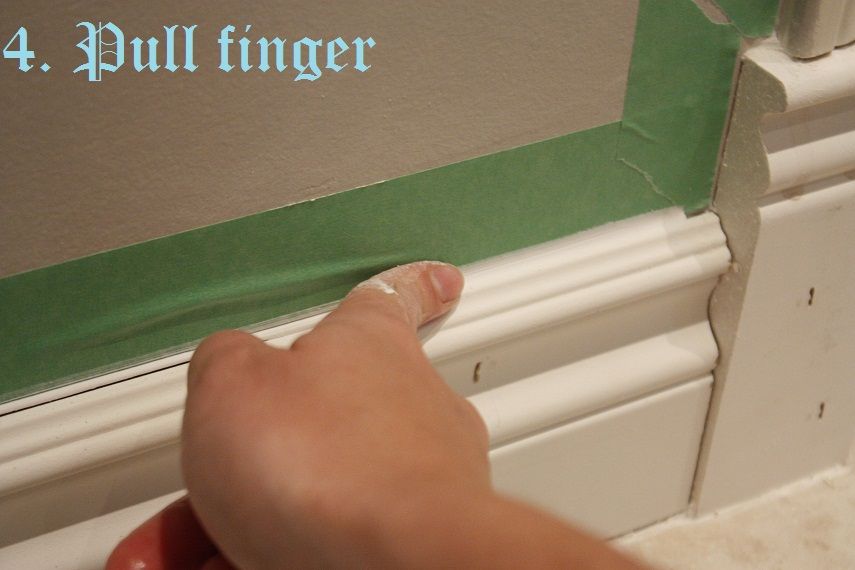
The wet rag is another trick of the trade, when you go to run your finger through the caulking you will get a MUCH smoother finish if you have wet fingers. So I keep an old rag on hand.

Yeah, yeah, I can already hear the teenaged boys laughing at this one! There are multiple tools on the market for applying caulking, but I really haven't found anything better (or cheaper) than my finger!
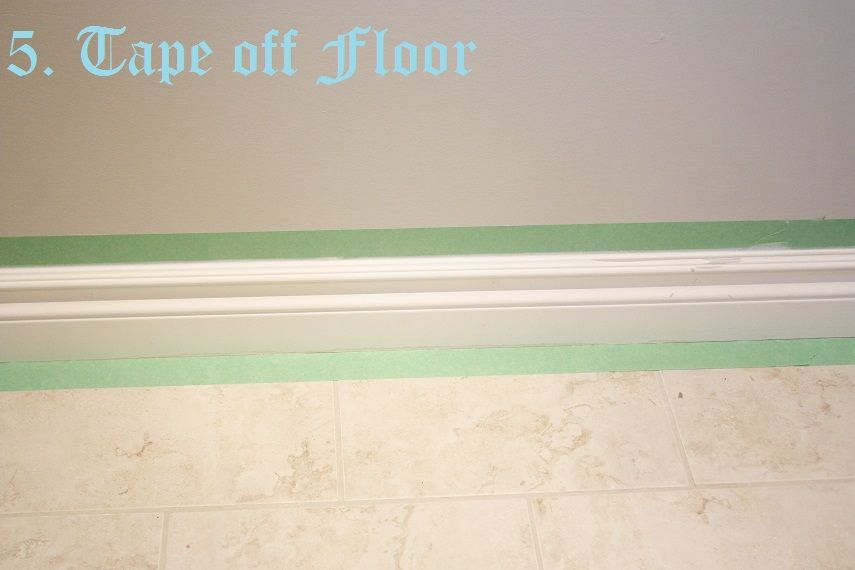
This is where my system really starts to save some time. After you have filled all the nail holes and done the top of all the baseboards I tape off the floor. This lets the caulking start to set, but not completely dry before we paint.
Because the caulking is not solid yet, I ALWAYS use a high quality brush with nice soft bristles. Harder bristles will ruin that nice finish we have. I like to use Mirage White in semi-gloss for all our trim work, but you can use any color.
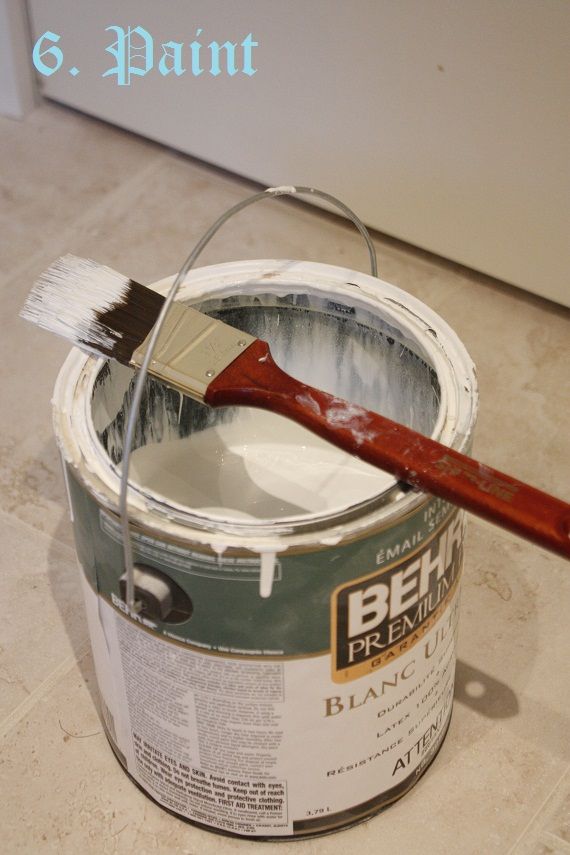
Now I let the paint start to get tacky, but not completely dry. If we waited until the paint and caulking were dry the tape would not come off well and the finish would not look clean (trust me, I've done it!).

And last comes my favorite part, the big reveal! Because we didn't wait to let the caulking dry and then re-tape everything it literally took only 55 minutes from start to finish to do the WHOLE ROOM!
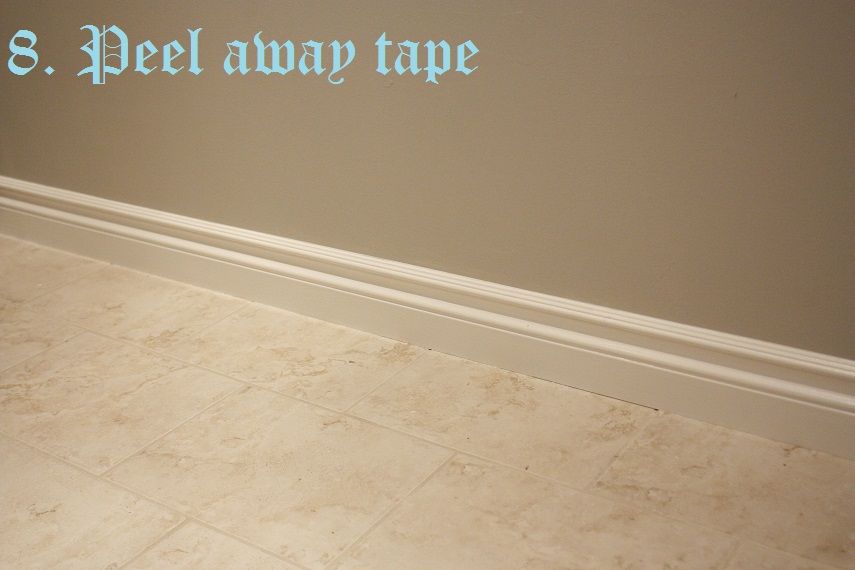
Some times with older dry wall you may get some of the wall paint/plaster peeling away with the tape, but I just go back with a touch up brush and the wall color to fix those little patches. With the exception of this door frame (which sees a lot of moisture as it is the door to the garage) all the other tape peeled off perfectly with no peeling!

Hope that was helpful to some of you, and will maybe inspire you to update your baseboards or trim!


34 comments:
i love you for this tutorial! i think you wrote it just for me! as i am getting ready to caulk and fill holes in my bathroom crown moulding! and the faster the better! would this work just the same for crown? thanks for your help!
Yay! I am so glad it helped someone! I hate learning through mistakes so hopefully you have smooth sailing now. It should work perfectly for crown moulding too, as well as beadboard and board and batten.
Can't wait to see your new crown Julie!
Great tips! Honestly I've always made my husband do the caulking because I just haven't ever been able to get it to look right --- maybe after seeing your tutorial, I'll give it another shot. Thanks!
Thanks for the tips! I'm going to need them in the coming months! We're putting an addition on the side of the house.
I so need to do some painting! Thanks for the tips!!
That looks great!!!! awesome tutorial!
I am crazy about caulk, but I never tried the 10 minute rule. I'm going to give it a try. Do you fill your nail holes with caulk or wood filler?
Thank you for reassuring me that I have been doing it YOUR way...which is the right way. :) At least among us... :) --- but it works oh so fabulously.
Cheers~
e
I thought I was a good caulker, but you gave me some pointers I didn't know. Thank you!!
I am going to be re-doing all the trim in my house in the next couple of months so this is great timing. Thanks! Can you please tell me where you picked up your baseboard moulding? Did you use MDF? I am having a hard time finding a nice moulding here in e-town and since I need so much of it I want to make sure it is something that I will be happy with for a long time.
This is perfect timing for me as well! We just nailed in our crown moulding and baseboard for the kitchen and now it's time to finish it off. Thanks!
Care, check out Timbertown! Our baseboards are 4.5 inche MDF I believe, but they are like half the price at Timbertown compared to Home Depot or Rona!
Pine Tree, I usually just fill with caulking, but for seams where two boards meet I use filler and then sand for an even transition. Since caulking doesn't take a sanding well I find this much easier!
Great tips Holly! I am petrified of caulking, I even might give it a try! Thanks so much
Love this turorial Holly! I am going to put your advice to good use since I have nearly ALL of the new baseboard in our house to paint!
Ooooo! Thanks Holly! I am so going to go check Timbertown this week. I am so excited. LOL. I just wonder how well MDF would stand up to my two kids, especially my 5 year old son who loves to ram his cars against the wall. I know you won't have that problem with Wren. :)
Love this tip! I have new wainscotting and door framing in my dining room that needs to be caulked and painted and I will definitely try it your way! First thing I learned here: paint the walls first. (which I thought I should do last!)
It is very very helpful. Don't worry about it. Thank you so much and have a beautiful day.
xoxo,
raru
What is your preferred kind of caulk? Thanks for this helpful tutorial!!
Thanks for sharing your advise and tips. Now I just need to do this :)
Great tips! Thanks so much. I had never thought to use a wet rag before -- what a great idea!
We also will be redoing our trim soon so this was very helpful. By the way...what is the paint color on the walls?
Frances, the wall color is called Windham by Pratt & Lambert!
This made me laugh out loud. My mom taught me "fingers are the best tools" at a very young age. I've never used anything except my finger and a wet rag for caulking. Love the paint tape idea though!
Thanks for sharing this . I will use this when I paint any room. I love it.
Perfect! I'm just about to caulk the trim in a room I just painted, and this was just the tip I needed. :) Thanks!
Thanks for the handy tutorial! If I'm painting the walls rather than the baseboards, would I do the same technique, only placing the tape on the baseboards instead?
What kind of caulking is the best, to use.
What is the best caulking to use?
I was wondering the same thing, what kind of caulk do you use?
Thanks for the tip! Wish I had read your blog before I removed all the tape from around my moulding. lol.
this is a great idea. I was wondering what to do about the second coat on the trim. Do I re-tape for that one?
Thanks for the tip on painting over semi-wet caulk. I used it today and it was a huge timesaver. Not posted about this specifically yet, but this is what the baseboard looked like before painting: http://lifebeyondsilicon.wordpress.com/ Honestly, it still looks basically the same since I painted it white!
This blog helped me sooooo much tonight! Thank you! My husband is more of the "suit and tie" type so I thought I'd give mounting my base trim a whirl myself with a little research. It turned out fantastic. Gave myself a little pat on the back! Thanks again!
What brand and type of caulk do you use, mostly to full the nail holes. I think i am using the wrong stuff because it never ends up being smooth and flush, I always see the nail hole after.
Post a Comment