Showing posts with label Dining Room. Show all posts

Thursday, June 5, 2014

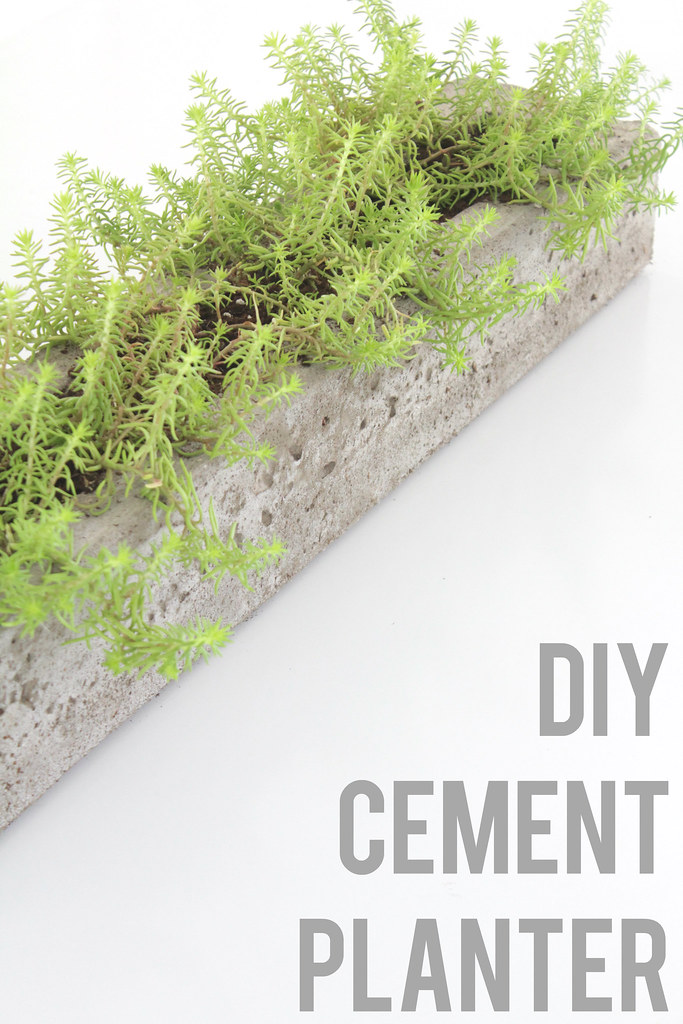
DIY Cement Planter

IMG_8155

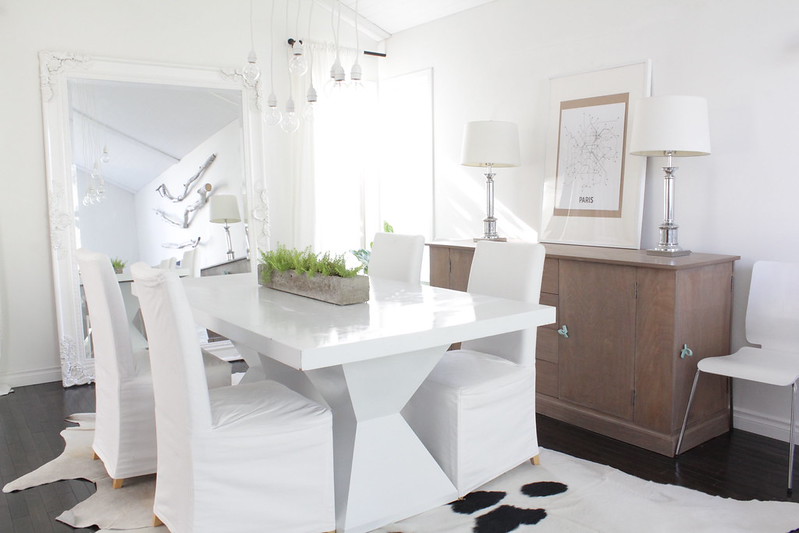
I have been brainstorming ideas and keeping my eye open for something to use as a centre piece on the dining room table. The table is long and is a lot of empty white space, it definitely needed something. But I wanted something simple, something not too 'in your face', and something that wouldn't break the bank (duh!).

Then one afternoon while Wren and I were getting a couple plants at the hardware store it hit me: make my own planter out of cement! I know there are tons of DIY blogs and Youtube blogs that have done this before so I am not trailblazing or anything. But I felt pretty darned proud of making my own creation for a grand total of $7. 

Yes, this only cost me a $7 bag of cement, which I only used half of, so maybe more planter creations will be in my future!

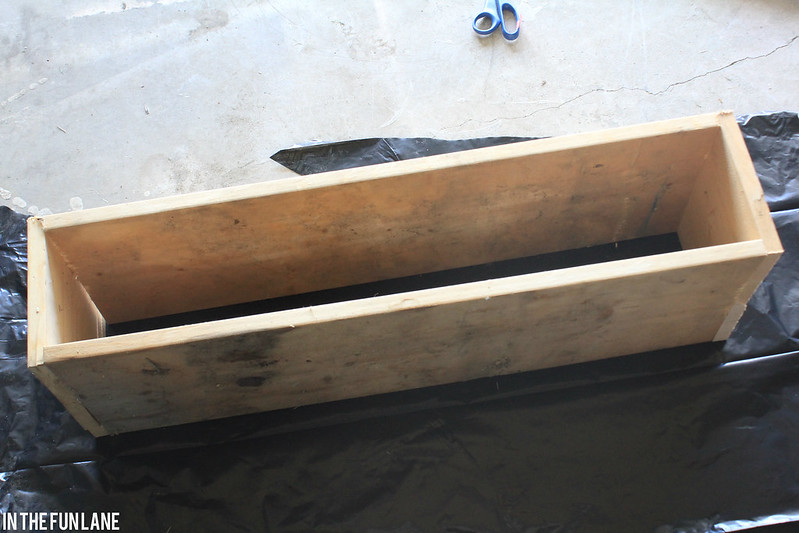
To start, I went into my scrap wood pile and cut a rectangle in the dimensions I was wanting. screwed it together and set it on a plastic surface ( a garbage bag in this case). I also made a smaller rectangle that would create my inner planter area.
IMG_8107

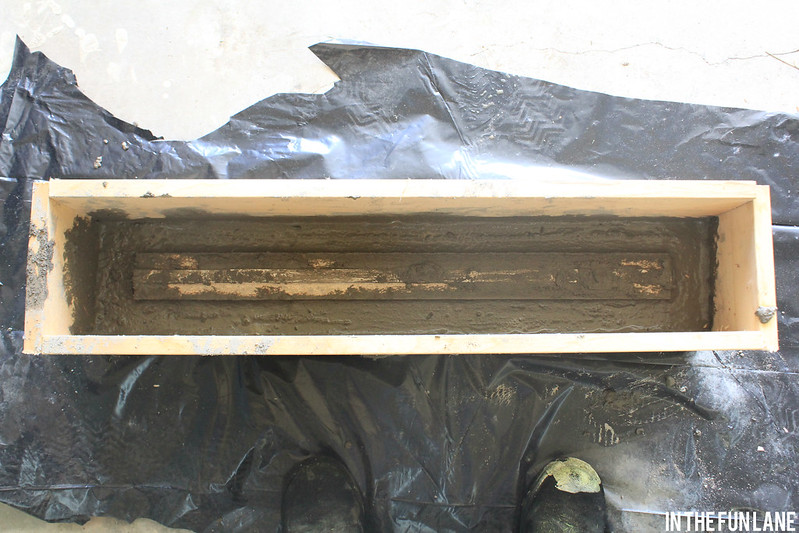
I filled the large rectangle with about an inch and a half of cement, then set my inner form on top and filled the remainder of my cement to about an inch lower than the inner form stuck out. Then I tapped the outer rectangle with a mallet for a minute to get as many bubbles out as possible. I wasn't aiming for perfection so I didn't go too nuts.
IMG_8109

About 4 or 5 hours after I first poured the cement it was still pretty wet and pliable, and I gently removed my inner form at this point. It was really easy and while I was concerned the form wouldn't stay put without that in place everything did stay put. I then left the cement to dry for a day, then unscrewed and removed the outer form from the planter. Then we let it sit for 2 more days to fully cure before Sean kindly chiselled a couple spots to clean up the corner. He offered to smooth it and buff it as well, but I was totally in love with the rustic texture of the cement as it was!
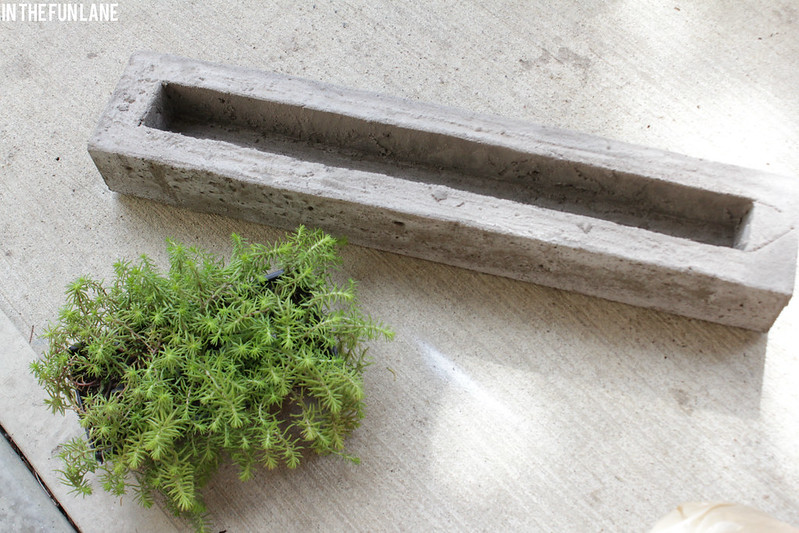
IMG_8135

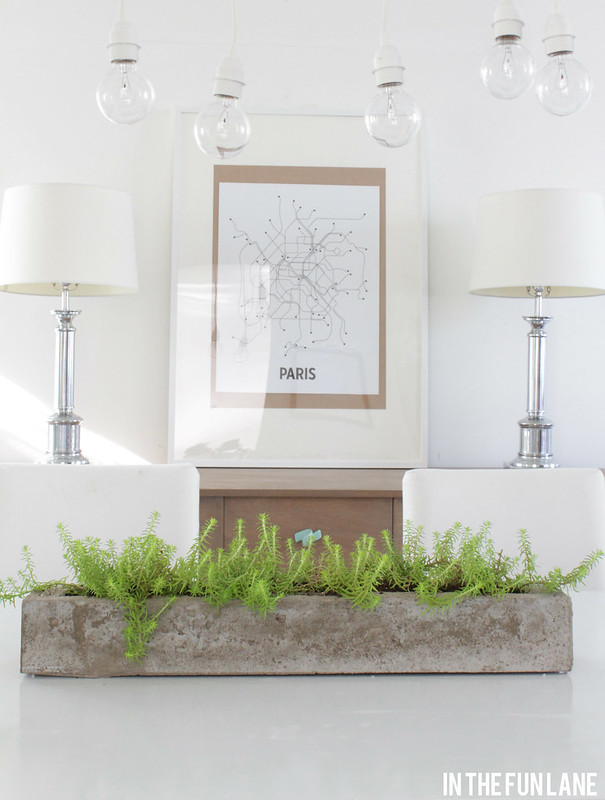
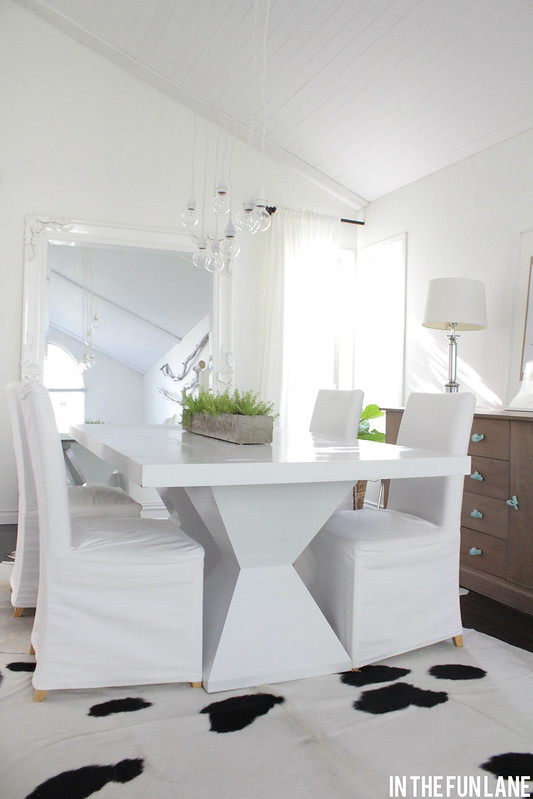
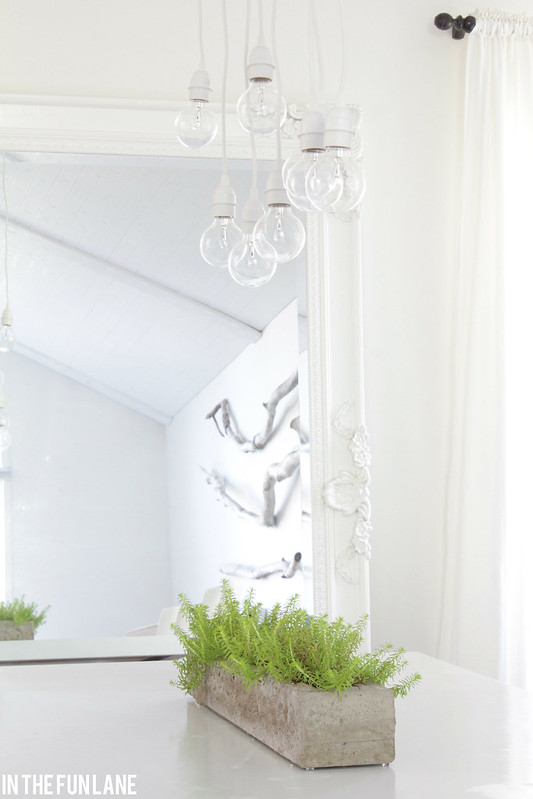
A 12 pack of ground cover planted in a row filled it nicely, and as soon as it was on the table I was in love!
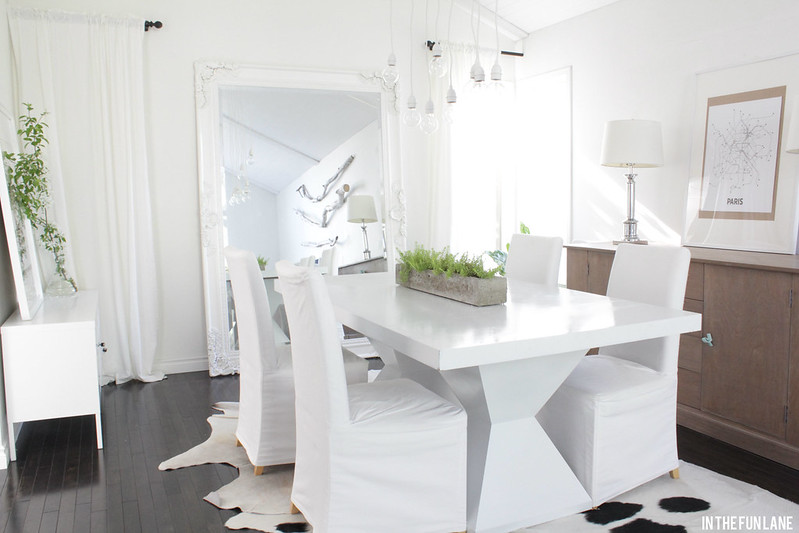
IMG_8147

I put 6 clear, sticky rubber feet (the kind you put on cabinet doors to keep from slamming) on the bottom to keep it from scuffing and scratching the table. 
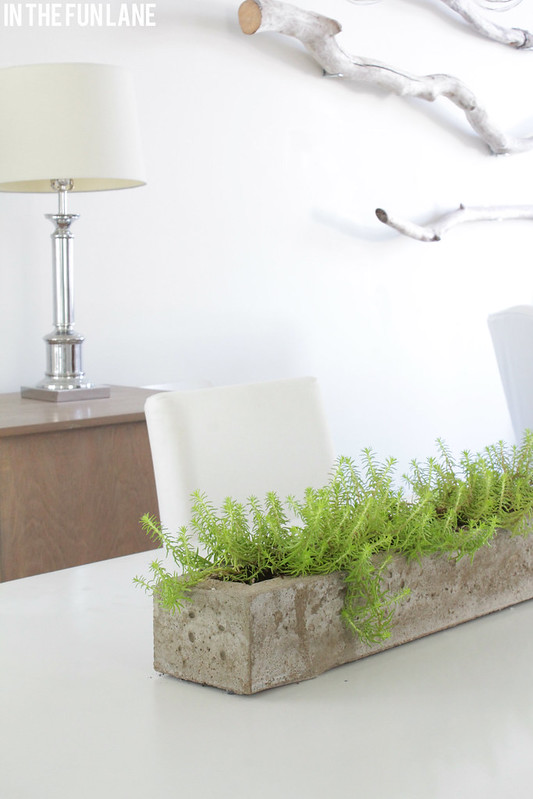
IMG_8148

The subtle texture and pop of green it gives is exactly what I was envisioning.
IMG_8137

I've never been one to patiently wait until I find what I was looking for, but I never thought I could actually pull this one off so I will admit to a small round of applause for myself once it was all done. Believe me when I say that the hardest part was being patient while it all dried.
IMG_8144

IMG_8151

IMG_8146

so what do you think? Does it seem like something you might try?

Thursday, March 6, 2014

Updated Video Tour of the Living and Dining Room

I had a comment this week asking for an updated video tour, but I feel like narrated tours are kind of well, umm, awkward, so I decided to just do another video of the living/dining room like the tour we did last year (you can see it here). I find these hilarious to make (laughing at all my 'artistic' shots while editing can bring tears I tell ya!) but they do give a lot more perspective to how things are laid out and where different things you see in photos actually land in our house.


Thanks for the request Karen, and I hope you enjoyed it as well!

Thursday, January 9, 2014

Hardware switcheroo

 photo IMG_9177_zps8abcc365.jpg

I know I mentioned it when I first showed you our new dining room buffet last Summer, but in case you forgot I hated the hardware on it. 

LOVED the lines and simplicity (and price) of it, so I bought it. But I wanted to eventually switch out the knobs. 

I was in no rush, but I always keep my eyes peeled when I am out and about. And it was HARD to hold off and wait until I felt they were perfect because, well, I have quite a history with hardware and I may have felt a bit of that old urge to stock pile great hardware in case of future use (check out my old WhiteBerry creations here)

But this past week I found these pretties sitting in the sale pile at Anthropologie and I just KNEW they were it.
 photo IMG_9172_zpse0c937c0.jpg 

They were on clearance for $1.49 as well, which only heightened my excitement as I ran to the checkout with an armful of them.

See, the knobs that came along with it aren't exactly ugly (trust me, I've seen some ugly knobs!) but they just weren't for me.
 photo IMG_9169_zps0f3b0a91.jpg 

{ a little tip, if you ever buy ceramic knobs at Anthro always pick up an extra one or two just in case you have a disaster one day and break one. They usually don't stock them for long and it would suck to be short a knob}
 photo IMG_9173_zps1ccf1f1a.jpg 

10 minutes later I fell even harder in love with this cabinet.
 photo IMG_9175beforeafter_zps25c363d2.jpg 

The blue really pops off the wood, and I love the funky shape of the knobs on such a simple, straight cabinet.
 photo IMG_9182_zps8f79c469.jpg 

 photo IMG_9180_zps5450ed25.jpg

A small investment in time and money, but it makes a world of difference. 
Ok, maybe I'm a little over dramatic about the results, but I am just a tad obsessed with these knobs. 


Thursday, December 12, 2013

DIY Light and the FINALLY Planked Ceiling

Whew, sorry about not popping in sooner guys! Our shoot has been going wonderfully, but I've barely had a moment to whip out my camera and share all of the progress in the dining room until earrrrrrllllyyyy yesterday morning. I was going to take pictures over the weekend to share on Monday, but plans change and Sean did a real number on his thumb last Saturday so we ended up in the ER and woefully behind schedule. But despite everything, Sean and I managed to tie up all the loose ends without a moment to spare. And his thumb is nicely tied up as well with a small number of stitches.

What I find the most shocking about the whole ordeal isn't that it happened, but that we actually have had the great fortune of not needing to make an ER run sooner in our 5 years of stumbling around the learning curve of renovating!

But enough about that, today I am going to show you the light fixture we came up with to deal with our off-center dining room light.

It  took about $10 in plumbing pipe and fittings for the mounted portion, and another $50 in these  pre-wired cord kits from Ikea.
 photo IMG_8804_zpsb02d29d4.jpg
We cut the plug-ins off the cords at various lengths and wrapped them around the pipe as needed to get the varying lengths and heights we wanted. The cords are still totally adjustable since we wrapped a little bit extra around the pipe for each strand.

Sean told me mid-project that he didn't 'see the vision'. Which is his nice way of saying 'this is crazy, and I already hate it'.
 photo IMG_8813_zpse800e73d.jpg

So I was SHOCKED, SHOCKED I tell you when he declared it his favorite thing in the room now.
 photo IMG_8821_zps482d6725.jpg

My favorite part is the ceiling. It just feels so much calmer now without all that spackle distracting me.
 photo IMG_8824_zpsb25e68ed.jpg

I found this map of paris at Urban Outfitters last month and it is the perfect fit for a nearly monochromatic room.
 photo IMG_8825_zps5ebb1874.jpg
 photo IMG_8822_zps1d16c760.jpg

  photo IMG_8827_zps2c6b5aca.jpg  
I layered a couple cowhides, also from Ikea (originally bought for CottageK) and it gives the perfect amount of curve and texture to all the straight angles.
 photo IMG_8832_zpsc614327a.jpg
 photo IMG_8829_zpsf4ef101c.jpg

And just so you can see a glimpse of real-life. The kitchen was piled up with stuff from everywhere else while I shot this, with lots of cleaning supplies peeking in as well...
 photo IMG_8841_zps1da1831d.jpg

A little extra storage never hurt anybody! And this awesome graphic from fifteen.ca is easily one of my favorite new additions.
 photo IMG_8837_zps1ae7724e.jpg

This room (and you!) has seen so many changes and updates over the past few years but I think I am fully and totally in love! The mix of scandi style with all my favorite things (planked ceilings, industrial lights, and lots of white!) make it a pretty happy spot in my world. 

Now I'm off to finally set up the Christmas tree and get started on our last 3 days of shooting with the incredible Robin Stubbert 
Wish us luck that we get it all done!

Thursday, September 12, 2013

Dining Room Shake Up

I have been MIA this week, laid out with a combination ear infection/tooth infection. Multiple dentist and doctor trips and a few more to go kind of got me down, but not for long...

It is hard to feel sorry for yourself when you have so many awesome people helping you out (thanks for the chauffeur and babysitting services this week Dad!).

But enough about the bad, let's talk about the good. I have been meaning to show you a few things for a couple months!!! The first being the new buffet in our dining room. There wasn't anything wrong with the white one that was previously in there, except that it wasn't long enough to really fill the wall (you can see that one here). I wasn't actively searching for anything but one quiet evening in June I stumbled across this wood cabinet in the back of a clearance area in HomeSense. It didn't jump right out at me as something I adored, but I found myself staring at it for a more than a few seconds. 
 photo IMG_7830_zpsbd7eea05.jpg

I knew I loved the color, but I wondered what was drawing me to it...  I realized after continuing to browse the rest of the store that I loved it's simplicity. I liked that it wasn't a certain style. I tend to float around between eclectic, minimalist and vintage styles so this is a great basic foundation for whatever direction I feel like I'm currently pointing. The price tag read $500 which is a great price, but I will admit I've only ever spend that much money on three piece of furniture in our home (our living room couch, the dining room mirror and our master bed frame) so I did hesitate. But in the end I decided that at nearly 30 years old I should have a handful of decent (read non-ikea/thrifted) furniture I love so it came home.


The only thing I was not happy with is the hardware, but I haven't yet decided what knobs I want to replace them with.

 photo IMG_7833_zpsb0cc039a.jpg 

The second shake up happened without any notice. I was out thrift shopping for books with my Grandma in late July when I saw this super sculptural wood table. I was big, chunky and NOTHING like something I would buy.

When I got home I kept thinking about it and decided that at $50 I was a fool to not buy it! So I went back a few days later, loaded it up and spent the next 2 weeks transforming it from a dinged up wood table to a sleek white statement piece.
 photo IMG_7829_zps82fa7fa8.jpg 

 photo IMG_7818_zps734c6fbb.jpg 

My family knows me so well, I found this cool vintage frame in a box of trinkets my Aunt sent over last year.
 photo IMG_7814_zpse16542f0.jpg 

I finally knew what I wanted to use it for when I reorganized the room, so I painted it up. I love that it mimics the lines of the huge mirror in the back of the room.
 photo IMG_7819_zps0cb09139.jpg 

I have been on the hunt for a larger, longer light fixture for close to a year (ironic that I've replaced nearly everything else, right?) but I do kind of like how unexpected the table is with the light. 
 photo IMG_7826_zpsc4939b53.jpg 
If you're wondering where the last table went, it's now up in my office where Wren and I have some serious room to get our craft on!


 photo IMG_7828_zpsec64be58.jpg

Old habits die hard for this girl, and the shuffle is always ongoing... but I know this is the happiest and best this big room has ever looked. 

Monday, November 26, 2012

A homecoming (of sorts)....

I am feeling so fresh and renewed lately. It sounds so superficial but sometimes a change of pace, or in my case space, can put that extra little umphf in my step. 


It has a lot to do with re-calibrating my design compass. Sorry if you are confused, I think Sean is still whirling from some of the recent changes too. So let me explain. I have always LOVED white interiors. Love, love, love them. My favorite design book of all time is called Living With White by my design-hero: Atlanta Bartlett. And while I have ALWAYS loved time-worn and well loved items as well, my original vision for my home was a balance of the two (which Atlanta does exquisitely). When we bought this house it was a big house for two 24 year olds with little furniture and lots of expensive renos to do. Meaning furniture was not in the budget.

As many of you know, that is how WhiteBerry Reinvented came to be. The only way I could get this house feeling like a home was thrifting, garage sale-ing and dumpster diving for furniture I could refinish on the CHEAP! 6 months later I was doing it as a full-time job. While I always stayed true to my vision of white, our house became a constantly evolving 'show room' of pieces, coming and going as they sold and I finished new ones. Obviously I managed, and found myself enjoying the whole process (if you are a design junkie it is addicting to constantly reinvent your spaces). But as WhiteBerry wound down over the past year as I ventured on to bigger and more time consuming projects (aka Lexington and now ParkView) I took a look around and realized that while I loved every item individually my vision for a fresh, yet warm, lived- in interior was not my reality.

I know more and more moms are venturing into the painted furniture business, and if you have then you know that right now distressed furniture is HUGE. Whenever I finished new pieces the first ones to sell were always the most distressed. So before I knew it I was distressing things left and right! Which is a good thing for some people, but for me I need a little bit of that new-sparkle. Some crisp, straight lines to play off my still-insanely-loved old items. And now that we don't live in a 'showroom' I am getting back to it.

This is my homecoming. To embrace the idea of designing a room and *gasp* then live with it! So slowly, bit by bit Sean and I are tweaking a few things. Not starting from scratch, just shifting a few things in the direction we always envisioned our home to be. 

So we started with our dining room/living room. I have rambled about it endlessly here. How I have never been content in here, hence the constant work in progress. 

_MG_1614


Just because we are finally making our space our own, it doesn't mean we can break the bank, so you know I hit the thrift store when I went looking for a new table.

I found this tacky, dated table for $45 (of course my original before shot disappeared mysteriously from my camera). It had good lines, but most importantly it has really awesome chrome legs. So I unscrewed them from the table top to save myself a ton of taping during the painting process. Thanks for the support during this project mr. garbage can!

_MG_1584

The table was not special or all that great, in fact it is what I call a 'particle board special' with plastic veneer. The lesson here is you don't always need to buy solid wood furniture to paint, so long as the veneer is in good shape and you use a paint that adheres to plastic. For this table I just used a can of krylon spray paint.

_MG_1583


30 minutes and $8 of spray paint later this is what the outcome was. I left it in the Garaga
 to 'cure' for a few days then we hauled her in and used a little stainless steel polish on the legs.

And Voila, I finally have that little bit of sparkle I've been craving.
_MG_1590 

I played around with bringing the wing backs around the table but in the end I feel like I simplicity won out.
_MG_1592


As things stand.
_MG_1752 

The one splurge we have made in our tweaking is the Stockholm rug from Ikea. 
_MG_1678 

There are 2 sizes they make but the largest size is almost ALWAYS out of stock. It is massive people, you don't get this much rug for under $500 very often! 
_MG_1757 

It is just the perfect punch of fun for us. We are negotiating what we want to do for a coffee table still because we've always known the trunk was both too high and not substantial enough for our big room but loved it enough to look past those flaws. So who knows what will happen there...
_MG_1758

But for now we enjoying the luxury of feeling like we are actually creating the home we insanely adore. 

And if you read this whole post, thanks for listening, and more importantly thanks for not laughing (at least to my face) that we've changed the dining room... again. 

Monday, August 27, 2012

Old and New

I am making a few minor tweaks in the dining room, trying to merge 2 looks I love: clean and fresh, old and timeworn. It is something that I think may be my biggest stumbling block... I truly do love clean, modern design, but I can't seem to embrace it. Individually, I love many different modern pieces and looks but I could never live in a totally 'modern' home. I love texture, warmth, age, charm and old things wayyyy too much. I think this duality may be part of my inability to feel 'done' with designing some parts of our home. 

So I am determined to make a few small changes in that direction, while maintaining the qualities I love about what I've already come up with. Sounds crazy, but I feel better going in to it with a plan.

Step 1: I brought these Ikea dining chairs in here. I bought the set off Kijiji for super cheap a couple years back. They were brown at the time, but I painted the seats white and keep them on hand for extra seating. They are fresh, crisp and clean looking and a fun mix with the rest of my white, upholstered seating (I decided to only flank the buffet, not bring them around the table as well).
 

Step 2: We are going to be painting the walls! I am undecided on whether to tackle it alone (hello, I am a painter!!) but there are some really high ceilings in here and I may just see if it is worth the investment to save myself some trouble and hire it out. I still love the white in here (Seed Pearl by Pratt & Lambert), but there are days and months when it doesn't translate as a creamy, warm white. The reality of living in a cold climate is that half the year my warm cream looks like a blue-white. I have narrowed down the selection but I have about 4 shades of warm, clay-like taupes and tans that I am deciding between. I cannot wait to see the white furniture pop off the warmer walls!
 
Hopefully this will put an end to my multiple-design-personalities for a little bit!


And as a reminder, today is the LAST DAY to enter the amazing SaSea Decor pillow giveaway!!! As I mentioned, about 50 comments went missing the first day and while many of you have re-entered please check to make sure your comment wasn't one of the unfortunate missing ones!

Friday, July 20, 2012

Ikea Chalk Board Table


I may be coming down with something guys, I painted... something... BLACK! Huh? What? maybe I should sit down for a minute???
In all fairness, it wasn't for the sake of wanting black furniture. It was to add a dash of fun in our dining room with some chalk.

I found this table at Goodwill last week and knew it was perfect for a wall in our dining room. It was $14 and when I flipped it over it had a sticker that said Ikea Lack. I thought "cool! If anyone likes this project they can do it too!", and you still can, but I guess the Lack sofa table/console isn't made anymore... which is a bummer because the size and dimensions are awfully close to the always popular Parsons Table from West Elm.

{ the table in it's wood grained glory }
 
(and yes, I notice that I have baseboard missing there. I will admit I have procrastinated on that project for about 6 months now and this may just be the motivation to finally get it done. The joys of renovating!!)

I threw a can of spray chalkboard paint on the table. It was my first time using the canned stuff and it worked well, but really, is it any different than flat paint, beside being triple the price??? I might see how flat spray paint works on future projects first unless someone can talk be off the ledge with some words of wisdom.


While I don't mind a pop of black or dark grey here or there it was a lot to take in for me. I think the main issue was that it looked too stark. I wanted it to look more like slate, and not so new. So I rubbed the whole thing down with chalk. I would have done it outside (and if you can, definitely go that route) but it was a torrential down pour the weekend I tackled this project.
 (side note: our sump pump gave out at 10pm Sunday night as water was rising FAST. Thank goodness I have a handy hubby, he got it sorted out, found an emergency plumber on Kijiji and got us a new one before we had a pond for a basement. NOT fun!!)

Back to the project!! All rubbed up.
 

A quick wipe with a dry paper towel gives it the look I was going for.
 

Now here's where I need your help!! I had just got it all set up and photographed like this when an assortment of cool things came home from the Salvation Army with me. 

I couldn't leave well enough alone so I need your opinion on which set up is your fav!

{Set up 1 }
 
I went simple for my first attempt at free hand decorating a table. But wouldn't a detailed faux bone inlay look amazing? It is in a low traffic area so it wouldn't be ruined in a hot minute, but I know in a foyer or office it wouldn't stand a chance.
 

Haven't tackled the ceiling yet, but I am ITCHING to get started!
 

As many of you have noticed and commented, my linen lion chairs that were intended for Lexington never made it over there. My dining room held them hostage instead.


I also switched the table out with this antique french provincial table I have like 6 leaves for! Good for entertaining. It was stripped by the previous owner and I used tinted wood stain to give it the driftwood/limed wood look. I have been asked by friends if it was done with chalkpaint but I am going to share a little secret, one I know will not be popular: I do not like chalkpaint. I know!! It is all the rage right now, but I am not. a. fan. On a high traffic surface that we use and wash daily I need durability, and I had a can of this color of stain leftover from some of our floor projects at Lexington. The color name escapes me, but it was pre-tinted and by Verathane brand. After a few months of solid use I am more than pleased with it and not a scratch, oil spot or scuff can be seen even though it is a flat finish.


The title page of some old sheet music made a fast and easy art addition.
  

One last look at set up number 1!
 

Then this really cool french bucket jumped out at me for $5 at the Salvation Army!!! And now the lavender doesn't fit under the table so I had to move it all around...
 
{ Set up number 2 }


What's the verdict judges??? Set up 1 or 2?

Have a happy and fun weekend!
 
Blogging tips