
Showing posts with label Garden. Show all posts

Monday, June 17, 2013

Washi Tape and Flowers

 photo f354a5f4-47e5-481f-abdc-8511ff6e83ae_zpsa9656754.jpg

Have I mentioned my love of washi tape before? (that's rhetorical, don't answer)

I don't have a huge collection, but the few rolls I have get a lot of use for gift wrapping, art display and general DIY odds and ends. When we were on our girls weekend I found a little pot of gold at the back of the Madewell store: clearance washi tape! They were $1.90 a roll so I picked up a few more. I felt like a bit of a lame-O as I was preaching the amazing-ness of this find to the other ladies, who were much more excited about all the amazing clothes (and rightfully so!). But I knew all your fellow crafters would join me in going gaga over such a find.

With summer blooms popping up I have been putting my washi tape to good use around here.

 photo _MG_5733_zpsaf34147d.jpg 

The good old washi-tape flag is a regular staple. It looks adorable in a little pot of flowers, or in a cupcake! If you buy a pack of small skewers I promise you will not be short of ideas for place to use a little flag (place settings, gifts, etc.)
 photo _MG_5732_zpsd99d493b.jpg 


 photo d86b0700-49d5-4be6-ba7f-fddd93e43060_zpse05fab57.jpg 

I was totally inspired by Amanda's adorable egg crate planter a couple weeks ago and decided to put one of my own to use as part of our gift for Wren's teacher. It's a great gift that will be useful even if the plants don't make it (let's be honest, mine usually don't...).

 photo _MG_5749_zps4add8609.jpg

 photo _MG_5753_zps74a945f9.jpg 

This is the easiest and most creative! Keep an old pasta sauce jar or jam jar and you can bring it to life for your next batch of flowers. 
 photo _MG_5756_zpsee6baef3.jpg


Here are a handful of other creative and beautiful ways to combine washi tape and flowers this summer:
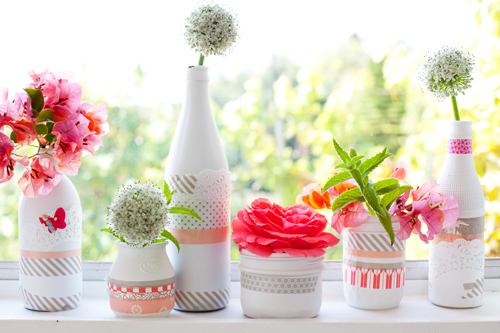
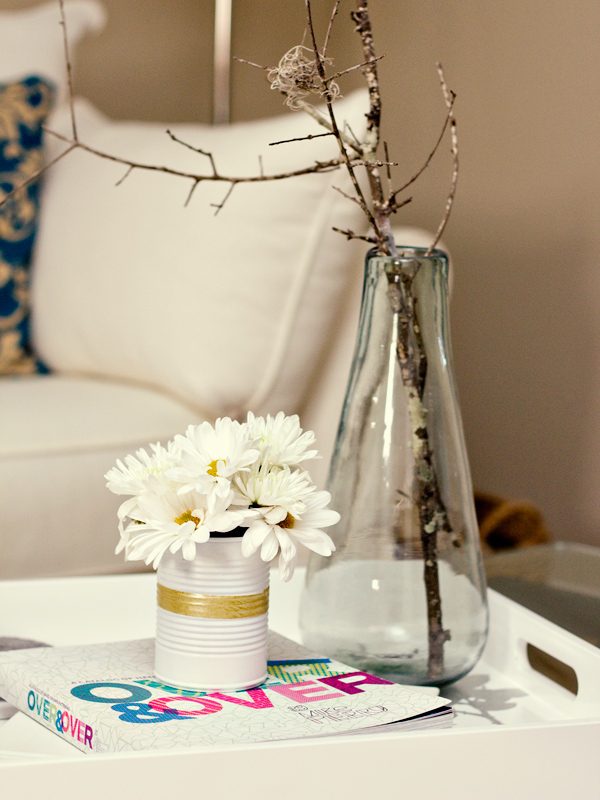


May not be the most practical idea, but I am itching to try this flower covered wall.

Sunday, January 27, 2013

Springing Up


I'm not sure what it is about January, but historically speaking if you go back through my archives you will see a pattern. In January I get all excited about Spring and buy new house plants. I'm going to be honest and tell you that of all those plants in previous years only one is still going strong. So wish these plants luck.

I have no idea why the feeling moves me in January to go out and victimize new plants. Maybe it's because I haven't had the joy of killing any of my yard plants in close to 5 months. Maybe it is the yearning for Spring to arrive. I'm going to tell myself it is the second reason. Whatever the reason, I do like to remind myself that even if I only get a solid month out of a house plant it is still cheaper than the week I get from cut roses or any other flowers. And if they live longer than a month it is all gravy to me!

This years first gardening adventure was brought to you by these big glass jars I found with wicker lids. I found them at goodwill a few weeks ago for $12 for the pair. I originally wanted them for future storage in Wren's bathroom reno. And they very well may end up there if these plants don't work out for me, but for now they struck me as really cool potential terrariums.


During a trip to Lowe's I picked out 7 little fern-like plants, and made a detour on the way home by a Michael's to get a couple bags of tumbled stones.

I threw the rocks in first (not literally, of course!) for drainage.


Then I just arranged some of the plants in on top of the rocks, tossed in a little extra potting soil and a couple sticks of drift wood for extra texture and interest. In the end I actually had 2 plants left over that I returns so it only took five plants in total to fill both my jars.

All done and lids back on! I really like these guys and hope they survive. I think the wicker lid is probably going to be my (or rather their) saving grace because it keeps the jars nice and toasty but does allow air to circulate.

Of all my past January plants I think this may be my all time favorite! 
Have you added a hint of Spring to your house lately with Plants?

Friday, July 13, 2012

Indoor Herbs


I kind of suck at keeping most plants alive. There are a few I know I can manage, but for the most part if it needs regular watering I find it won't live at our house. But I've always dreamed of having a small collection of herbs sitting on my window ledge.


It may sound odd, since I know my incapacity of owning a healthy plant, but I actually made the decision to have deep sills in our new kitchen windows strictly for the purpose of growing herbs. I figure that if the plants are right in front of the sink I won't forget to water them!

It was almost a year ago our new windows were installed but until this past week I hadn't thought about trying my luck with a new plant. But now is the time to try because many garden centers are discounting their plants, these two basil plants were only $1.94 at Super Store. I like that they have an almost tree-like feel.

I am hoping they will make it into Fall and Winter, and that it won't be too cold in the window. We went with  extra energy efficient windows so if these won't work I don't think my window garden was meant to be.


Wren and I made cheese burgers for lunch this week and a few basil leaves were a delicious, flavorful addition to our tomato/ketchup-free creations.

Do you have an indoor herb garden? Any secrets to keep it going strong, even in the winter??
 (I need a lot of help here guys!!)

Sunday, June 3, 2012

Three's a charm

If you have visited my instagram feed recently (inthefunlane is my username), I apologize again for the large number of lilac obsessed posts. 
I just can't help it guys!!

{Sitting on an old tarnished tray on a sunny day they almost look like they're glowing}
 

 I did manage to break through my lilac induced coma long enough to tackle a project that I had brewing at the back of my mind for some time. I knew this wall felt like it was lacking something. Needed something.

But I have a confession guys... I was scared! Scared to mess it up somehow, scared to commit, scared to over clutter the room. I find that I have no troubles at all getting a room 95% there. By then it really starts to look good and I can't. quite. finish. it. I am scared to take that 95% of the work and screw it all up with making a bad choice at the end. I don't want to be the lady you see walking around with every piece of jewelery on, plus a few she borrowed from a friend. But in the decorating sense, of course. 

So I usually chicken out and leave well enough alone. 

But recently those 3M removable adhesive hooks became my best friend, and now I am trying to tackle the fear yall!

{waiting patiently for something more}
 

This wall kind of needs something too, but the weight of the lamp and tray table are enough for me. For the time being...
 

See? Nothing to be scared of! I can't believe I was such a baby all these years.
I didn't want anything too overwhelming or statement-y (yeah, I like making up decorating words), just some character!

{triple threat}
 

The best part was it cost all of zero dollars thanks to finding an old box in the basement. I had 4 of these Michael's frames that I matted and mounted scrap book paper too from my office at our last house (holla if you are a nestie and remember when people had bios, not blogs!). So I took 2 and got to mounting some family prints I had around the house.

I also had this 3 laying around that I've had for years but that recently hasn't seen a lot of love. Problem was it wasn't adhesive hook friendly! But I came up with a fast and easy solution to easy hang items or art like this.

First I knotted some twine so that the knot was bigger than the top of the hole but smaller than the bottom at a length I liked.

Then I cut it right below the knot.

and slipped it into the opening, pulling up. Snug as a bug in a rug!

I liked the texture the twine gives, but didn't really love the visual of the adhesive hook so I simply mounted the hook under another frame.

Because white on white can be a little... um bright? I decided to mount the pictures over some of the board and batten to allow natural light and shadows to give a hint of contrast so they don't just fade into the wall.

{my all time favorite picture of Wren. Soooooo her!}
 

What do you think, should I add one or two over the folding table??

{ is it weird that I love how plump lilacs are? }

{ the bigger picture }

I have had a lot of emails in the past year about how we are liking/adjusting to not having an eat in kitchen and whether it was a good or bad move. I think it deserves it's own blog post in the near future where I can elaborate on it all. But the short answer is: 

{ NO regrets }

Wednesday, May 23, 2012

Sunny Days, come back... PLEASE?

Wren has been LOVING the warm weather that signals the coming Summer. She is at the age where cool sprinkler water is interesting and even enjoyable.


And it sure makes clean up easy for Mom after a mid afternoon hot dog cook out. 


But of course, just as soon as we share something exciting and new with her Mother Nature has to throw a wrench in everything and give us days upon days of rain.


 I can't be too mad because in the last couple days everything has finally come into bloom and greened up nicely. We have a lot to accomplish in our yard this year, but I am aiming to keep it natural and not overly manicured looking. Two reasons being that I don't have the time or energy needed to maintain that sort of thing, and it just doesn't feel organic to me (doesn't that sound like such a snobby thing to say? Sorry).
I kind of like seeing what Mother Nature has in store for us, maybe just guiding it slightly instead of forcing it all. 


But for now she has forced us indoors. Which gives rise to the occasional "WHY is it still raining, Mom?", but for the most part we have taken the opportunity to get cozy, bake some goodies together and spend a good deal of time cuddling up with our favorite books and movies.


There's a definitely a big silver lining to this rain cloud!

Tuesday, April 17, 2012

Succumbing to Succulents


I was in Restoration Hardware just last week when I spied these glorious succulent urns. I loved them, was ready to take one home...


The only problem is that they ranged from $180-$250. Holy plants batman, that's pricey!!


I figured why couldn't I make my own? Specially because succulents are the most realistic fake plants out there.


I tracked down some nearly identical succulents to the RH version and even counted out how many they had in their display to get the same effect. The faux plants ranged from $4-$5 each at Chintz & Co. and I picked up 9 to play around with. I also needed some dry floral foam and 2 different kinds of moss to get more of a natural, uneven look. The planter I had already, but I picked it up about 2 years ago for only $10 at HomeSense so the entire project came in under $50.

I packed in the foam first. Don't worry, if you want to try one as well it doesn't need to cover the entire area.


Next, Wren and I had a messy but fun time gluing in the moss. If you want to just use one variety that would look just as good, but I thought I would go for the more is more technique here.

I wanted it to look slightly like a mound of moss, not entirely flat.

After playing around for a few minutes I settled on a simple, not too full look.

Not bad for a fraction of the cost!!

And the best part is that I had more than enough to a second planter with another container I had laying around!

So 2 arrangements for $50... sure as heck beats the wallet emptying alternative at RH!
(specially because I empty my wallet there plenty enough as it is)
 
Blogging tips