


It had great proportions, and was the perfect size. And while the decorative detailing was "neat" it really didn't have much hope so I took my chisel to it and low and behold it wasn't even wood! It was plastic, which was fast and easy to remove.
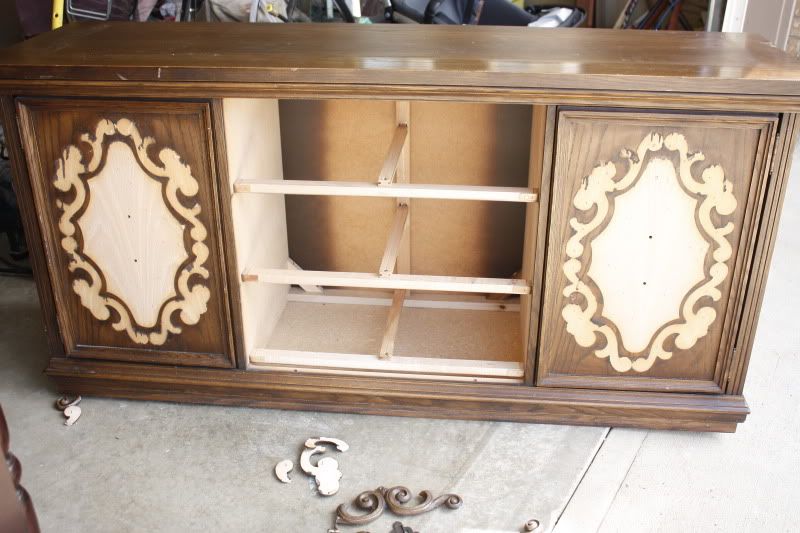
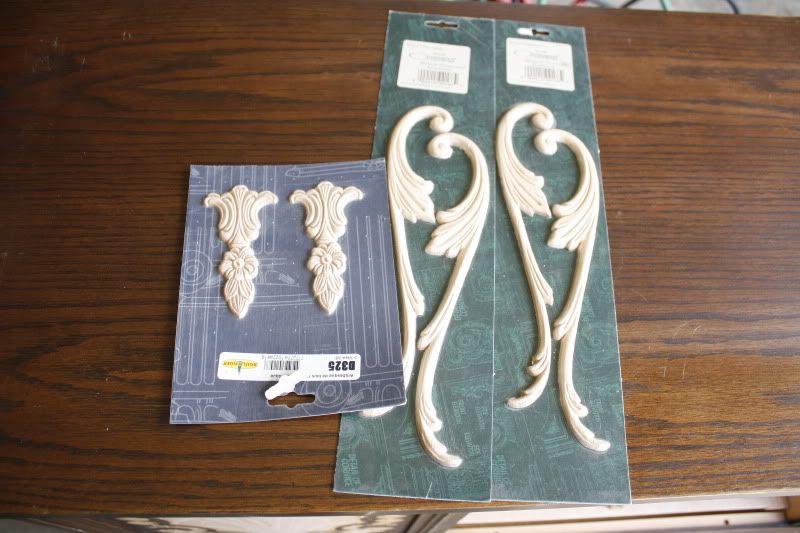
I saw these decorative wood pieces at the hardware store on clearance for $4 and thought those would be perfect for adding some interest to the door fronts.
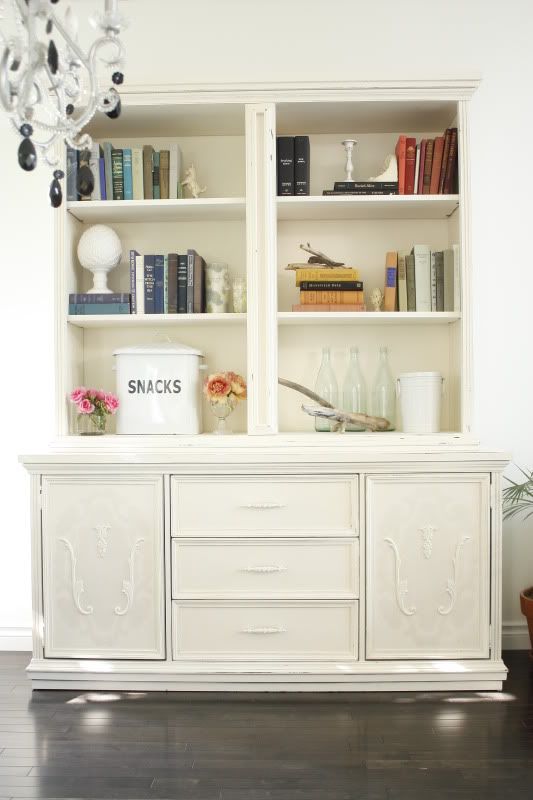
One thing I didn't anticipate was how much paint this would take, I went through a full can! I chose to remove the cabinet doors, but still painted them just incase I ever change my mind so that took extra paint, and I added wood shelves instead of the glass ones which also took extra paint. I still can't believe how much painting this thing required!
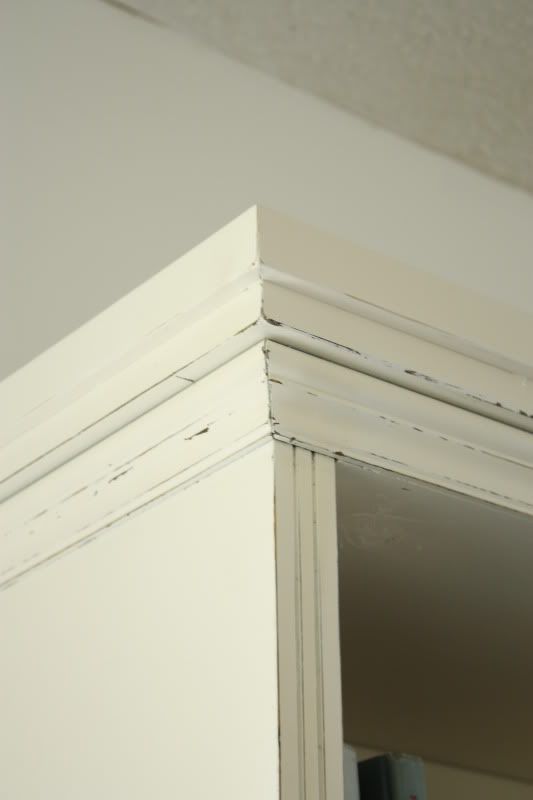
I also added an extra couple inches of decorative molding at the top to make it feel a little more substantial. This is a fast and easy way to make furniture feel a little more heavy.
I really want to display a collection of all white ceramics in here eventually, but for now it is housing some of my antique book collection (along with a few new favorites!).
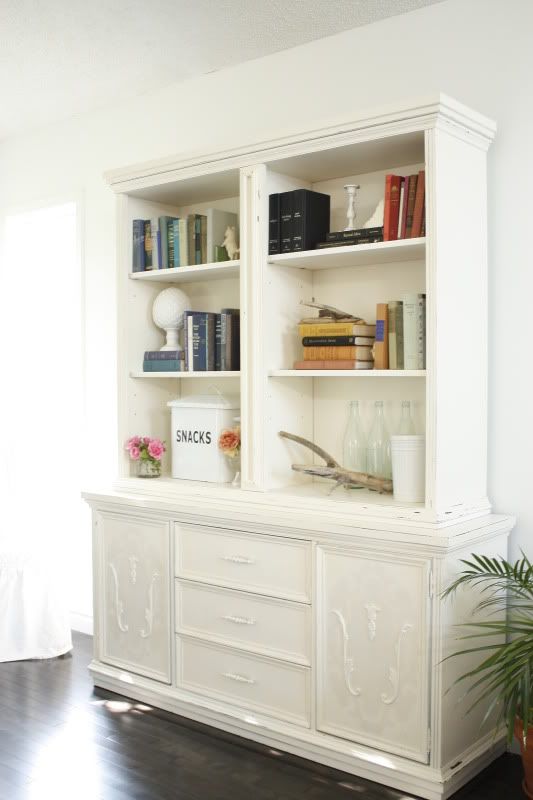
An unexpected thing happened on my second coat of paint: the pattern of the old decorative piece started showing through. This is really weird because this area was actually lighter since there was no stain on it, but it came through darker than the paint. I have no idea what happened but I LOVE it! It feels like a really worn off old decorative paint embellishment.

I am in the midst of picking out some new hardware for the handles, but the old ones with a coat of Rustoleum will work for now.
WOW! That's amazing, as are all of your other furniture transformations! I love the French dresser, I have a bedroom set like that, white with gold detail, I wasn't going to keep, but seeing yours and this transformation of that type of dresser:
ReplyDeletehttp://tashahorsley.typepad.com/to_tell_you_the_honest_tr/2009/01/the-nursery.html#comments
I'm going to keep it now and redo it! Thanks for all the great inspiration, your floors look gorgeous!
I don't know if my link worked in my other comment, but it is from Tashahorsley.typepad.com, the name of the blog is "To tell you the honest truth," and the post is "The nursery" from last January. Just in case you want to check it out!
ReplyDeleteAbsolutely gorgeous! You are so talented at transforming these pieces. Will you please do a post on how you prep and paint these?
ReplyDeletethat cabinet turned out great! i love how the old decorative pieces showed through. your home is lovely. keep the inspiration coming!
ReplyDeleteSo pretty, I love the show thru design too!
ReplyDeleteOh my! I would have run in horror from that piece if I saw it in the store. Now that you have transformed it, I want to give it a hug.
ReplyDeleteI love how the door detail shadowed through, very cool.
I would also love to know how you transform these pieces. What do you do first, etc.
ReplyDeleteThanks! You are amazing!
Gorgeous!
ReplyDeleteAmazing!!! I love everything that you do! What kind of paint sprayer do you use? And do you have any tips for first time sprayers?
ReplyDeleteG-O-R-G-E-O-U-S-! i'm with gwen -- i would've said, "no way, that thing is UGLY," if i'd seen it in the store, but you've transformed it into awesomeness. ;)
ReplyDeleteI totally love all of your furniture makeovers. So inspiring!
ReplyDeleteYou never fail to blow me away with your transformations. I wish you lived closer to me so I could tag along on one of your thrifting trips!
ReplyDeleteWhat a cute little unexpected detail with the paint!
ReplyDeleteWow!!!
ReplyDeleteSo you must design for some high end furniture stores, right?! Don't lie! That looks GREAT!!!!!!!!!! Just wished you lived closer so we could go thrifting together :0(
ReplyDeleteYou are amazing. seriously.
ReplyDeleteI am LOVING all these furniture transformations. I think you can paint anything, add your little flair, and it will look amazing. Great work!
ReplyDeleteGreat reno! I too would love to know about prep. I restored a very old solid wood table and it required a week of work sanding, painting, etc. I always walk past the laminate pieces because I have no idea how to prep. If you do decide to do a post on prep, a mention of the type of material (laminate, wood, mix) of the piece would be great to know also! Thanks!
ReplyDeleteWow, that looks great. I bought an old dresser recently. I'm also looking for a hutch to create a piece like this for my dining room. So this post is a great inspiration. It's amazing what some paint can do, isn't it?
ReplyDeleteYour home is lovely.
Thanks so much everyone! almost all of the questions asked are already answered below in "Furniture painting questions" so just check there.
ReplyDeleteAs for prep on the laminate pieces, I wish I knew more, but all of the pieces I do are solid wood. I don't think that the finish would be as good on the laminate just due to the fact that it cannot be sanded if need be, and the edges are usually that rubber-finish.
This is awesome! I would have walked right by that hutch. Beautiful!
ReplyDeleteits my 1st visit to your blog & i'm absolutely captivated! i would never have imagined that those pieces could be anything other than ordinary - this is an amazing transformation!
ReplyDeleteyou have been on a roll!!!!!! wow
ReplyDeleteSpectacular!
ReplyDeleteI especially love that the pattern bled through. What an unexpected little surprise!
How do you get the shabby look? Do you use sandpaper after you paint? The piece is so inspiring.
ReplyDeleteWOW wow WOW ..I love the make over on this piece! I love the rachel ashwell shaby sheek white look. I saw a program where she did a whole house in white (like 5 years ago) and ever since then, I have dreamed of a whole white house. I think you were inspired by the same program. Keep the photos comming. They are so inspirational and give me ideas for my own house. Also, how did you add the decorative molding?
ReplyDeleteWOW wow WOW ..I love the make over on this piece! I love the rachel ashwell shaby sheek white look. I saw a program where she did a whole house in white (like 5 years ago) and ever since then, I have dreamed of a whole white house. I think you were inspired by the same program. Keep the photos comming. They are so inspirational and give me ideas for my own house. Also, how did you add the decorative molding?
ReplyDeleteOh my gosh!! I absolutely love what you've done with this. I have to add this to my Tumblr page. It is just amazing how it turned out & goes to show, you just have to look past the 70's and see how something can turn out. Great job on this!! I will definitely come back to visit you again. HOpe you'll stop by & see me too. Someone linked over here from my blog, so glad I came by.
ReplyDeleteholly, you are insanely talented! Just thought I'd mention it ;)
ReplyDeleteHi Holly - love your blog...it is so fun to follow your house transformations. I thought that this might be a good time to come out of lurkdom :) I have a theory on why the unstained part of the doors (where the decals were) are darker...it might need an oil-based primer such as Zinsser's to cover, seal and block the wood from sucking in your paint. This is a common problem for furniture. Didn't know if you used oil-based primer or not but that is my guess. Hope this helps and please keep those renos coming!
ReplyDeleteXO - Katie
allbowerpower.wordpress.com
You seriously make me want to re-decorate all into white...love that piece...great job!
ReplyDeleteThat looks amazing!!!! :)
ReplyDeleteTruly wow!!! This is one of the best furniture transformation I have ever seen. What a beauty it turned out to be!
ReplyDeleteGreat job on your new piece of furniture!!! I love the white, like everything white and beautiful in your home, so very pretty!!
ReplyDeleteAbsolutely amazing!!! You motivate me so much! Would you mind sharing a step by step on how to add the molding to the top? If you could e-mail it that would be awesome itiseverlasting at gmail dot com
ReplyDeleteI also have a sprayer question-- do you use the sprayer to do the "insides" of a piece also or just the outer pieces. We have one and it still makes me nervous sometimes (getting too close and messing it up, etc...). Thanks!!
So, so lovely! I can't believe how well it turned out. I am a huge thrifter, too. Thanks for the inspiration.
ReplyDeleteYou've got great vision! I love that! You did a fantastic job. Wonderful blog!
ReplyDeleteAndrea
you are such an inspiration! I love looking at your projects.
ReplyDeleteYou are SO creative!!!!
ReplyDeleteYou are amazing! I have been watching your blog for awhile. I wish you lived closer so you could give me some tips. I have a huge wall (limited budget) and no ideas for what to do with it. If only you lived closer I would beg you to help me! I love your style. Keep it up.
ReplyDeleteWOW!!! This is amazing! I wish you could come stay at my house for a while and transform my furniture into beautiful pieces like this. It's so wonderful to see the big reveals!
ReplyDeleteThis is so pretty! I kind of wish you left the doors on though because it feels a little like it doesn't go together anymore. Don't get me wrong you did a fabulous job, I just feel like it's a little disconnected. Perhaps like bookshelves were stuck on top of an old dresser. You know? Anyway, I love you home and your blog.
ReplyDeleteI am seriously loving this!! I am thoroughly amazed to see your work!!!
ReplyDeleteHolly that's looks FABULOUS!! You never disappoint me with your transformations!! Way to go girl!
ReplyDeleteHolly, this is fantastic!! Do you mind if I highlight this?
ReplyDeleteThanks again everyone!!
ReplyDeleteI'd be honored Sarah ;)
What kind of paint did you use?
ReplyDeleteFabulous! I actually like the painted hardware. I wouldn't change a thing!
ReplyDeleteunbelievable!
ReplyDeletei am so "encouraged" seeing what you've done with this piece! it is absolutely beautiful! i see these all the time at thrift stores and now i will definitely look at them in a different light!
love your blog, i'll be back again!
That looks great!
ReplyDeleteWOW this is incredible! You have a great eye for hidden treasure :)
ReplyDeleteIT LOOKS AMAZING!!!
ReplyDeleteBeautiful...I think I would have taken a goldleaf pen & outlined the pieces you removed from the doors...
ReplyDelete--
Jen Ramos
'Cards & Prints You'll Love...'
www.madebygirl.com
madebygirl.blogspot.com
This is so beautiful! I love how the bottom pattern "ghosted" through too, when you originally removed the plastic embelishment I was sad that you were going to lose that pretty design.
ReplyDeleteI agree on keeping the doors off for now :)
oh my! I love your blog. You make me want to get to work right now on things I need to paint. I love this hutch and shelve unit you did here. It looks very nice with the doors off the top!
ReplyDeleteVery creative!
ReplyDeleteStart a painting business
Love this! I have a china cabinet passed down from my mom after she died and I was thinking of selling it. But I may keep it and redo it! Thanks for the inspiration. Pinning you!
ReplyDelete